Connect to a remote system via HTTP Destination
Use this procedure when the OData service runs on a different system, for example, a remote SAP system, SAP BTP, or an external API.
The HTTP Destination approach stores the target host, port, protocol, and login credentials in an SM59 entry of connection type G. This keeps credentials in the ABAP system rather than in the OData Source record itself, and is the recommended method for all productive remote connections.
For same-system services on the local ABAP system, see Create an OData Source for a same-system service instead.
Prerequisites
-
You have access to transaction SM59 in the target ABAP system.
-
You have the hostname, port, and login credentials for the remote OData service.
Procedure
Step 1 — Create an SM59 HTTP Destination
| SM59 entries are system-local and must be maintained separately in each landscape: development, QA, and production. |
-
Open transaction SM59.
-
Select Create.
-
Set Connection Type to G - HTTP Connection to External Server.
-
In RFC Destination, enter meaningful technical name, for example,
S4IDES_ODATA_TEST. This is the name you will select from the Cockpit. In Description, enter a plain-text description of the target system and purpose.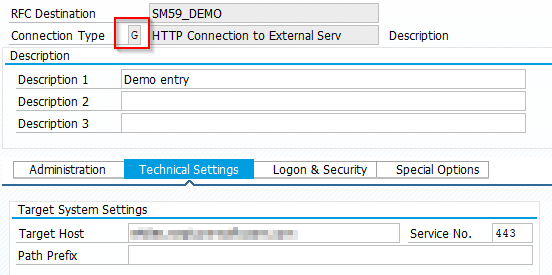
-
On the Technical Settings tab, enter the following:
Field Value Target Host
The hostname only — do not include the protocol prefix. Example:
<my-s4-system.example.com>Service No.
TCP port of the target service. Typically
443for HTTPS. -
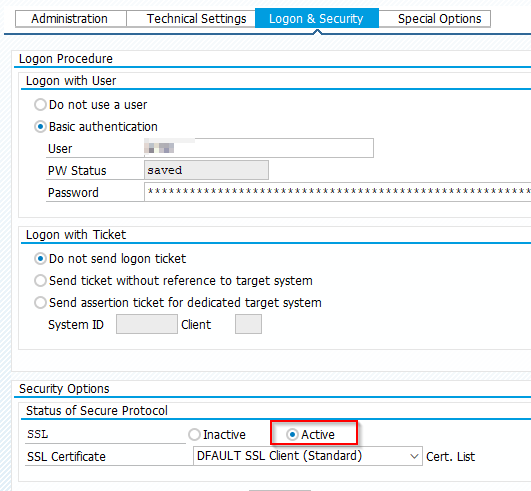
Switch to the Logon & Security tab:
-
Enter the User and Password for the target system, or configure ticket-based authentication if applicable.
-
Set SSL to Active for HTTPS connections.
-
-
Save the SM59 entry.
Step 2 — Create the OData Source in Neptune Cockpit
-
In the Cockpit, go to Connectivity → OData Source.
-
Select Create.
-
Enter a unique name and select Create OData Source.
-
Enter an optional Description and Package assignment.
-
In the Connection section, select Enable Proxy.
-
Leave Proxy Version at Version 2. This is the default and the recommended setting for all new OData Sources.
-
Set Authentication Type to HTTP Destination.
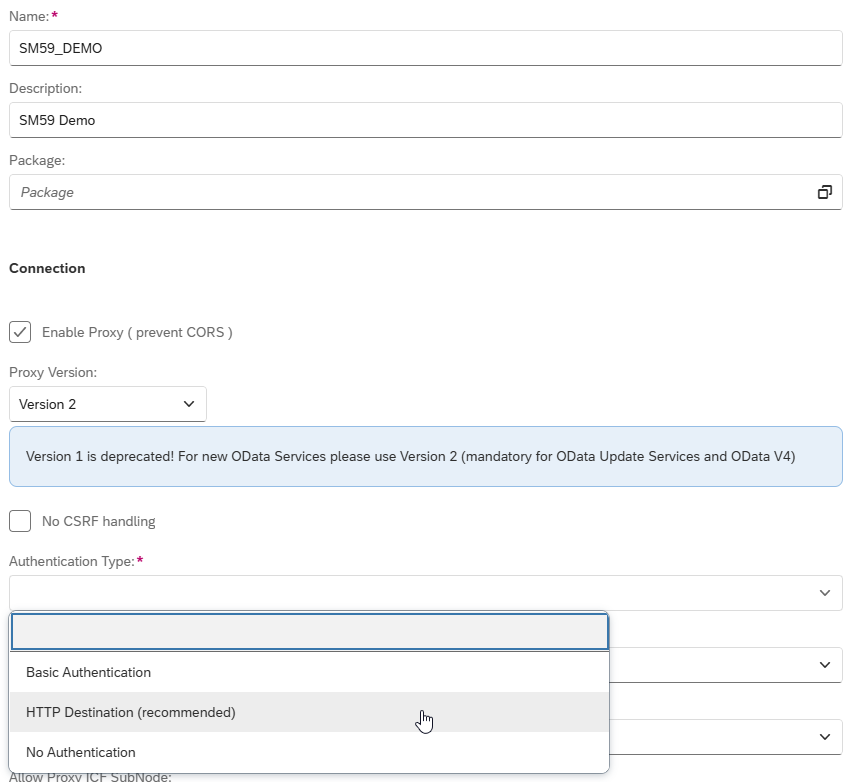
Result: A new HTTP Destination (SM59) field appears.
-
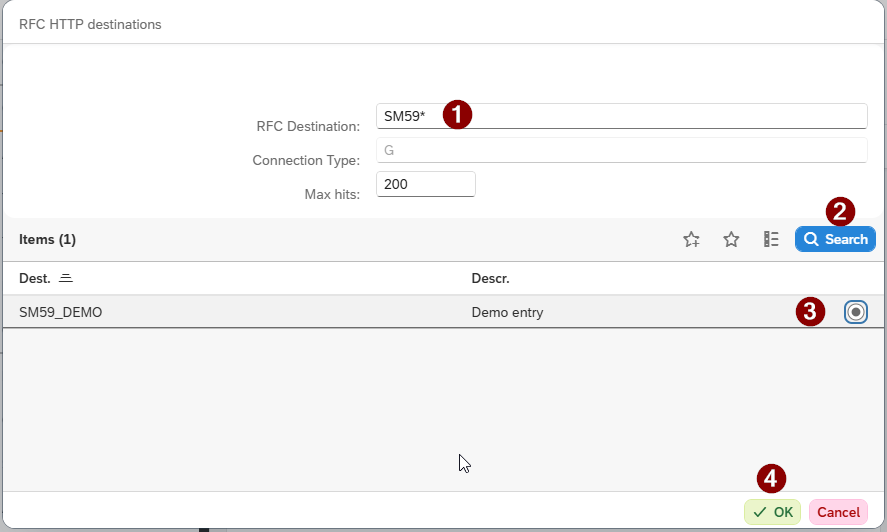
Select the value help icon in the HTTP Destination (SM59) field.

Enter a search term if needed, select Search, and select the SM59 entry created in Step 1. Select OK.
-
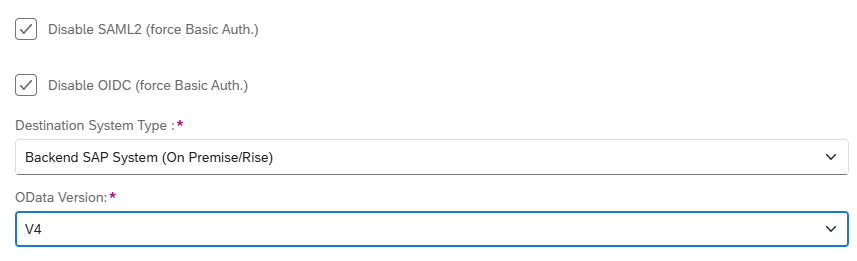
If the target system enforces SAML2 or OIDC authentication, and you need to override this with the SM59 basic credentials, enable Disable SAML2 (force Basic Auth.) and/or Disable OIDC (force Basic Auth.) as appropriate.
-
Set Destination System Type:
-
Backend SAP System (On Premise/Rise): for any SAP on-premise or SAP Rise system.
-
Other: for non-SAP targets.
-
-
Set OData Version to V2 or V4 to match the target service.
-
In the Service URL field, either:
-
Enter the relative service path (for example,
/sap/opu/odata/sap/<my_service>/), or -
Use the value help icon to browse the remote system’s OData catalog and select a service. See Browse and select an OData service using value help.
-
-
Select Save.
-
Select Display Metadata to verify that the connection is established and the service metadata document loads correctly.
Result
-
The OData Source is configured to route requests through the Neptune proxy using the SM59 destination for host resolution and authentication. The metadata display confirms end-to-end connectivity.
OData Sources are not transported via TMS transports. Use Deployment → Export and Deployment → Import in the Cockpit to move OData Sources between system landscapes.