Feedback Framework Documentation
About
Today’s web applications, like the ones you are building using Neptune DXP, are used in many different contexts. Due to the heterogeneity of devices that can be used (screen sizes, processing power, operating system), applications can have minor visual problems. This feedback framework allows users to report these problems by giving you tools to show a feedback button in your Launchpad, or application.
How it works
Feedback press
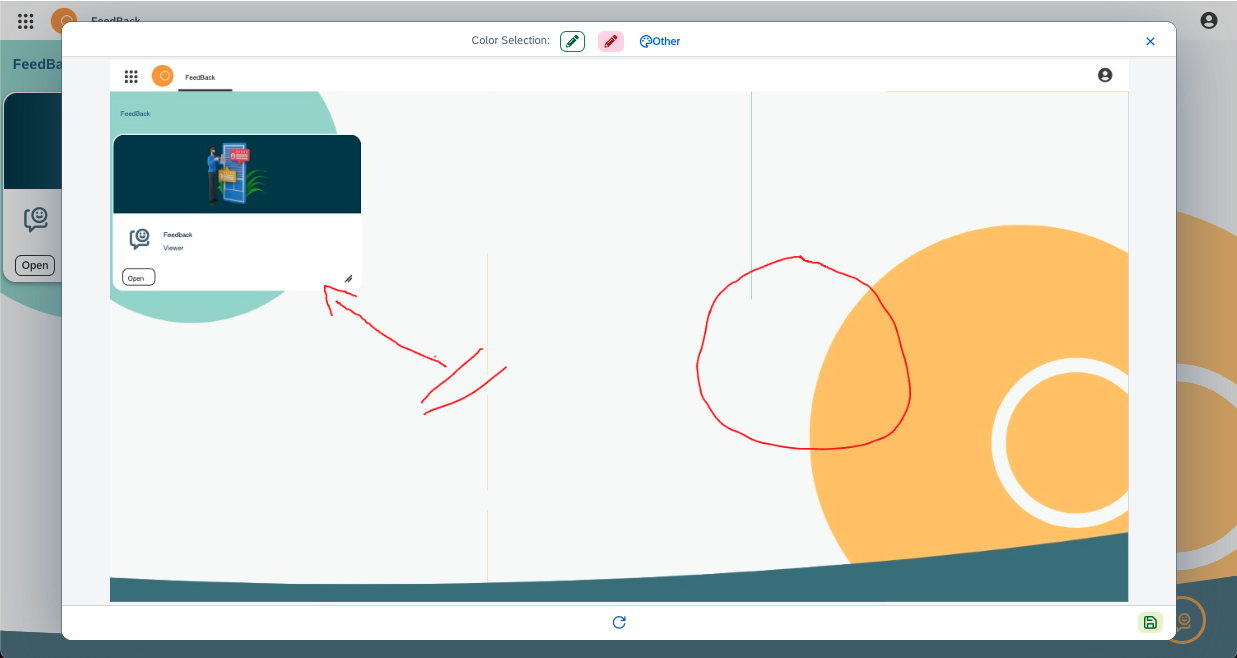
When one presses the button ![]() , a screenshot is automatically generated, and the following dialogue appears,
, a screenshot is automatically generated, and the following dialogue appears,
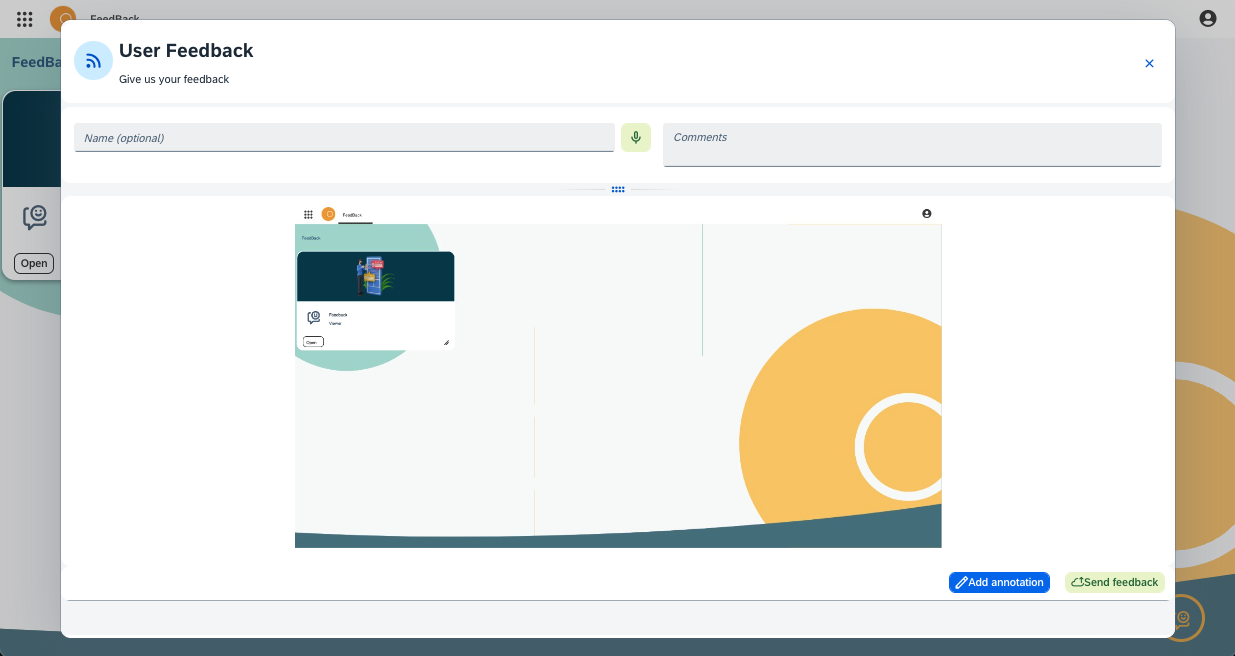
In this dialog, one has the possibility of identifying itself or sending an anonymous feedback. It’s also possible to write or use the speech-to-text functionality to provide feedback like:
-
Steps to reproduce issues.
-
New requirements.
-
Missing Applications.
By pressing the Add annotation button  , one can add annotations to the screenshot, improving the quality of feedback.
After inserting all the annotations and the comment, one can submit the feedback by pressing the Send Feedback button 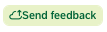 .
.
Annotations
It’s possible to change the color used in the annotations by pressing the quick selection buttons  , or by pressing the Other button
  . In the Other button, one can also choose the line thickness.
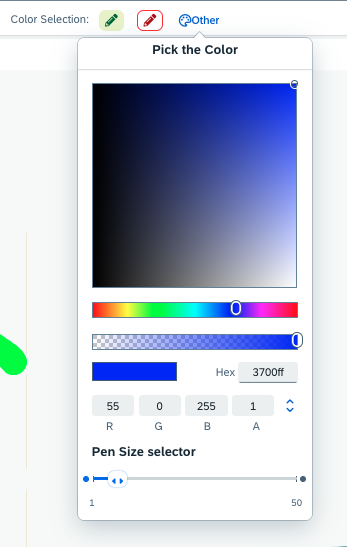
If, for some reason, one inserts an annotation incorrectly. It’s possible to reset all the annotations by pressing the reset button  .
.
To save the annotation and return to the feedback dialog, one needs to press the save button 
Feedback storage
When one submits feedback, by default, the message is stored in the internal database of the Neptune DXP - Open Edition. The images are saved base64-encoded. To reduce the size of the internal database, it’s possible to keep the images in an Microsoft Azure Blob storage account. We also save the device ID, application name, operating system, version, device type, and position, along with the image, comment, and sender name; this is helpful information that can be very useful when troubleshooting bugs.

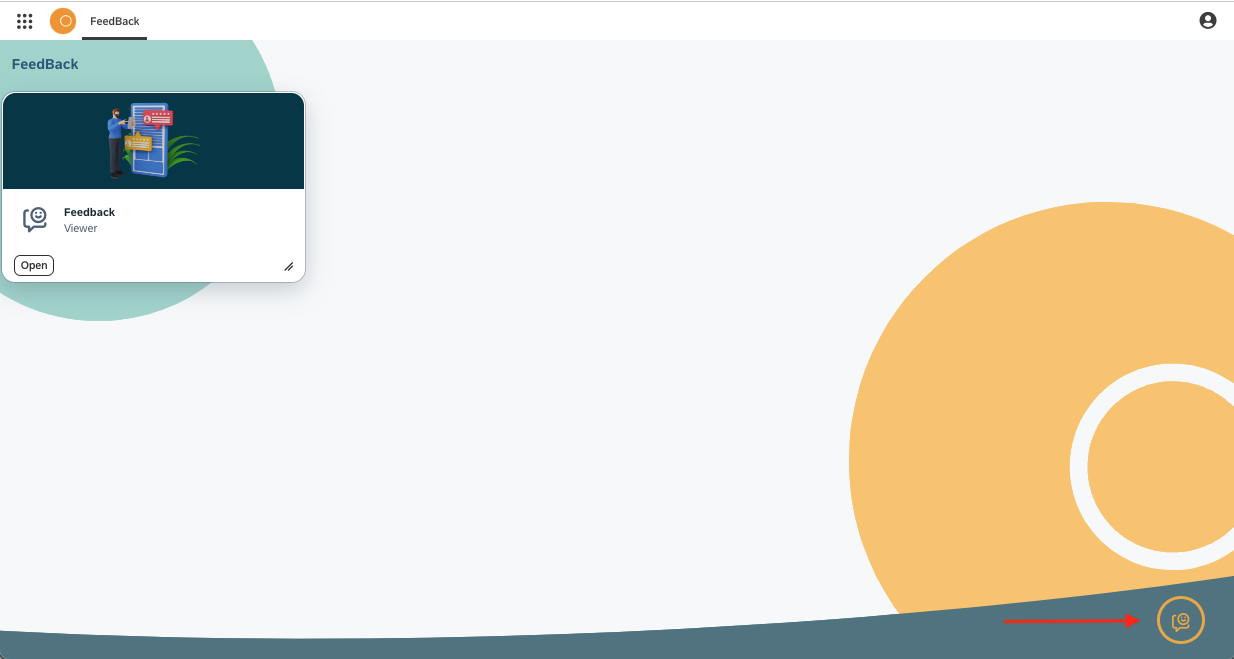
View feedbacks
One can view the feedback using the Feedback Viewer application.

In there, we will see a list of all the submitted feedbacks. It’s possible to know the date and time of the creation, the name of the application from where the feedback has been triggered, who submitted it, the device type and orientation, and the operating system.
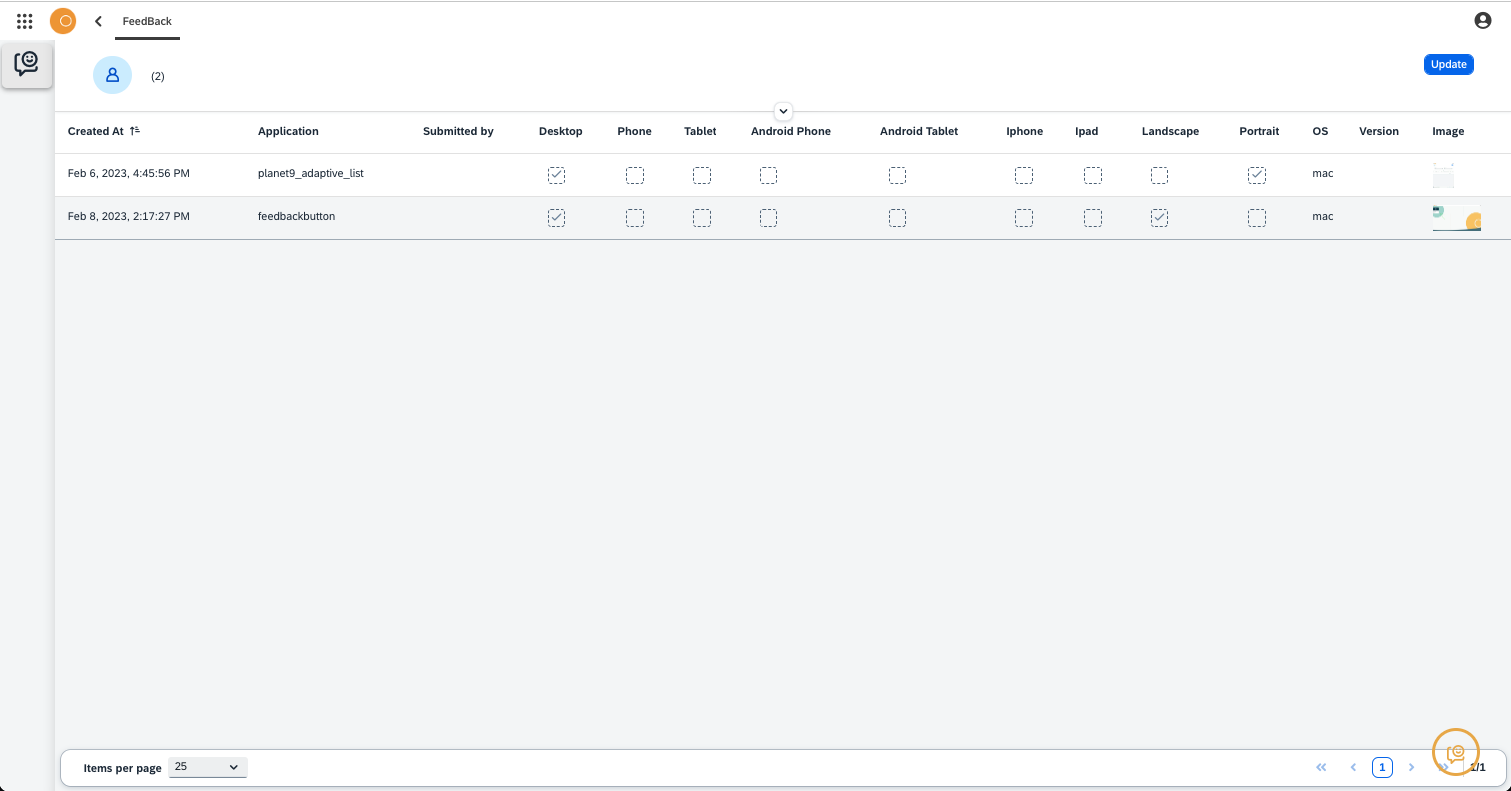
By selecting the filter expansion button  , one can filter the feedbacks by application and submitted by.
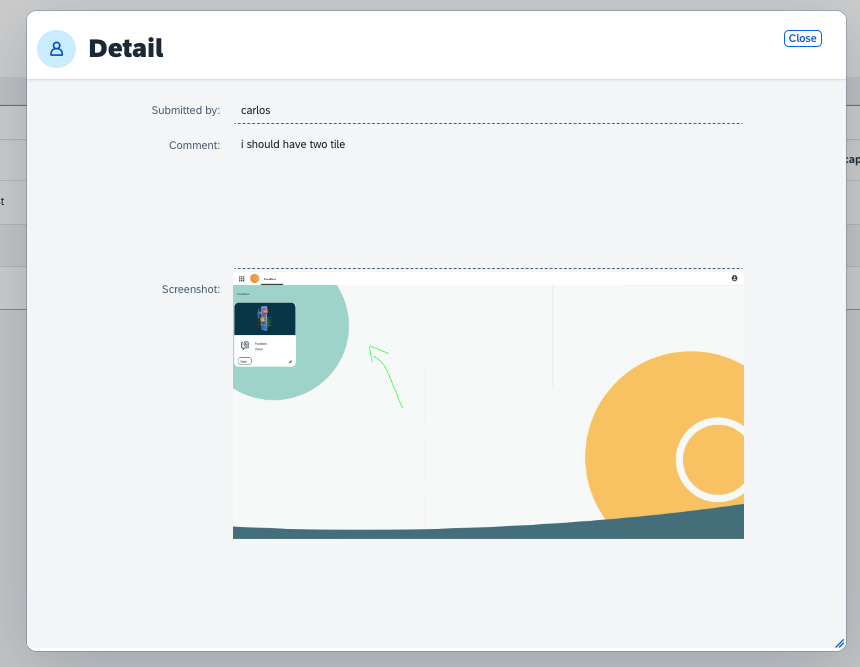
If one selects any of the feedback items, the detail view opens. In there, it is possible to see who submitted the feedback, the comment that has been given, and the screenshot. To increase the screenshot size, just select the image.
Configuration
The Feedback framework can be used in Launchpads or a standalone application. Next, you can find the required steps to enable this framework. By default, the feedbacks are stored in the table feedbackfw_main. In order to save space, it’s possible to keep the images in Microsoft Azure blob.
Launchpad set up
As guidance, we provide a demo Launchpad in this package.
-
Go to the Cockpit and select the Launchpad where you want to enable the feedback
-
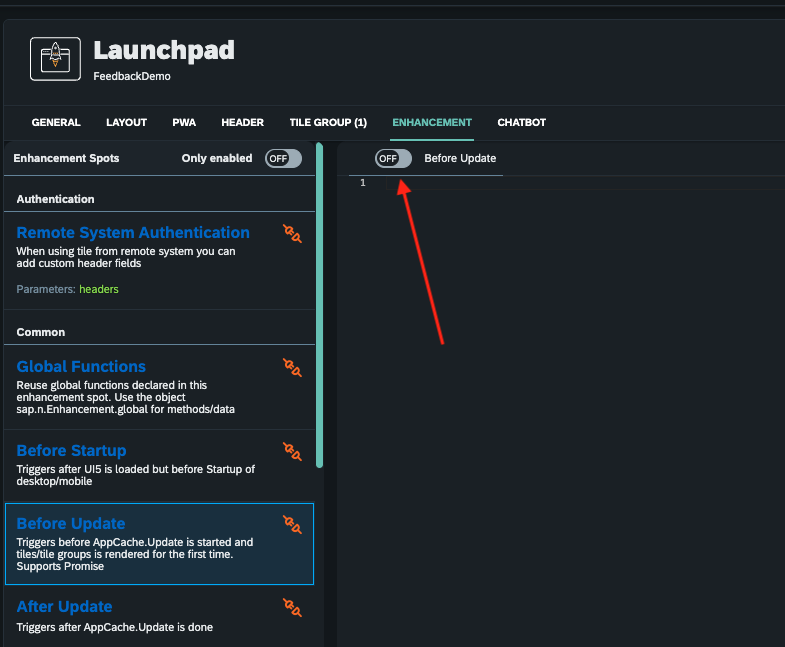
Navigate to the Enhancement Tab
-
Select the enhancement "Before update" and enable it by switching to On.
-
Please copy the following code and paste it into the enhancement dialog
AppCache.Load("feedbackbutton", {
    load: "init",
    startParams: {
        distance_from_bottom: "40px",
        distance_from_right: "40px",
        size: "24px",
        color: "#EBB043",
    }
});
It’s possible to adjust the position of the button, the size of the icon, and the color. That is achieved by changing the values provided in the previous code snippet. -
Save the changes by pressing the Save button

-
Open the Launchpad, and the Feedback button should be visible on the right lower corner.
Standalone Application set up
-
Go into the application you want to include the feedback button, and change to edit mode.
-
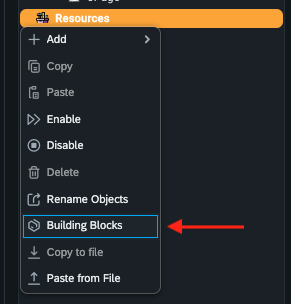
Select the Resources folder.

-
Open the context menu by pressing the right mouse button and selecting the application building block option.
-
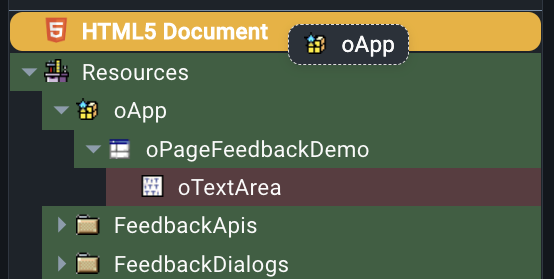
On the application building block dialog, select UTIL(1), then you will see the Feedback Framework(2), and press it. After selection, press the select Button(3) to copy the content into your application.

-
If your application already contains any sap.m.App or sap.m.SplitApp, please remove the one inserted by the application building block, otherwise drag the one inserted by the application building block into the HTML5 Document.
-
Activate the Application, and it’s ready for testing.
Package Content
| Object name | Type |
|---|---|
feedback_adaptive_edit_withimage |
Application, Adaptive framework template |
feedbackbutton |
Application, Application Building Block |
FeedBackFW_List |
Adaptive Application |
FeedBackFW_Detail |
Adaptive Application |
FeedBackFW |
API |
FeedBackFW_Viewer |
Connector |
FeedBackFW |
Connector group |
FeedbackDemo |
Launchpad |
FeedBackFW |
Tile group |
FeedBackFW_Feedback_List |
Tile |
feedbackfw_main |
Table |
FeedBackFW |
Script group |
SaveFeedback |
Script class |
FeedBackFW |
Media |
Known issues
| In this current version, the scroll position of the screenshot may be slightly off when we don’t have any application open on the Launchpad. |
Dependencies
| To use Microsoft Azure blob, the CMS on Microsoft Azure packages need to be installed in your environment. |