OData Source
The OData Source component is used to consume data from an Open Data Protocol (OData) service.
This component supports the OData V2 protocol. Since Neptune DXP SAP Edition Version 24.10.0000 support for OData V4 was introduced.
Open Data Protocol (OData) is a standardized protocol for creating and consuming data from OData server. oData builds on core protocols like HTTP and commonly accepted methodologies like REST. The result is a uniform way to expose full-featured data APIs.
OData source allows the user to publish and manipulate the resources identified by the endpoints (resource location).
Getting started with OData
Go to Connectivity → OData Source from Cockpit to view OData management editor.

Click the Create button to open the Create OData Source window.
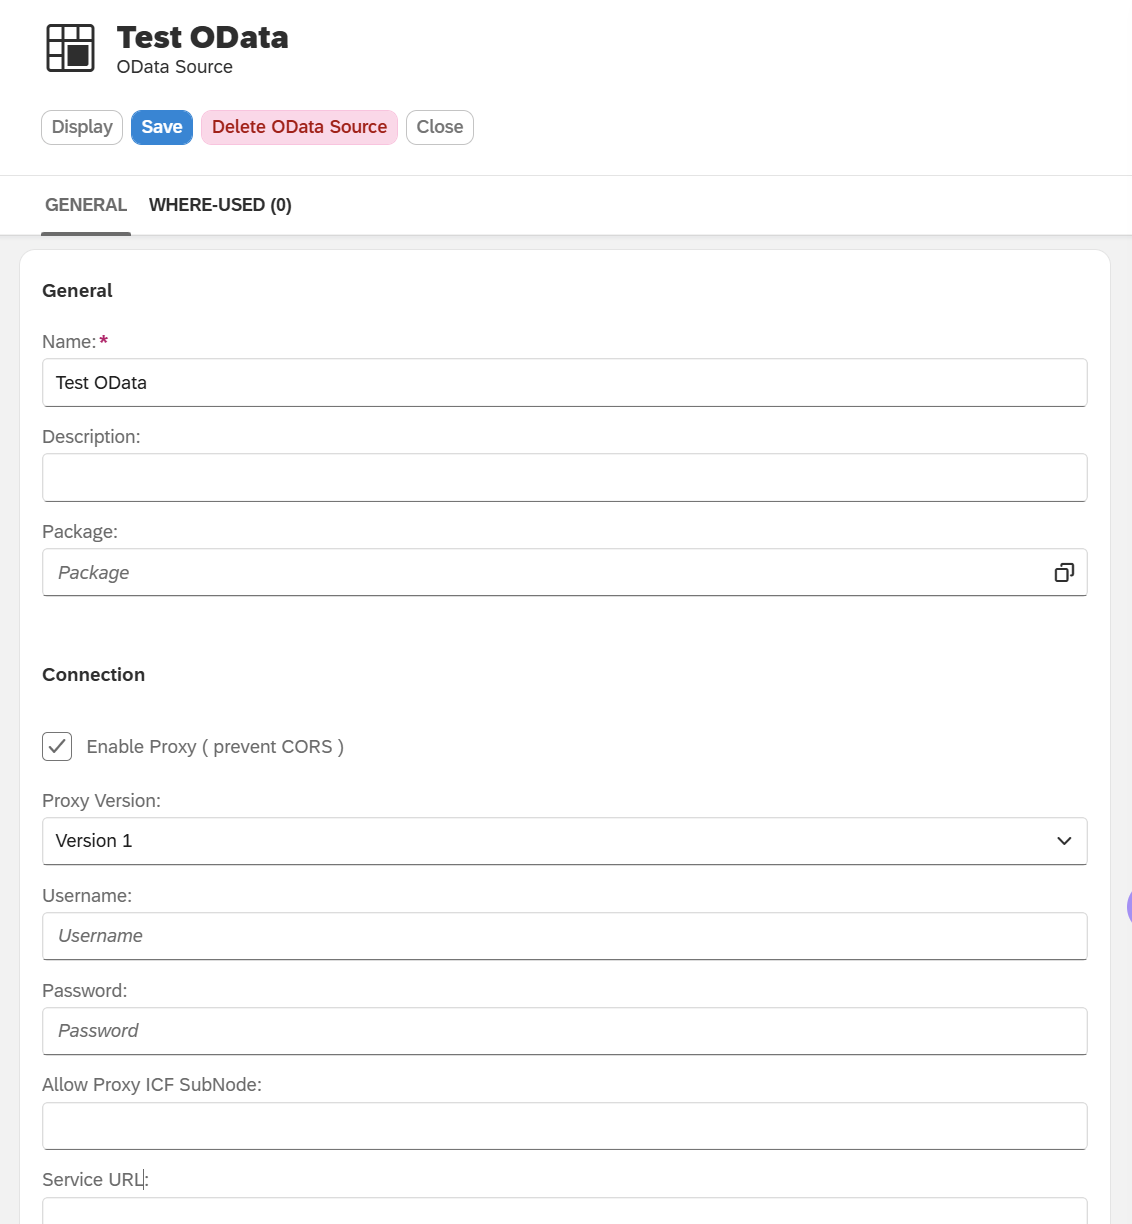
Type in a name for the new OData Source, and click Create OData Source.

OData Source properties explanation:
General
Name: Name of oData source, it can be anything
Description: Brief description of the oData source and service used.
Package: Optional Package assignment.
Connection
Enable Proxy: Allow cross-domain connectivity. When consuming oData services from sources which are external to your domain, Cross-Origin Resource Sharing (CORS) errors might occur in your app. While developing and testing, you may disable Security in your browser. In SAP BTP, please remember to setup the correct Destinations so CORS is avoided and your app is safe.
Proxy Version: If you enable the Proxy (see checkbox Enable Proxy ( prevent CORS )) this setting allows you to choose between the Proxy Version 1 and Version 2 which implements different flows for communication between SAP and the target system. For newly created OData sources it is recommended to select Version 2.
Version 1: Ensure backwards compatibility with existing OData sources (prior to DXP 24).
-
No special handling of Session cookies
-
No OData V4 support
Version 2: Enhanced Proxy handling (introduced with Neptune DXP 24).
-
Support for OData Version 4
-
Enhanced overall stability
-
URL query string support
-
Improved CSRF handling
-
Compatibility with both SAP and non-SAP systems
-
Session-less operation on SAP on-premise and Rise (handling of SAP Session Cookies)
-
Extensibility through custom proxy classes
Service Url: Path to access OData service resources. Additional functionality when using Proxy Version 2: You can add static query parameters to the Service URL. Those will be appended to all destination URL calls.
Username: Username for authenticating to OData source.
Password: Password for authenticating to OData source.
SAP Cloud Destination: When exporting an app to SAP BTP, SAP Cloud Destination field will be used instead of the regular URL field.
Additional Proxy Version 2 settings
No CSRF handling: This setting is only supported with the Proxy Handler Version 2. Certain services may not support CSRF handling and may produce errors when a CSRF fetch is requested. You can disable the CSRF fetch by enabling this flag.
Authentication Type: Currently No Authentication and Basic Authentication (Username and Password) is supported. In future releases we might enhance the authentication mechanisms to support other ways of authentication.
Destination System Type: You can choose between two destination system types.
-
Backend SAP System (On Premise/Rise): Special handling of SAP system requirements. SAP-centric services will include additional HTTP headers to prevent the creation of unnecessary SAP sessions.
-
Other: No special handling of cookie and header fields
Custom Proxy Class Name: This custom proxy class enables you to manipulate proxy calls through backend coding. It is advised to use this option only when necessary, as adjustments may be required during upgrades. For technical functionality, the class must implement the interface /NEPTUNE/IF_PROXY_HANDLER. However, inheriting the class /NEPTUNE/CL_PROXY_ODATA is recommended, as it already includes the current logic for OData calls and implements the interface.
How to use OData in App Designer
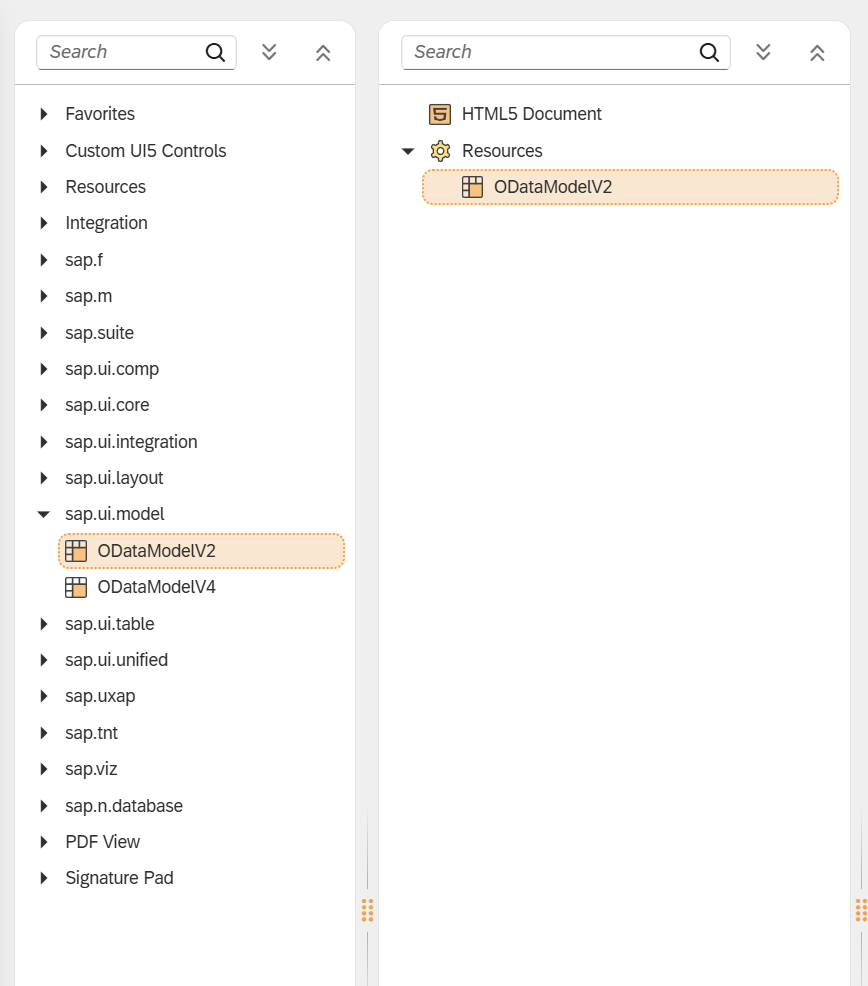
Open your App in App Designer. Define the OData service by adding the ODataModelV2 or ODataModelV4 object under the resources folder. This object is found in the sap.ui.model library.

-
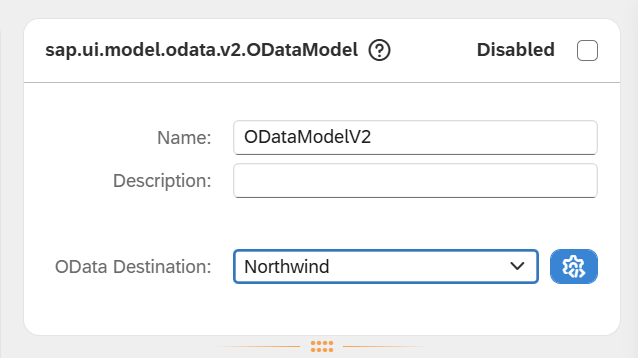
Set oData Destination, choose the oData source from the list.
-
Set attribute defaultCountMode to “Inline”
-
Set attribute defaultBindingMode to “TwoWay”.
BindingModes
Different ways of binding OData services, and your choice will depend on the use case, the OData service, and the UI component.
-
One Time: One-time binding means from model to view once.
-
One Way: One-way binding means a binding from the model to the view; value changes in the model update all corresponding bindings and the view
-
Two Way: Two-way binding means a binding from the model to the view and from the view to the model; value changes in the model and in the view update all corresponding bindings and the view and model, respectively

After defining the oData service, you can bind an Entity Set or Entity Type to the corresponding UI5 control.

You can use the wizard to add the desired fields automatically by right-clicking on the UI5 control and selecting "Wizard → Insert Fields - Display or Insert Fields - Edit"
You can choose to directly bind the UI5 control to the OData source by ticking the checkbox Use OData Model for UI Binding or use an intermediate JSON model for the binding by not ticking the checkbox. When directly binding the UI5 control to the OData source (ticking the checkbox Use OData Model for UI Binding) you can use OData CRUD, navigation, sort and filter operations directly within the UI5 control. This makes interaction with the OData source very simple. However, it only allows online-only scenarios as all data and communication will always be performed against the OData service. When not binding directly to the control (unticking the checkbox Use OData Model for UI Binding) the OData read operation will pull the data into an intermediate JSON model and the resulting JSON model will be used for binding of the control against the data. When choosing this scenario you can implement offline functionality with OData as the data will be put into a JSON model that can be put into cache. However, performing CRUD, sorting, or filtering operations against the OData service requires manual JavaScript coding to implement the desired functionality.