Use the Neptune Setup Helper
The Neptune Setup Helper contains the following automated step sequences that require only minimal manual intervention:
Procedure
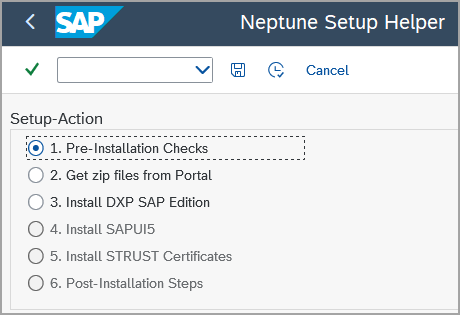
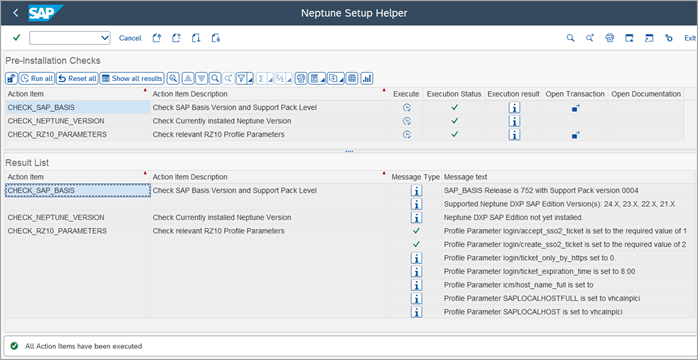
1. Run pre-installation checks
To verify which version of Neptune DXP - SAP Edition is compatible with your system, you must first run pre-installation checks.
-
In the Neptune Setup Helper, select 1. Pre-Installation Checks and select the Execute icon (F8).
Result: The Neptune Setup Helper performs the pre-installation checks. The result list displays in the action items which versions of Neptune DXP - SAP Edition are compatible with the SAP system, and if there are any profile parameters that need to be changed for a seamless user experience.
2. Get ZIP files from the Neptune DXP Portal
When you install Neptune DXP - SAP Edition for the first time, or if you upgrade to the latest patch version of Neptune DXP - SAP Edition and/or SAPUI5, you must download Neptune DXP - SAP Edition installation ZIP files, SAPUI5 installation ZIP files, and license certificate ZIP files:
-
In the Neptune Setup Helper, select 2. Get zip files from Portal and select the Execute icon (F8).
Result: A browser window opens that navigates you to the Product Download page of the Neptune DXP Portal.
-
Download the Neptune DXP - SAP Edition installation ZIP file (directly from the Product Download page)
-
Download the SAPUI5 installation ZIP file (Neptune DX Platform - SAP Edition → SAPUI5)
-
Download the license certificate ZIP file (Neptune DX Platform - SAP Edition → License Certificates → DXPxx)
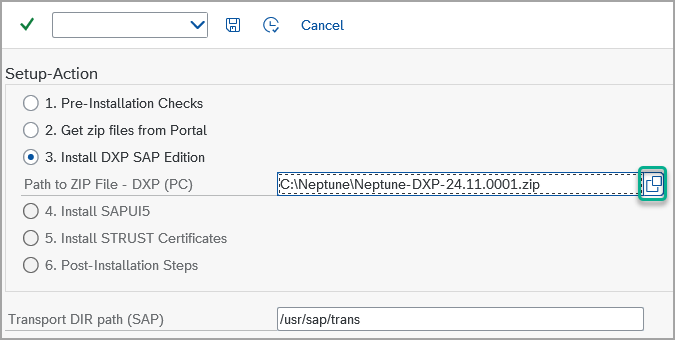
3. Install Neptune DXP - SAP Edition
-
In the Neptune Setup Helper, select 3. Install DXP SAP Edition.
-
In Path to ZIP File - DXP (PC), select the search help (F4) and locate the Neptune DXP - SAP Edition installation ZIP file.
-
In Transport DIR path (SAP), ensure that the path
/usr/sap/transis entered.Most SAP systems use the default transport directory path /usr/sap/trans, but if your system does not use this path, you can specify a different path. To verify your system’s transport directory path, you can check in the SAP transactionAL11. -
Select the Execute icon (F8) for each action item sequentially and confirm each action item in each of the dialogs that open during the execution process.

Start asynchronous transport import
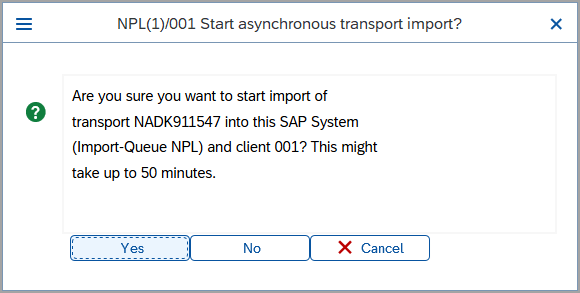
Result: If automated installation is successful, the Information dialog opens with the import status set to FINISHED.

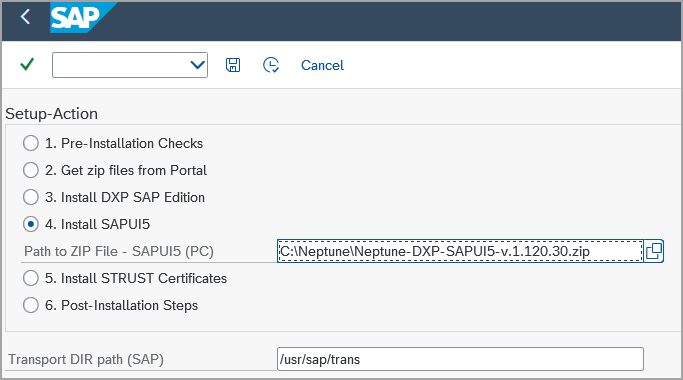
4. Install SAPUI5
-
In the Neptune Setup Helper, select 4. Install SAPUI5.
-
In Path to ZIP File - SAPUI5 (PC), select the search help (F4) and locate the SAPUI5 installation ZIP file.
-
Select the Execute icon (F8) for each action item sequentially and confirm each action item in each of the dialogs that open during the execution process.
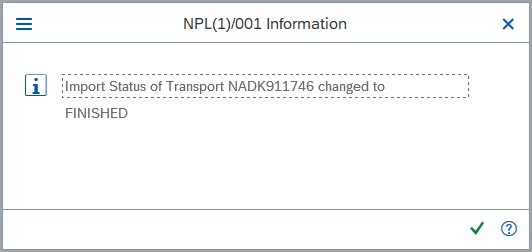
Start asynchronous transport import
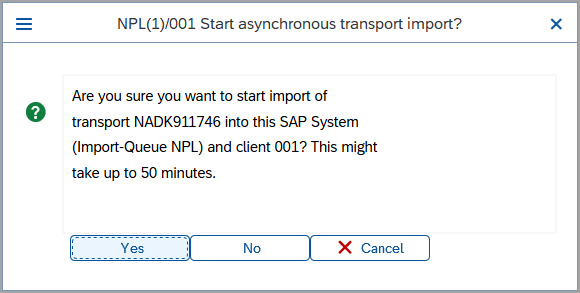
Result: If automated installation is successful, the Information dialog opens with the import status set to FINISHED.
5. Install STRUST certificates
-
In the Neptune Setup Helper, select 5. Install STRUST Certificates.
-
In Path to ZIP File - Certificate, select the search help (F4) and locate the license certificate ZIP file.
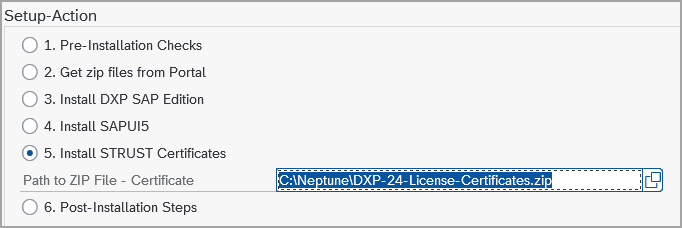
-
Select the Execute icon (F8) for each action item sequentially.
6. Perform post-installation steps
-
In the Neptune Setup Helper, select 6. Post-Installation Steps.
-
Select the Execute icon (F8) for each action item sequentially.
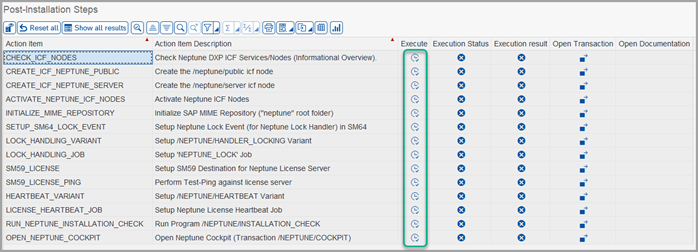
-
For the action item
CREATE_ICF_NEPTUNE_PUBLIC, enter valid credentials of a service user by double-clicking thepublicnode, and in the Logon Data tab of the dialog that opens, entering the username and password of a service user.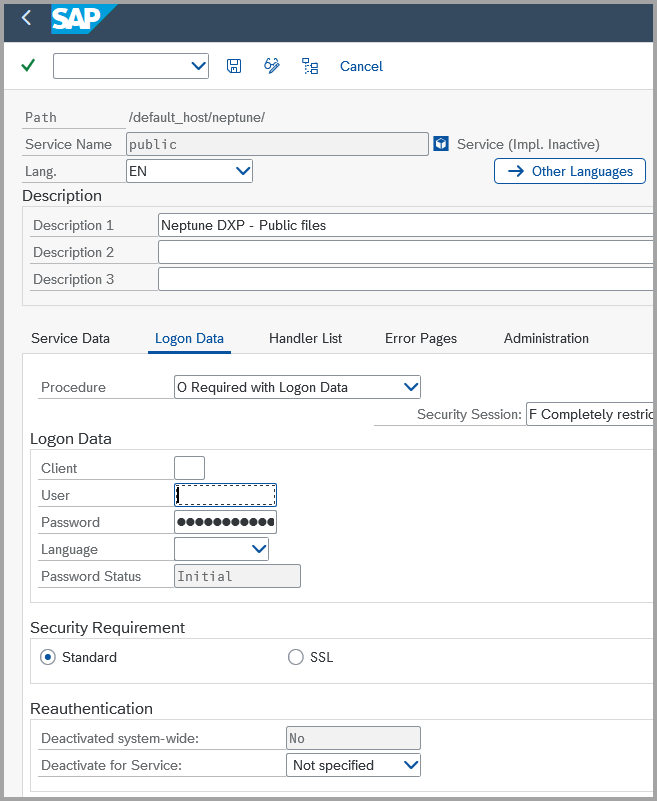
-
Repeat the step for the action item
CREATE_ICF_NEPTUNE_SERVERin theservernode. -
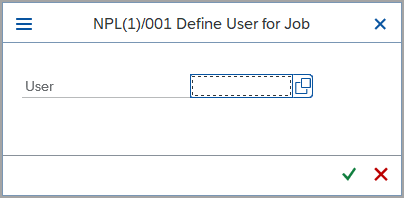
For the action item
LOCK_HANDLING_JOB, define a user that runs the lock handler background job for the App Designer.
Results
-
You have completed all the steps in the Neptune Setup Helper.
-
Your instance of Neptune DXP - SAP Edition is authenticated for your SAP system.
-
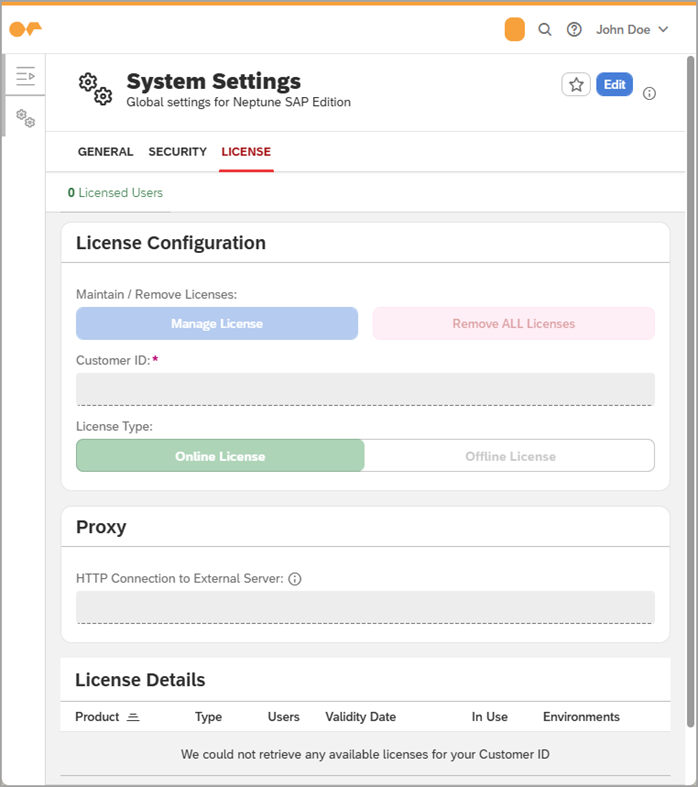
When you start Neptune DXP - SAP Edition for the first time, you are navigated to the System Settings tool to activate your license.