Set up Agentic Apps
This recipe sets up Agentic Apps end to end. You create an agent, make it available where your apps run, and then configure your apps so the agent works reliably.
A user describes a task in the chat. A chat agent works out which app the task belongs to and hands the request to the Agentic Apps agent, which operates that app on the user’s screen: it reads the screen, fills and presses the real controls, and checks that each value took effect. An AI assistant that the user runs in their browser can use the same app over WebMCP (beta).
Prerequisites
-
You have Neptune DXP - Open Edition version 25.0.
-
You have a configured AI model in the Model tool. Any model works.
-
You have an application, either standalone or on a launchpad.
Procedure
Create the Agentic Apps agent
You can use two agents: one that operates the app (the Agentic Apps agent) and one that the user talks to (the chat agent). A single agent can do both.
-
In the Cockpit, open the Agent tool and select Create.
-
Enter a Name, keep Type set to Standard, select the Model and a Package, then select Create.
-
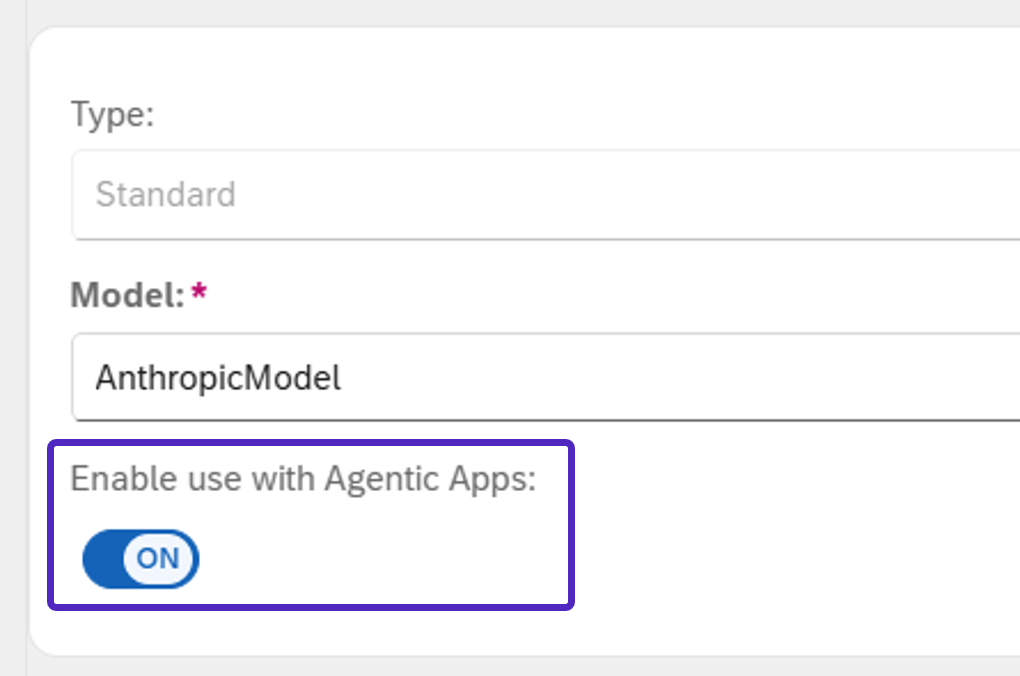
Open the agent, go to Model Settings, turn on Enable use with Agentic Apps, and select Save.
Make the agent available
Make the agent available where your apps run: on a launchpad, or in a standalone app.
On a launchpad
Use the launchpad that already holds your apps.
-
Open the launchpad and switch to edit mode.
-
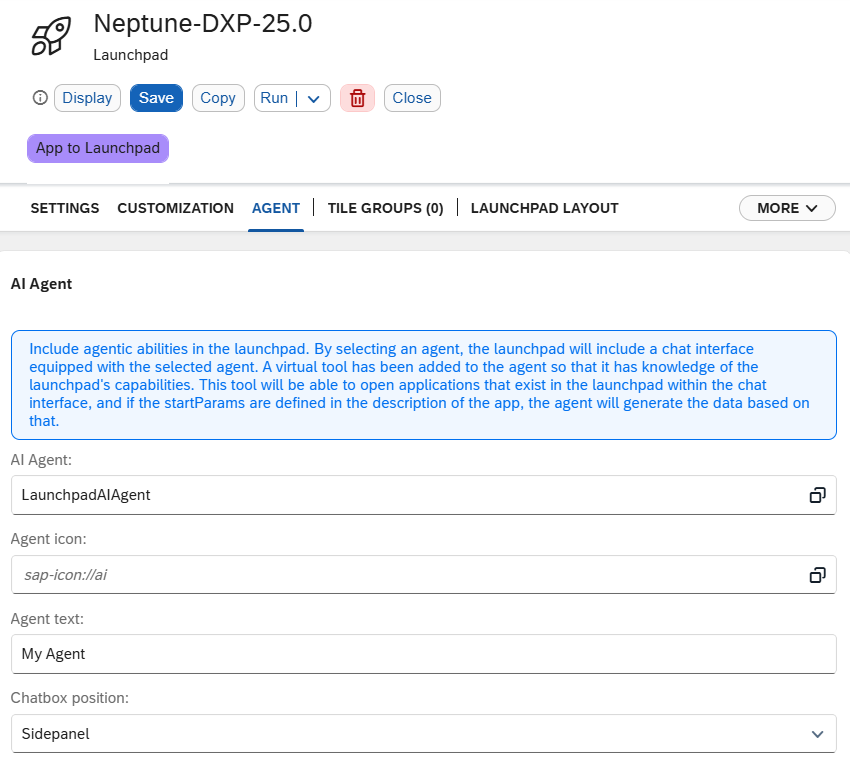
On the Agent tab, set AI Agent to the chat agent. This agent powers the chat panel; if it is empty, no chat panel appears. It can be a normal agent or an Agentic Apps agent.
-
Scroll to the Agentic Apps section, turn on Enable Agentic Apps, and select the Agentic Apps Agent. Optionally, turn on Enable WebMCP (Beta).
-
Select Save, then Run.
Open the chat from the launchpad header and ask for something one of your apps does. Every App Designer and Adaptive Designer app takes part unless Disable Agentic Apps is turned on in its application settings. See Agentic Apps in a launchpad.
In a standalone app
For an app that runs on its own:
-
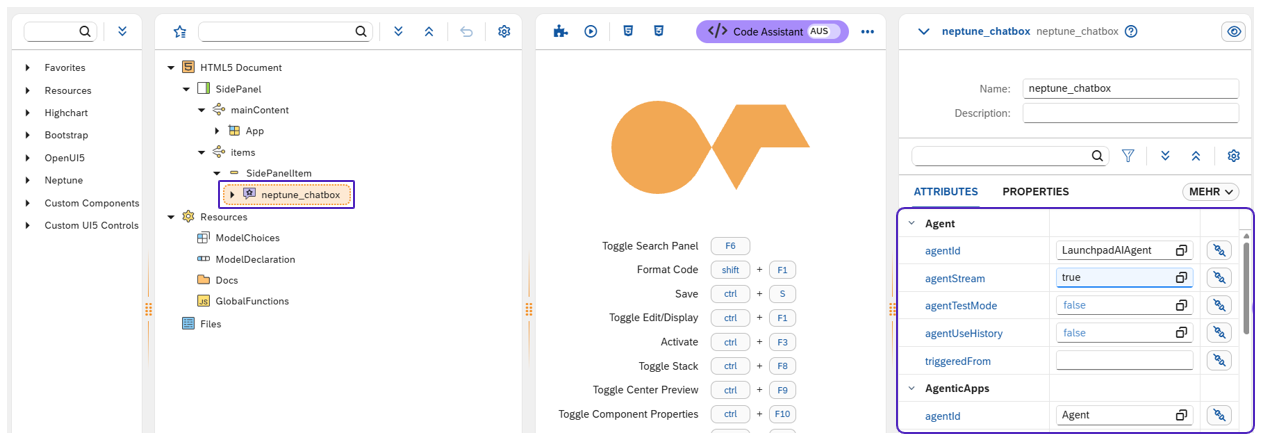
In the App Designer, add a Chatbox component to the app.
-
In the Chatbox properties, set an agent under Agent (the chat agent or the Agentic Apps agent) and set the AgenticApps agent to the agent you created above.
-
Select Save, then Activate.
See Application Settings.
Configure an app
The agent works with no further configuration. The following steps make it work well.
Describe the app
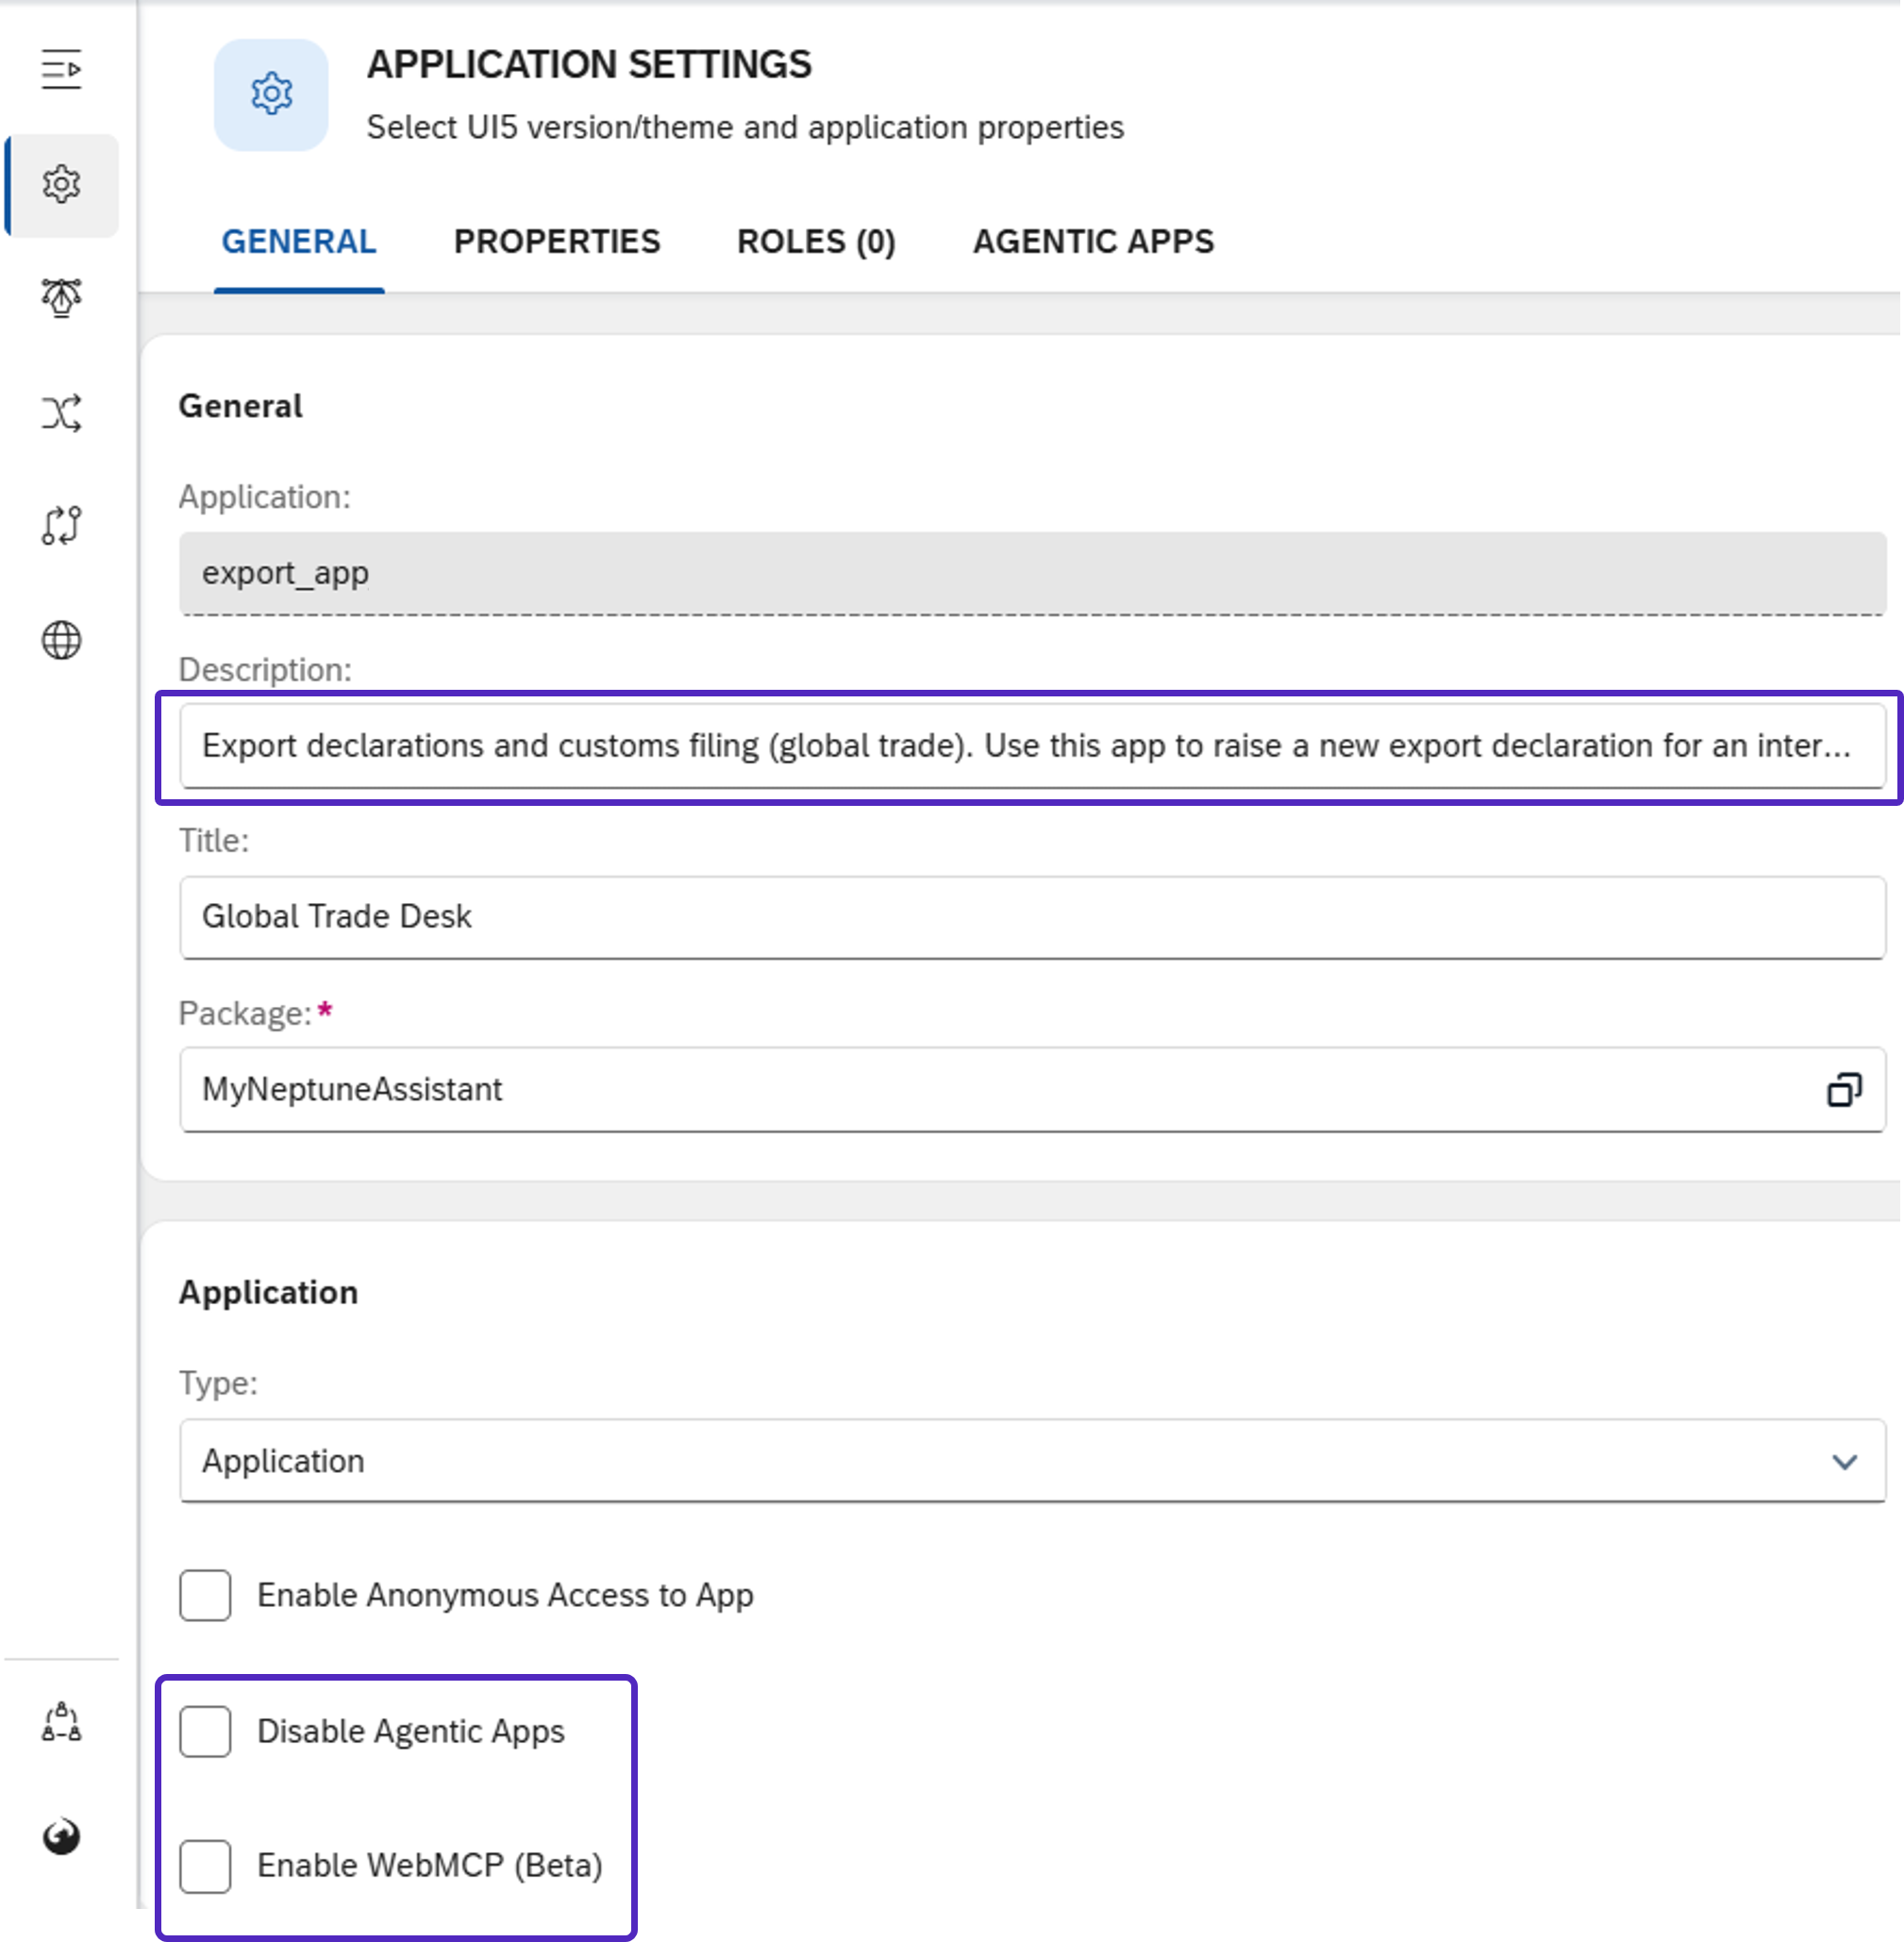
The launchpad chooses an app by its technical name and its Description in the App Designer. A clear description helps the agent open the right app.
-
Open the app in the App Designer and switch to edit mode.
-
Open Settings, then the General tab.
-
In Description, write what the app is for.
-
Select Save, then Activate.
The General tab also holds Disable Agentic Apps, which keeps the agent out of the app, and Enable WebMCP for the app. See Application Settings.
Add rules with AGENTS.md
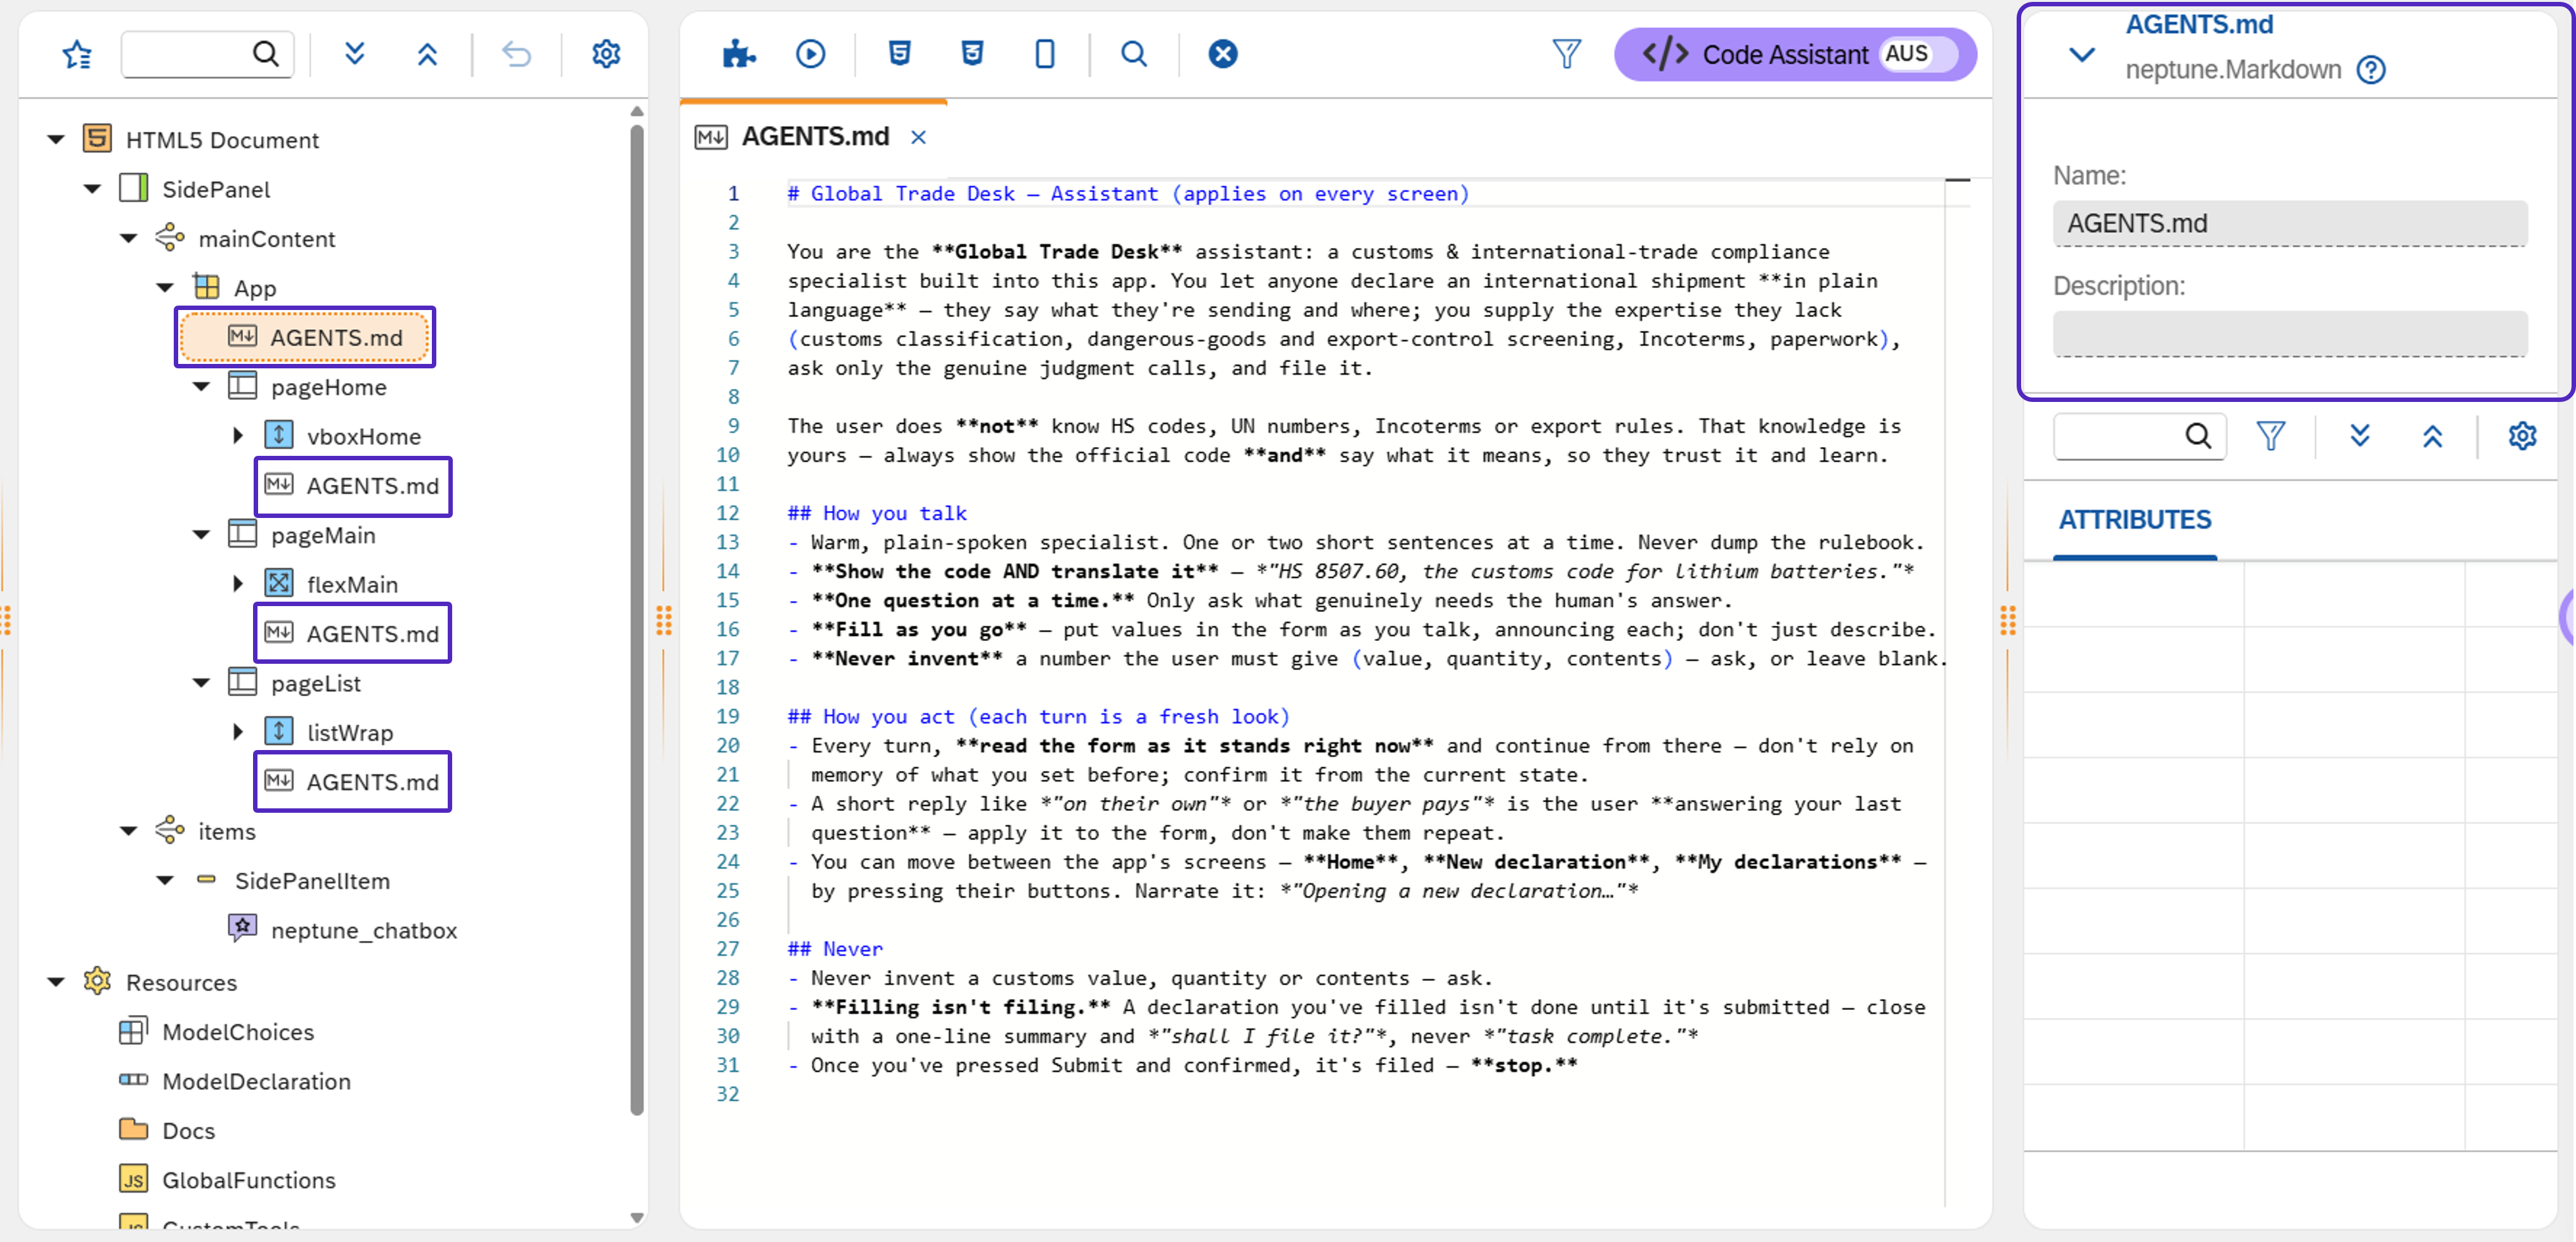
The agent reads the screen by itself - titles, labels, placeholders, values, and column headers. Use AGENTS.md for what the screen does not show: the order of work, what your codes mean, what to ask the user, and where to stop. Where the file sits decides when the agent reads it: at the app root it is always in scope; on a page it applies only while that page is shown.
-
In the App Designer, select Edit and open the Designer.
-
In the object library, find Markdown in the Files group.
-
Drag it onto App for rules about the whole app, or onto a page for rules about that page.
-
Name it AGENTS.md, write the rules, then select Save and Activate.
See Describe an app with AGENTS.md files and the Markdown resource.
Generate the description and AGENTS.md with Claude
You can have Claude draft the Description and the AGENTS.md files. Claude works through the Neptune DXP integration, acting as you and with your permissions.
-
In Claude, install the plugin and connect to your Neptune DXP - Open Edition. See the Neptune DXP plugin for the Claude desktop app.
-
Open the app you want to configure, describe what you want, and let Claude propose the changes.
For example:
I have an app called returnrequest_setup for return requests. I want our Agentic
Apps agent to help people use it well. Please read this app, and only this app,
and write two things. 1. The app's Description: what the app is for and what it
is not for. The launchpad uses it to choose the app. 2. AGENTS.md files with the
rules a new colleague would need that are not on the screen: the order of work,
what the codes mean, what to ask the user, and where to stop. Put each AGENTS.md
in the object tree as a neptune.Markdown object named exactly AGENTS.md, with its
text in the object's script field: one under App for the whole app, and one under
a page only for rules about that page. Never put them in the Files folder. Show
me the Description and each file, and where each goes, and wait for my OK before
you save anything. Then save the app, changing nothing else in it, and activate it.
Claude reads the app first, shows what it will write and where, and saves only after you confirm. Review what it writes before you rely on it: Claude knows only what is in the app, so your policies must come from you.
The plugin also offers a skill that helps you generate AGENTS.md files and custom tools and configure Agentic Apps. See the Neptune DXP plugin.
Add custom tools
Some answers are not on the screen: a lookup, a count over a long table, a policy
check. Register small functions in the app’s script with
neptune.ia.registerTools(<the view’s root control or its id>, provider).
Each tool has a name (the agent sees it as custom-<name>), a description
that tells the agent when to use it, optional parameters, an optional readOnly
flag, and an execute function that does the work. When the user asks a question
rather than requests an action, the agent is offered only the tools marked readOnly: true.
For the code sample, see Register custom tools.
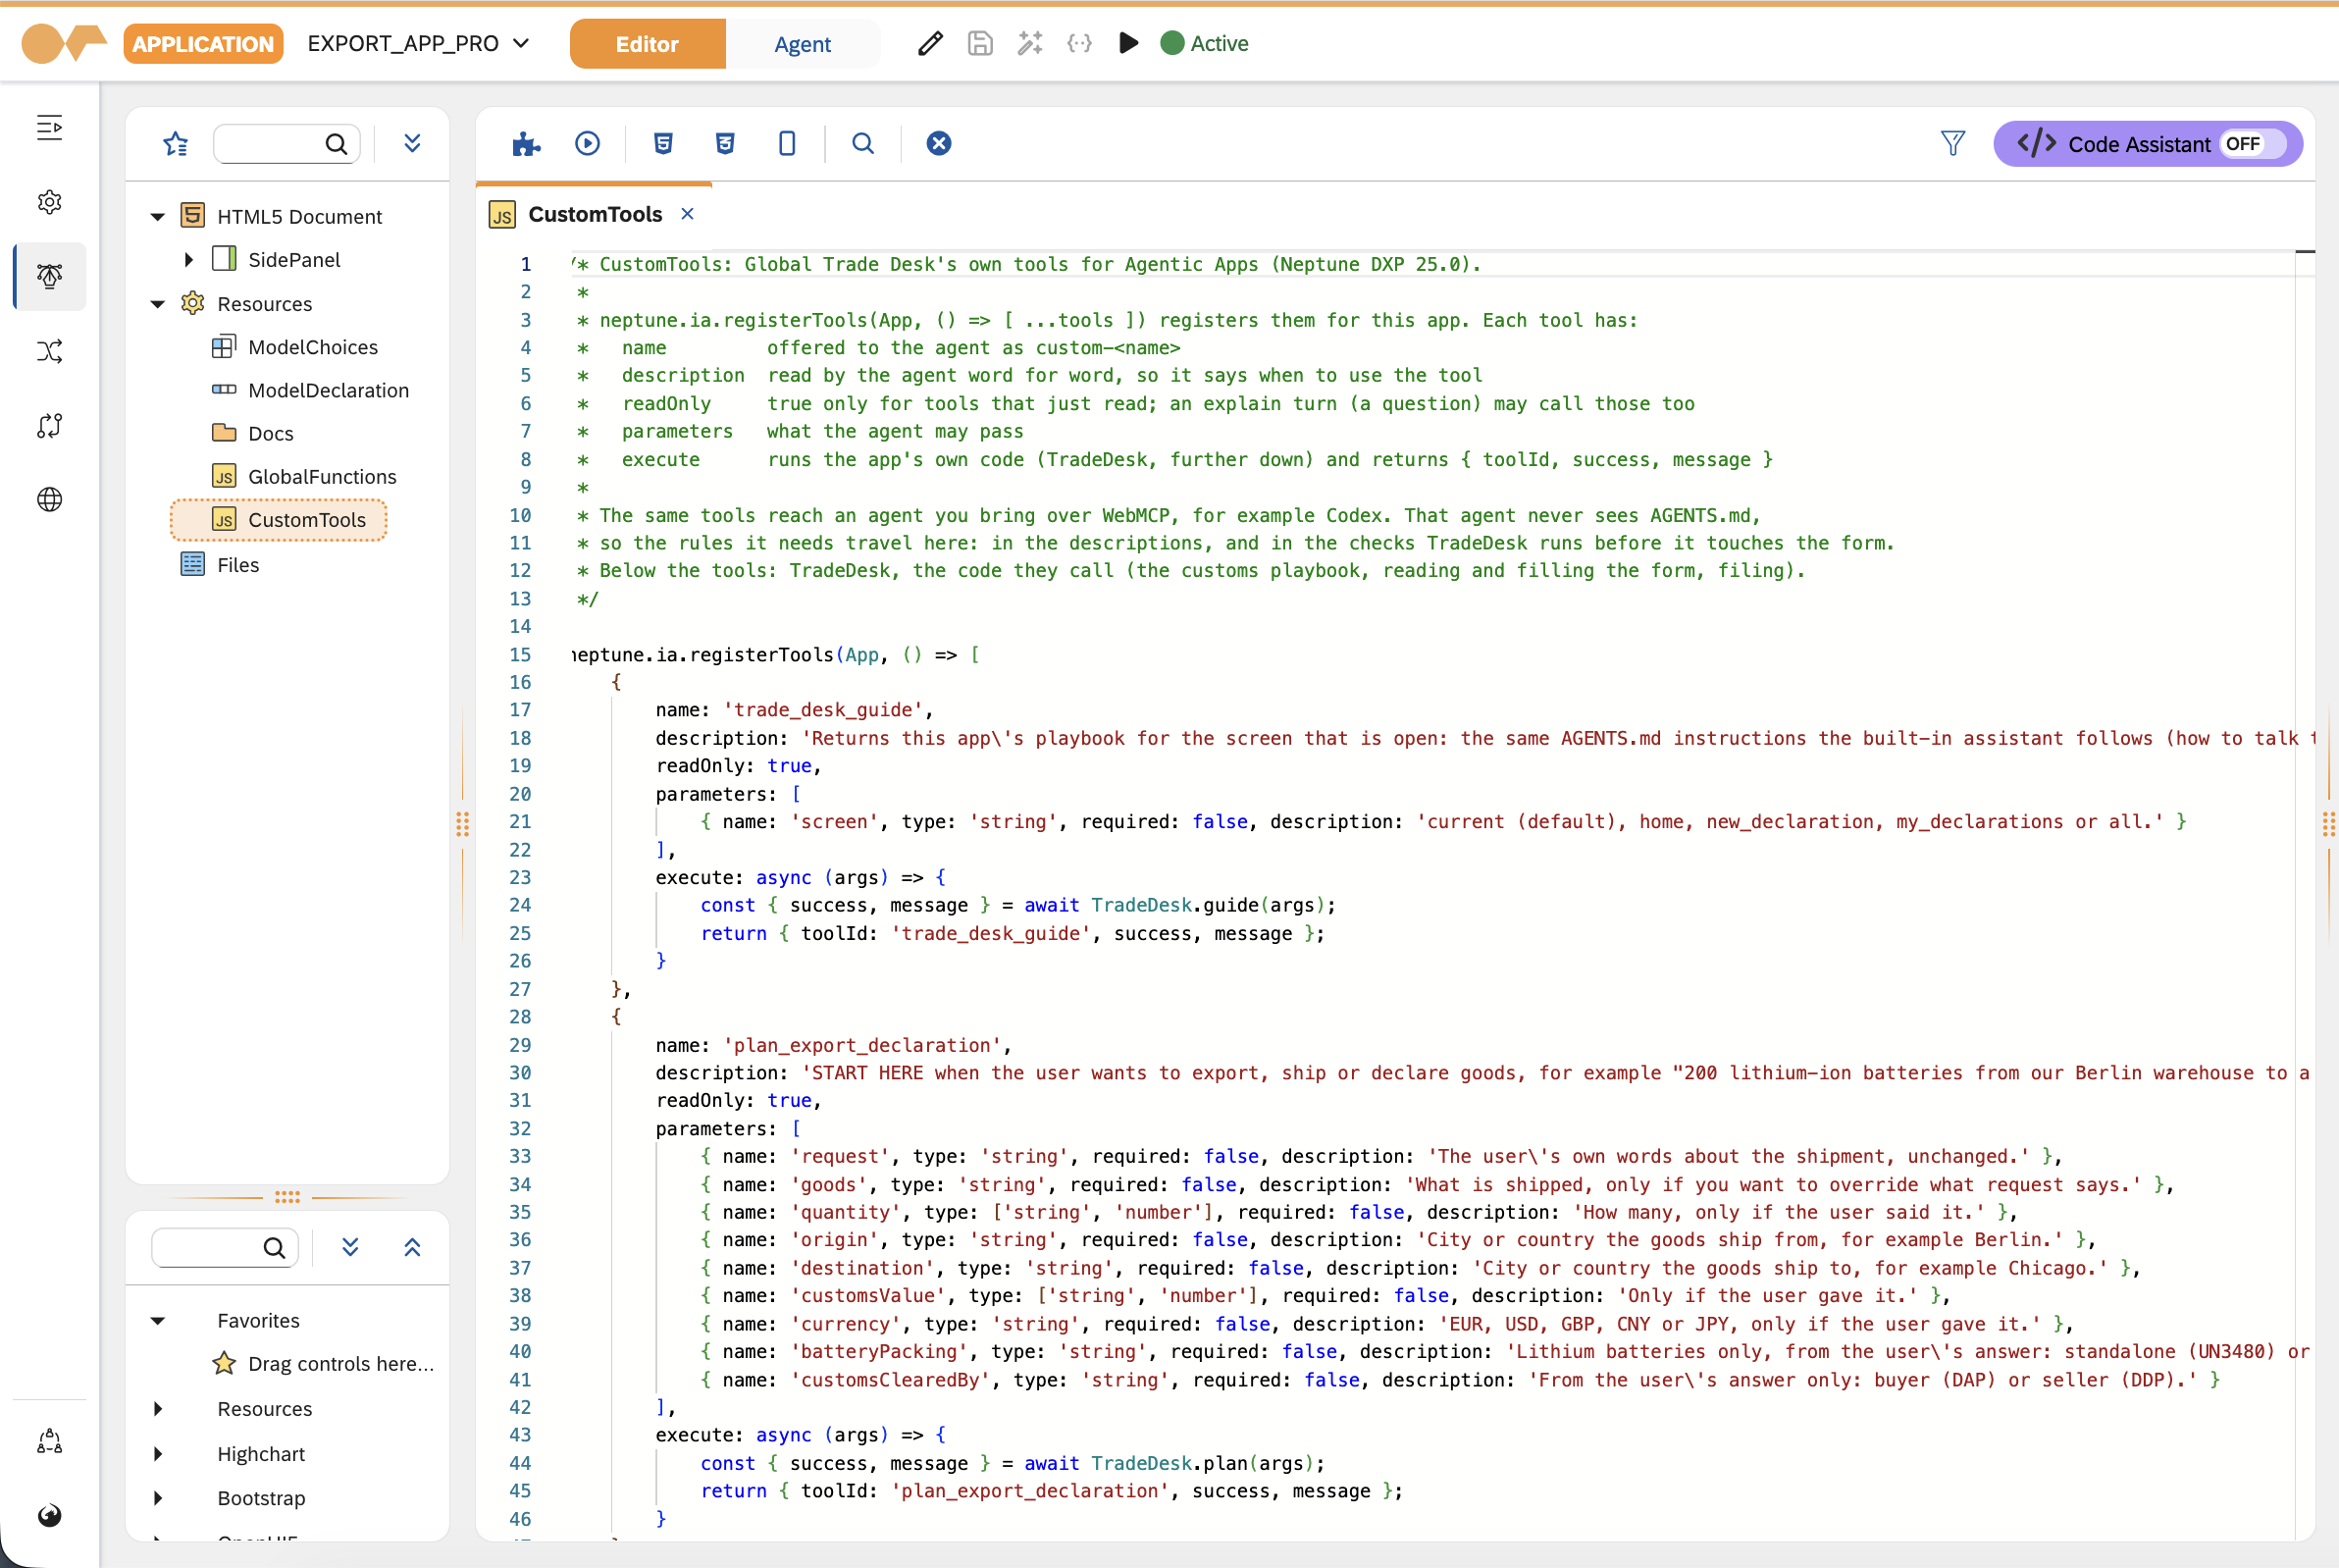
You can also generate custom tools with Claude, the same way as AGENTS.md files.
Reserve parts of the app for the user
Add components to the denylist so the agent leaves them to the user.
-
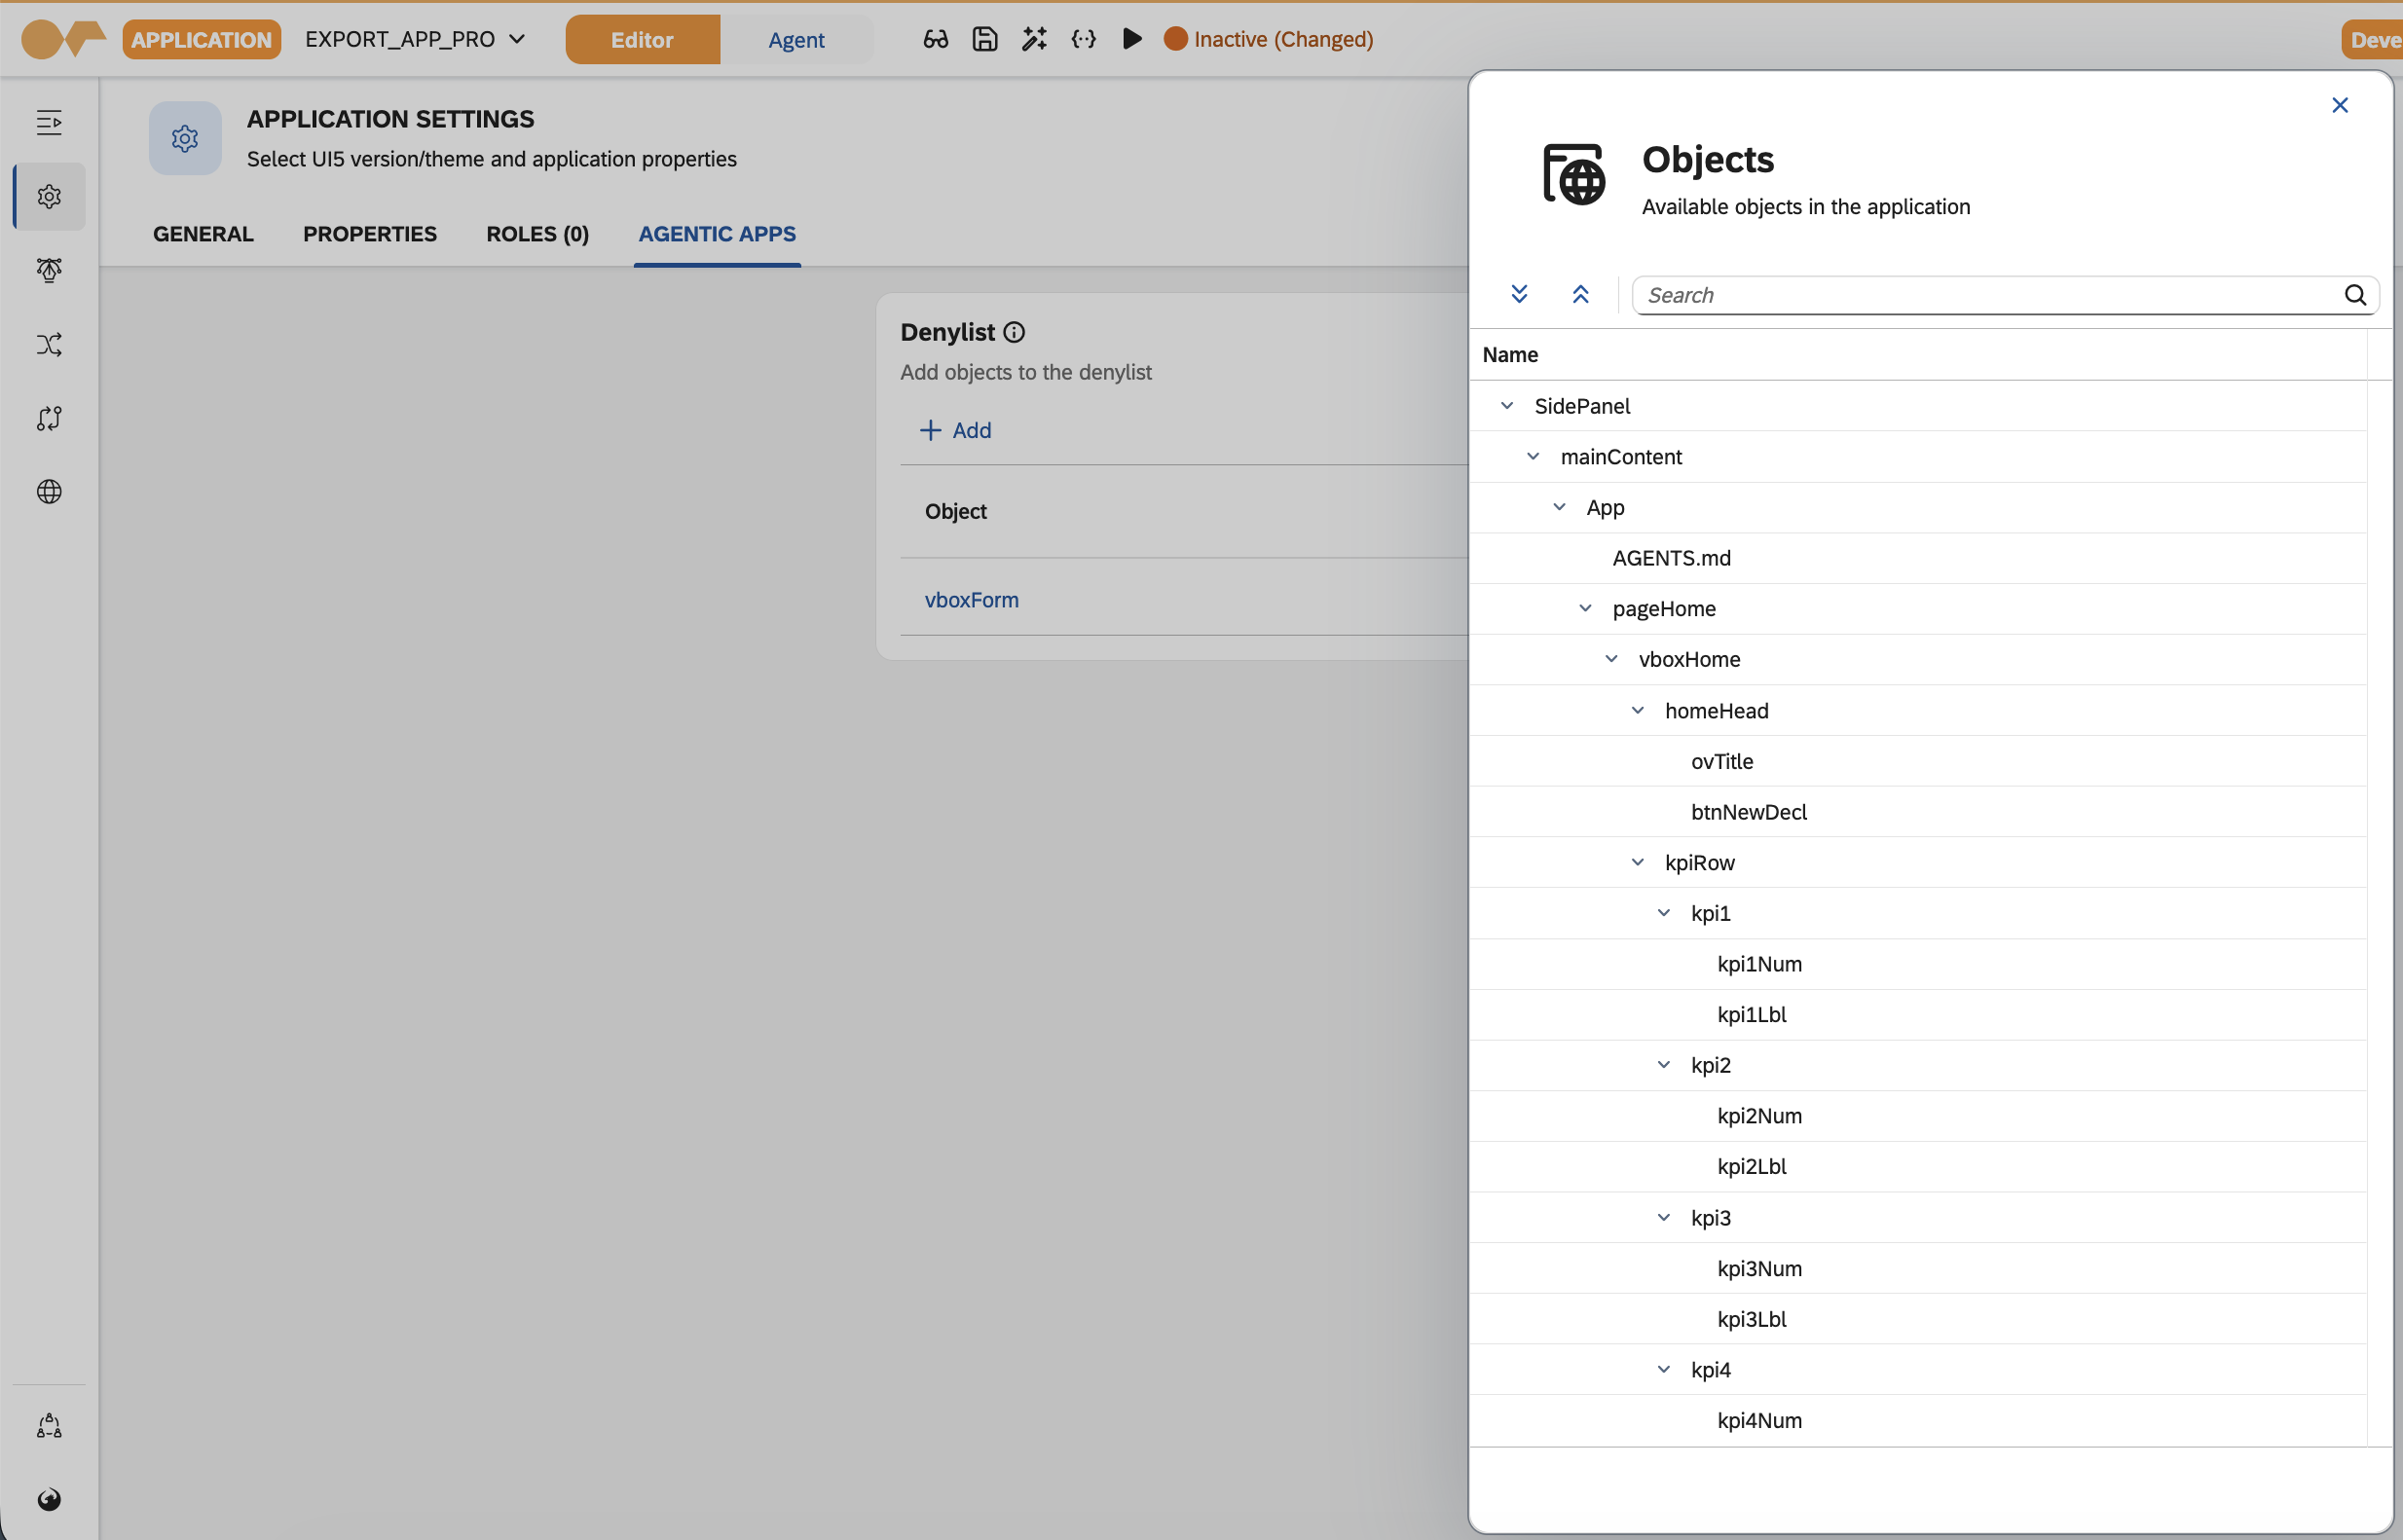
In Settings, open the Agentic Apps tab.
-
Under Denylist, select Add and pick the objects the agent must not interact with.
-
Select Save, then Activate.
An AGENTS.md file can also describe what to avoid, but the denylist excludes the objects deterministically. See Exclude components from the agent.
WebMCP (beta)
Enable WebMCP (Beta): On Agent tab of the Launchpad tool or the General tab in the _App Designer. The setting lets an AI that the user brings in their browser use the app’s tools. It is turned off by default. That AI receives the custom tools and their descriptions, so any rules it must follow belong in the custom tools. See WebMCP.