Create floorplan-based apps from an OData Source
The App Designer can generate a ready-to-run Fiori floorplan directly from an OData Source. From the source’s context menu you add a Worklist, a searchable and sortable list page, or an Object Page, a detail page for a single entity. Neptune creates the page, its table or form, and the navigation between them, so you can build a working list-and-detail app without laying out each control by hand. Floorplan generation is available for both OData V2 and V4 sources.
| The Worklist and Object Page floorplans are unavailable when Strict CSP is enabled in the System Settings tool. OData floorplans use the UI5 OData components, which do not work under Strict CSP. |
This guide builds a two-page app on the public Northwind OData V4 service. It starts with a Worklist of customers, adds an Object Page that opens when a customer is selected, and finally adds a related list of that customer’s orders to the Object Page.
Prerequisites
-
You have created and saved an OData Source.
-
You are familiar with attaching an OData model to an app, as described in Bind an OData Source to a table.
Set up the app and model
-
Create an app and attach the OData model, following Attach the OData model. Use ODataModelV4, rename the model to
Northwind, and set OData Source to your Northwind OData V4 source.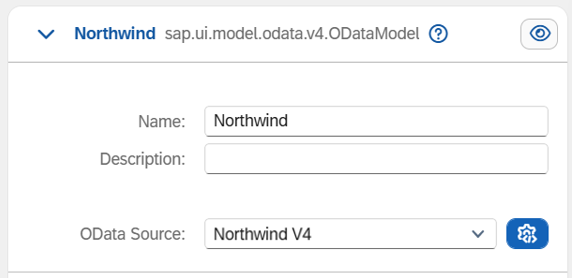
Generate a Worklist page
-
In the Application tree, right-click the Northwind OData Source and select Floorplans → Add Worklist Page for…, then select the Customers entity set.
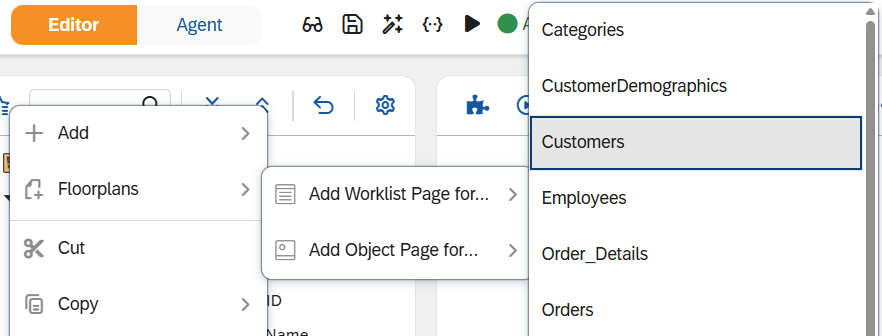
Result: Neptune adds a Worklist page with a table bound to the Customers entity set.
-
Add the columns to display, for example
CustomerId,CompanyName,City, andCountry.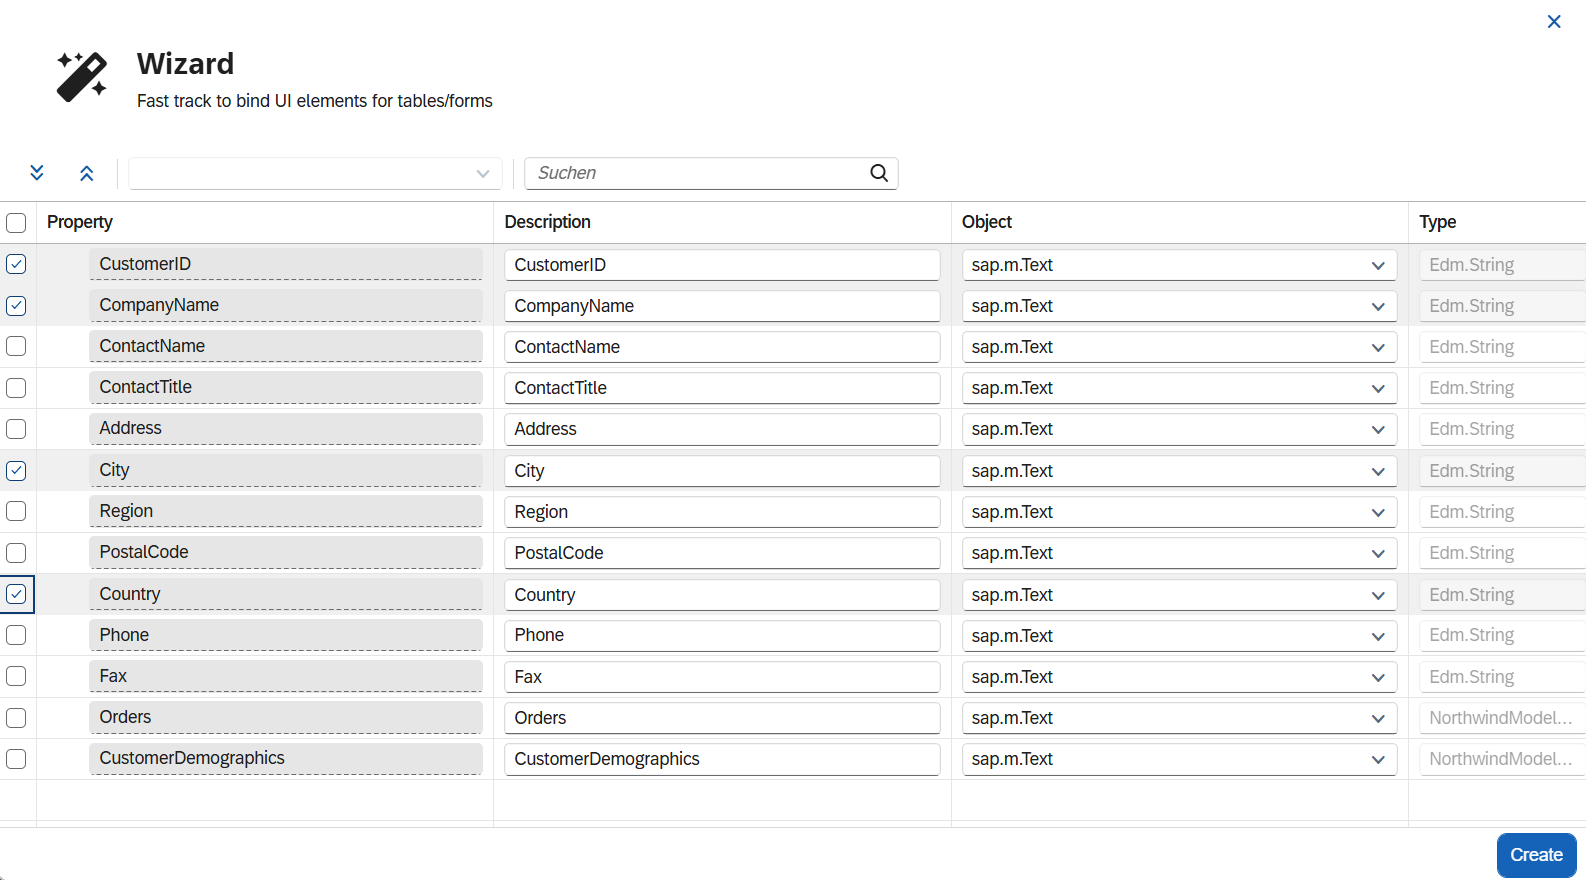
-
Activate and run the app.
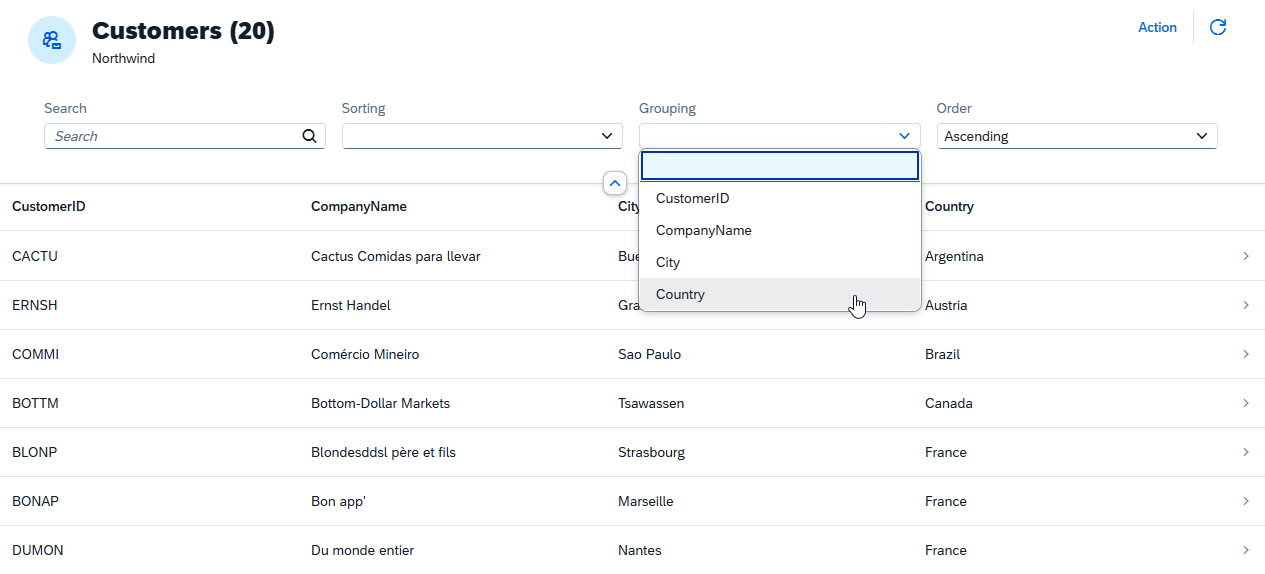
Result: The Worklist opens with built-in search, sorting, and grouping over the customer data.
Generate an Object Page
The Object Page is the detail view that opens when a user selects a row in the Worklist. Generating it also relies on a prepared navigation script that Neptune places on the Worklist table.
-
In the App Designer, open the
pressevent on the Worklist table’s column list, which fires when a user selects a row. Neptune has placed a prepared, commented-out navigation script here that you will enable in a later step.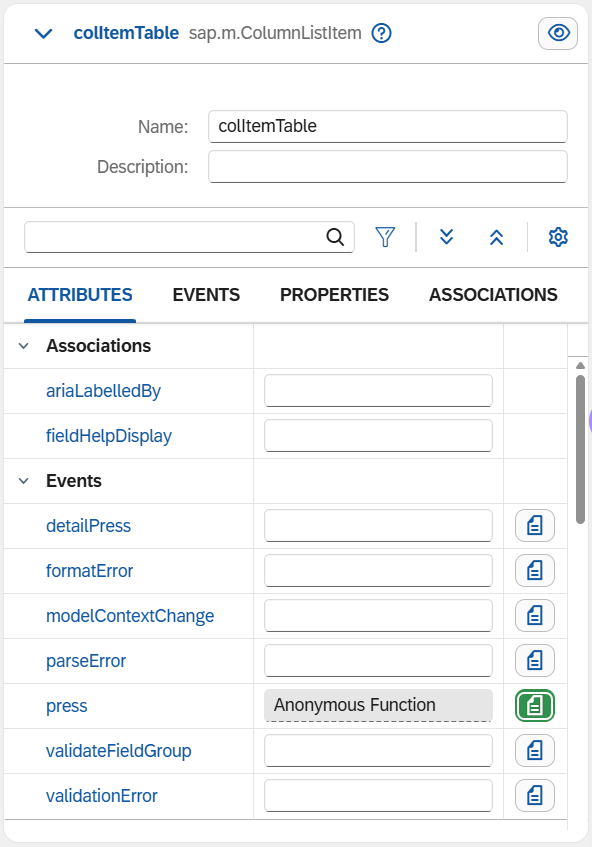
-
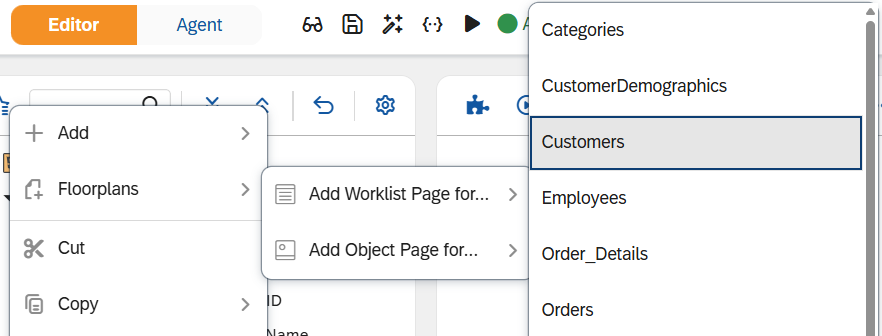
Right-click the Northwind OData source again and select Floorplans → Add Object Page for…, then select the Customers entity.
-
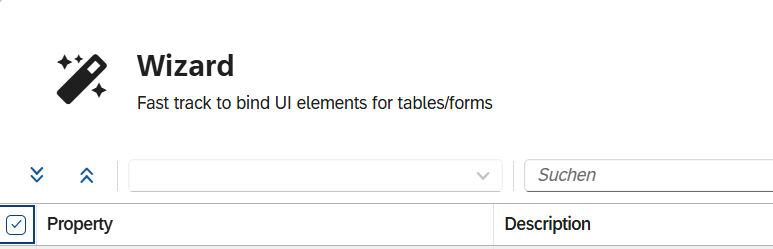
Add the fields to display on the detail page. To show the full record, add all fields.
-
Return to the
pressevent script and enable the navigation (Format Document). Uncomment the prepared block and replace the<YourEntityNameHere>placeholder withCustomer.Before:
// modelSimpleFormBlock1<YourEntityNameHere>.setData(data);
// App.to(Page<YourEntityNameHere>);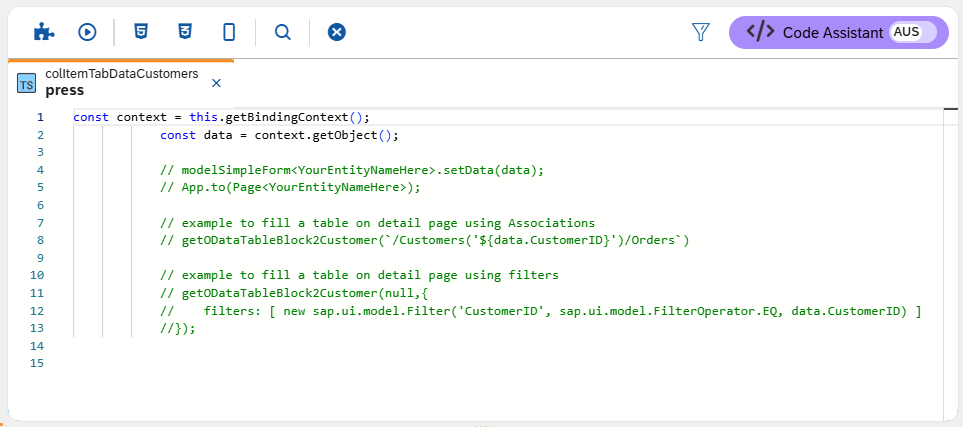
After:
modelSimpleFormBlock1Customer.setData(dat);
App.to(PageCustomer);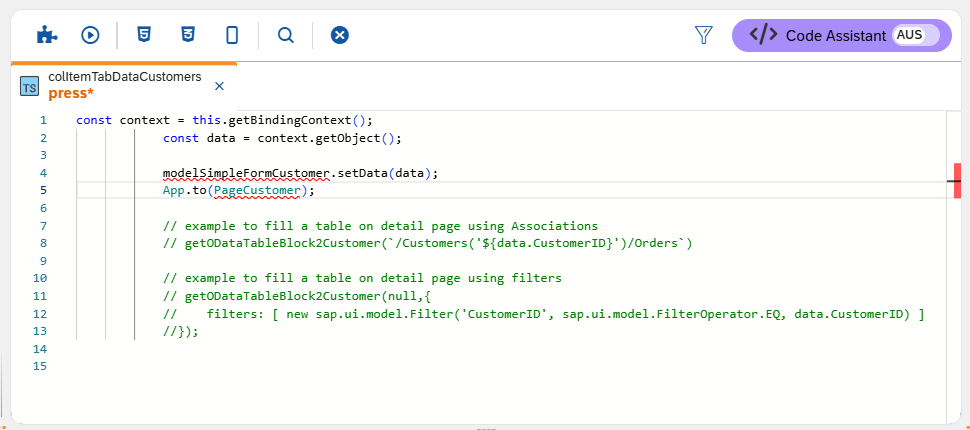
-
Activate and run the app.
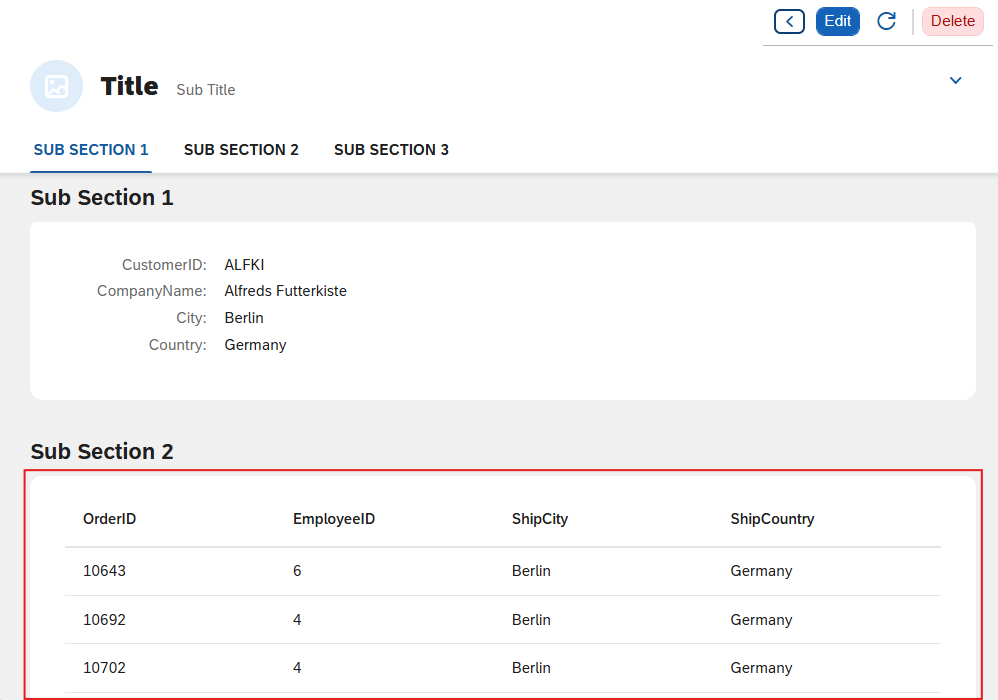
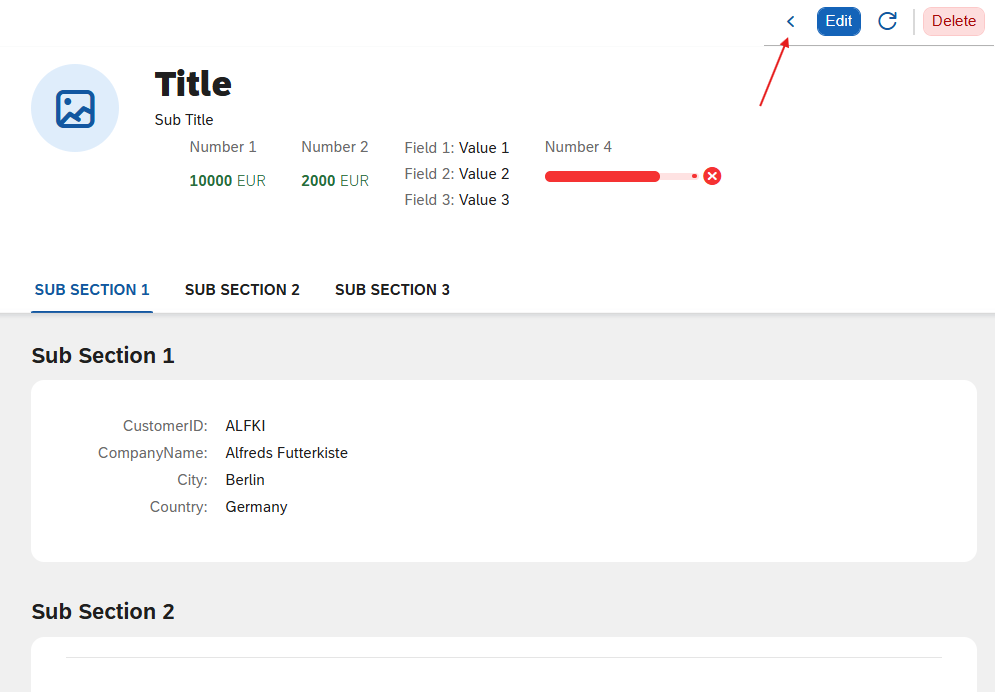
Result: Selecting a customer row opens the Object Page with that customer’s details. Use the back button in the page header to return to the Worklist.
Add a related list to the Object Page (optional)
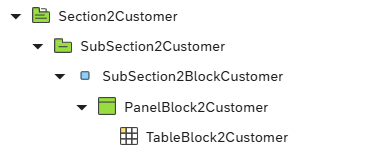
An Object Page can also show data related to the selected entity. This section adds a list of the selected customer’s orders to the second section of the Customer Object Page.
-
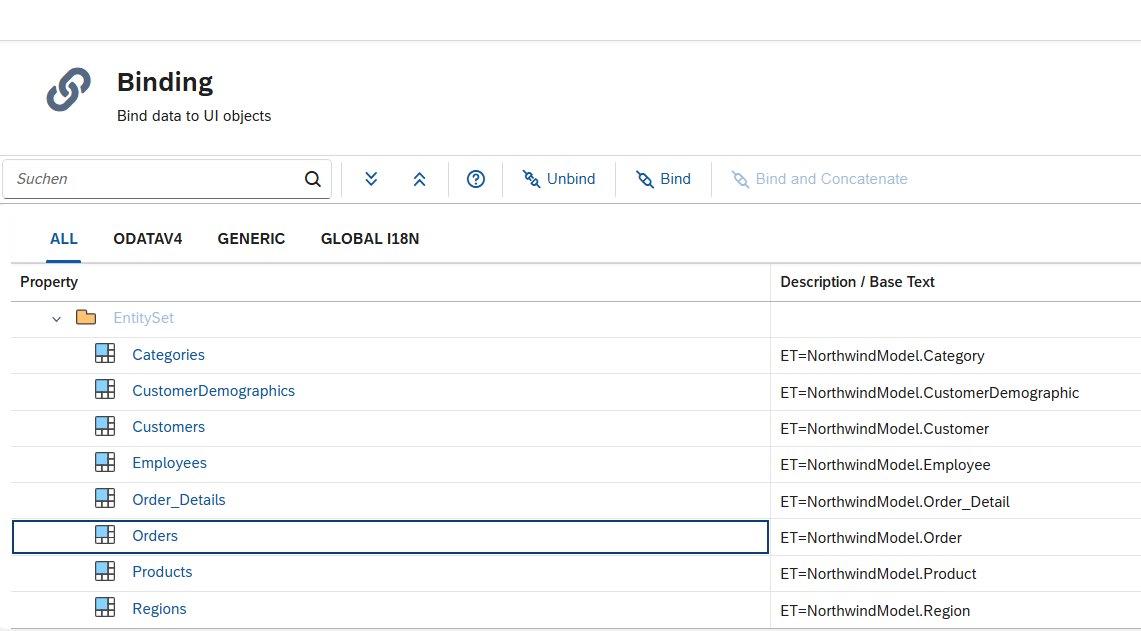
On the Object Page, select the table in the second section and set its Model Source to Northwind → Entity Sets → Orders.
-
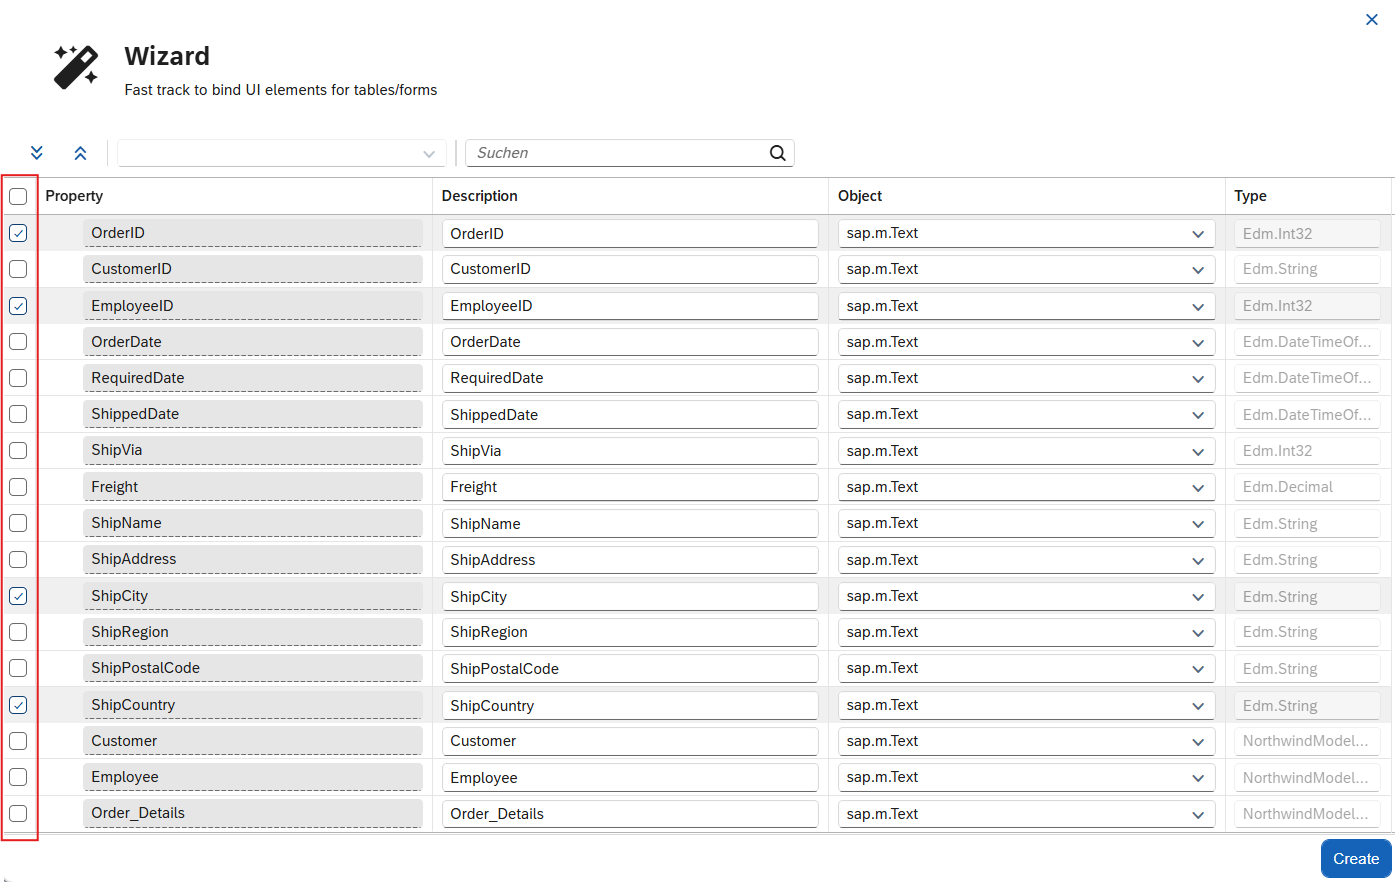
Open the table wizard from the table’s context menu (Wizard → Insert Fields (Display)) and add the columns to display, for example
OrderId,EmployeeId,ShipCity, andShipCountry.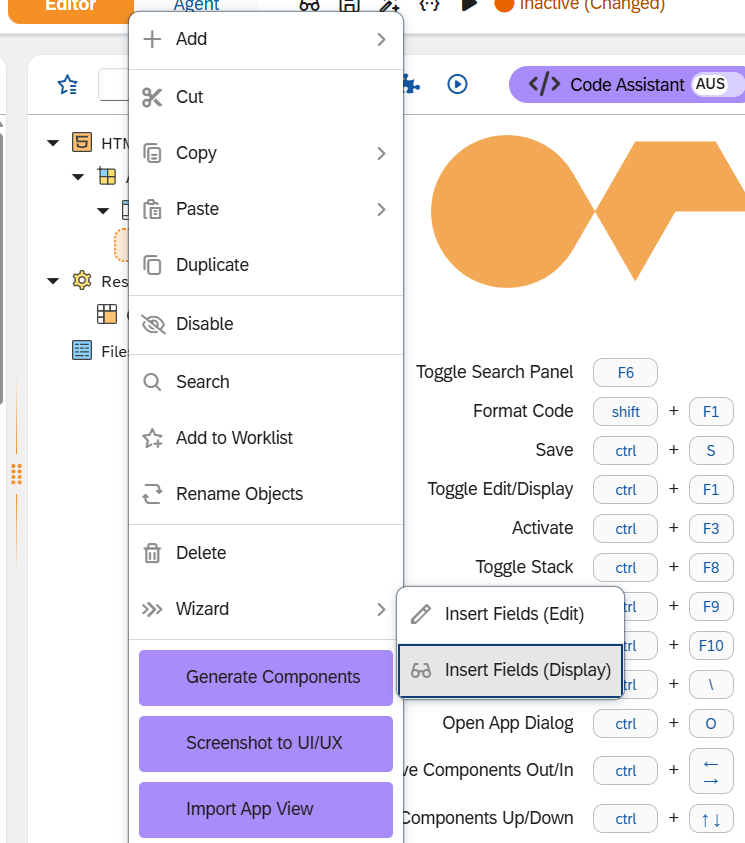
-
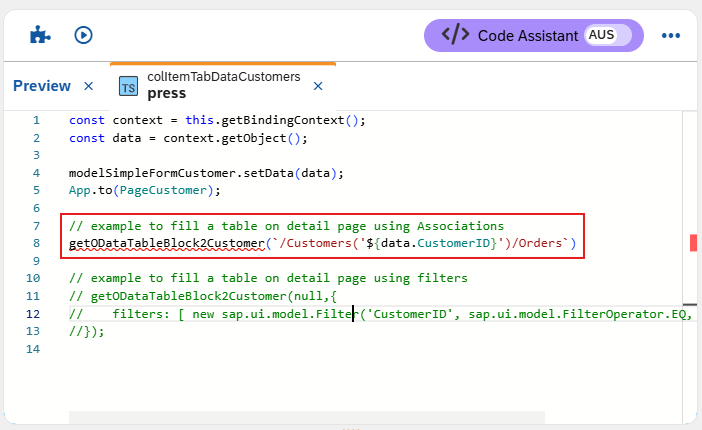
In the same event script you edited earlier, uncomment the next prepared block, which filters the orders by the selected customer.
Before:
// example to fill a table on detail page using Associations
// getOdataTableBlock2Customer(`/Customers('${data.CustomerID}')/Orders`)
After:
-
Activate and then run the app.
Result: The Object Page now lists the orders that belong to the selected customer.