Add a user task
This task adds the User Task that pauses the process flow until a hiring manager acts. The action they select becomes data the process flow reads, so a decision after the task can loop it back on rejection.
Prerequisites
-
You have created the process flow.
-
You have defined the interface.
-
You have added a script and exposed its output.
-
You have added a decision.
-
You have acknowledged the application via email.
-
You have run checks in parallel.
-
You have an approver group set up under Workflow > Approvers for the hiring managers.
Procedure
-
Open the process flow on the canvas.
-
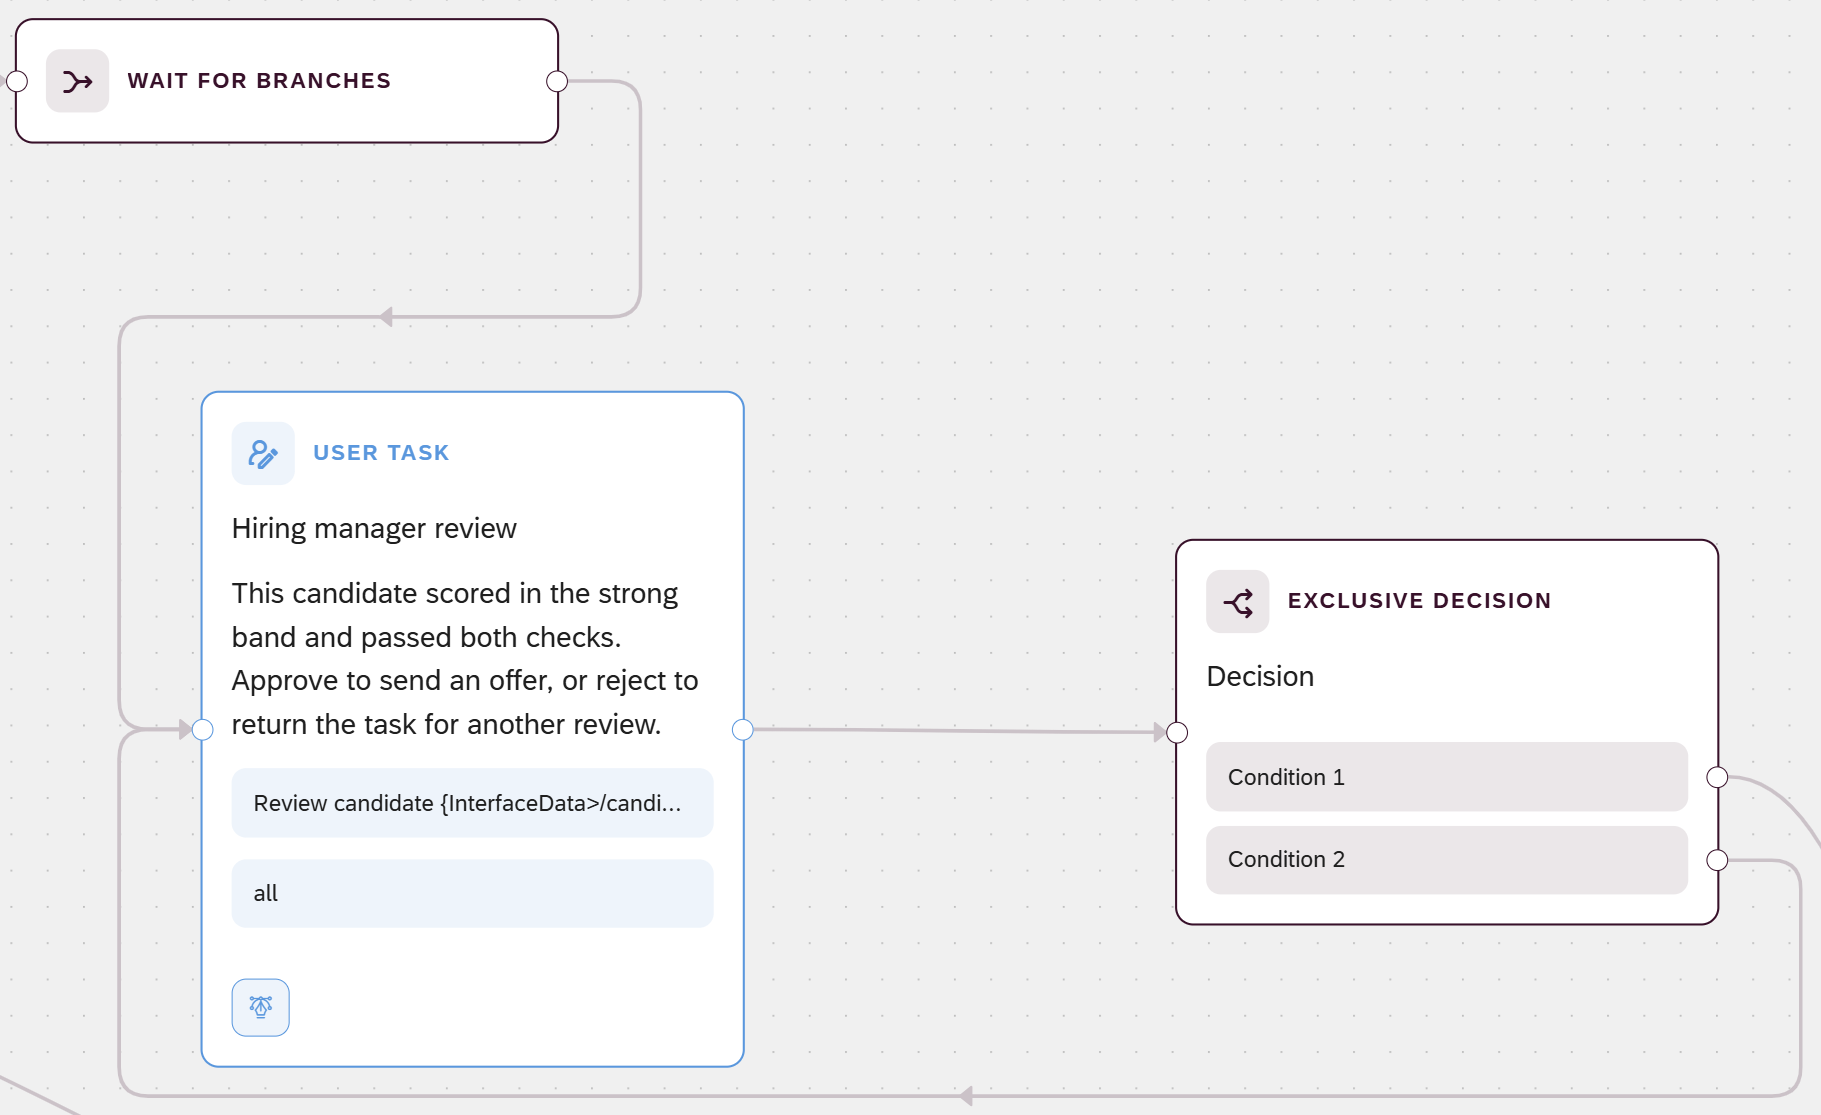
Drag a User Task node onto the canvas, and connect the Wait for Branches node to it.
-
Select the User Task node to open its details.
-
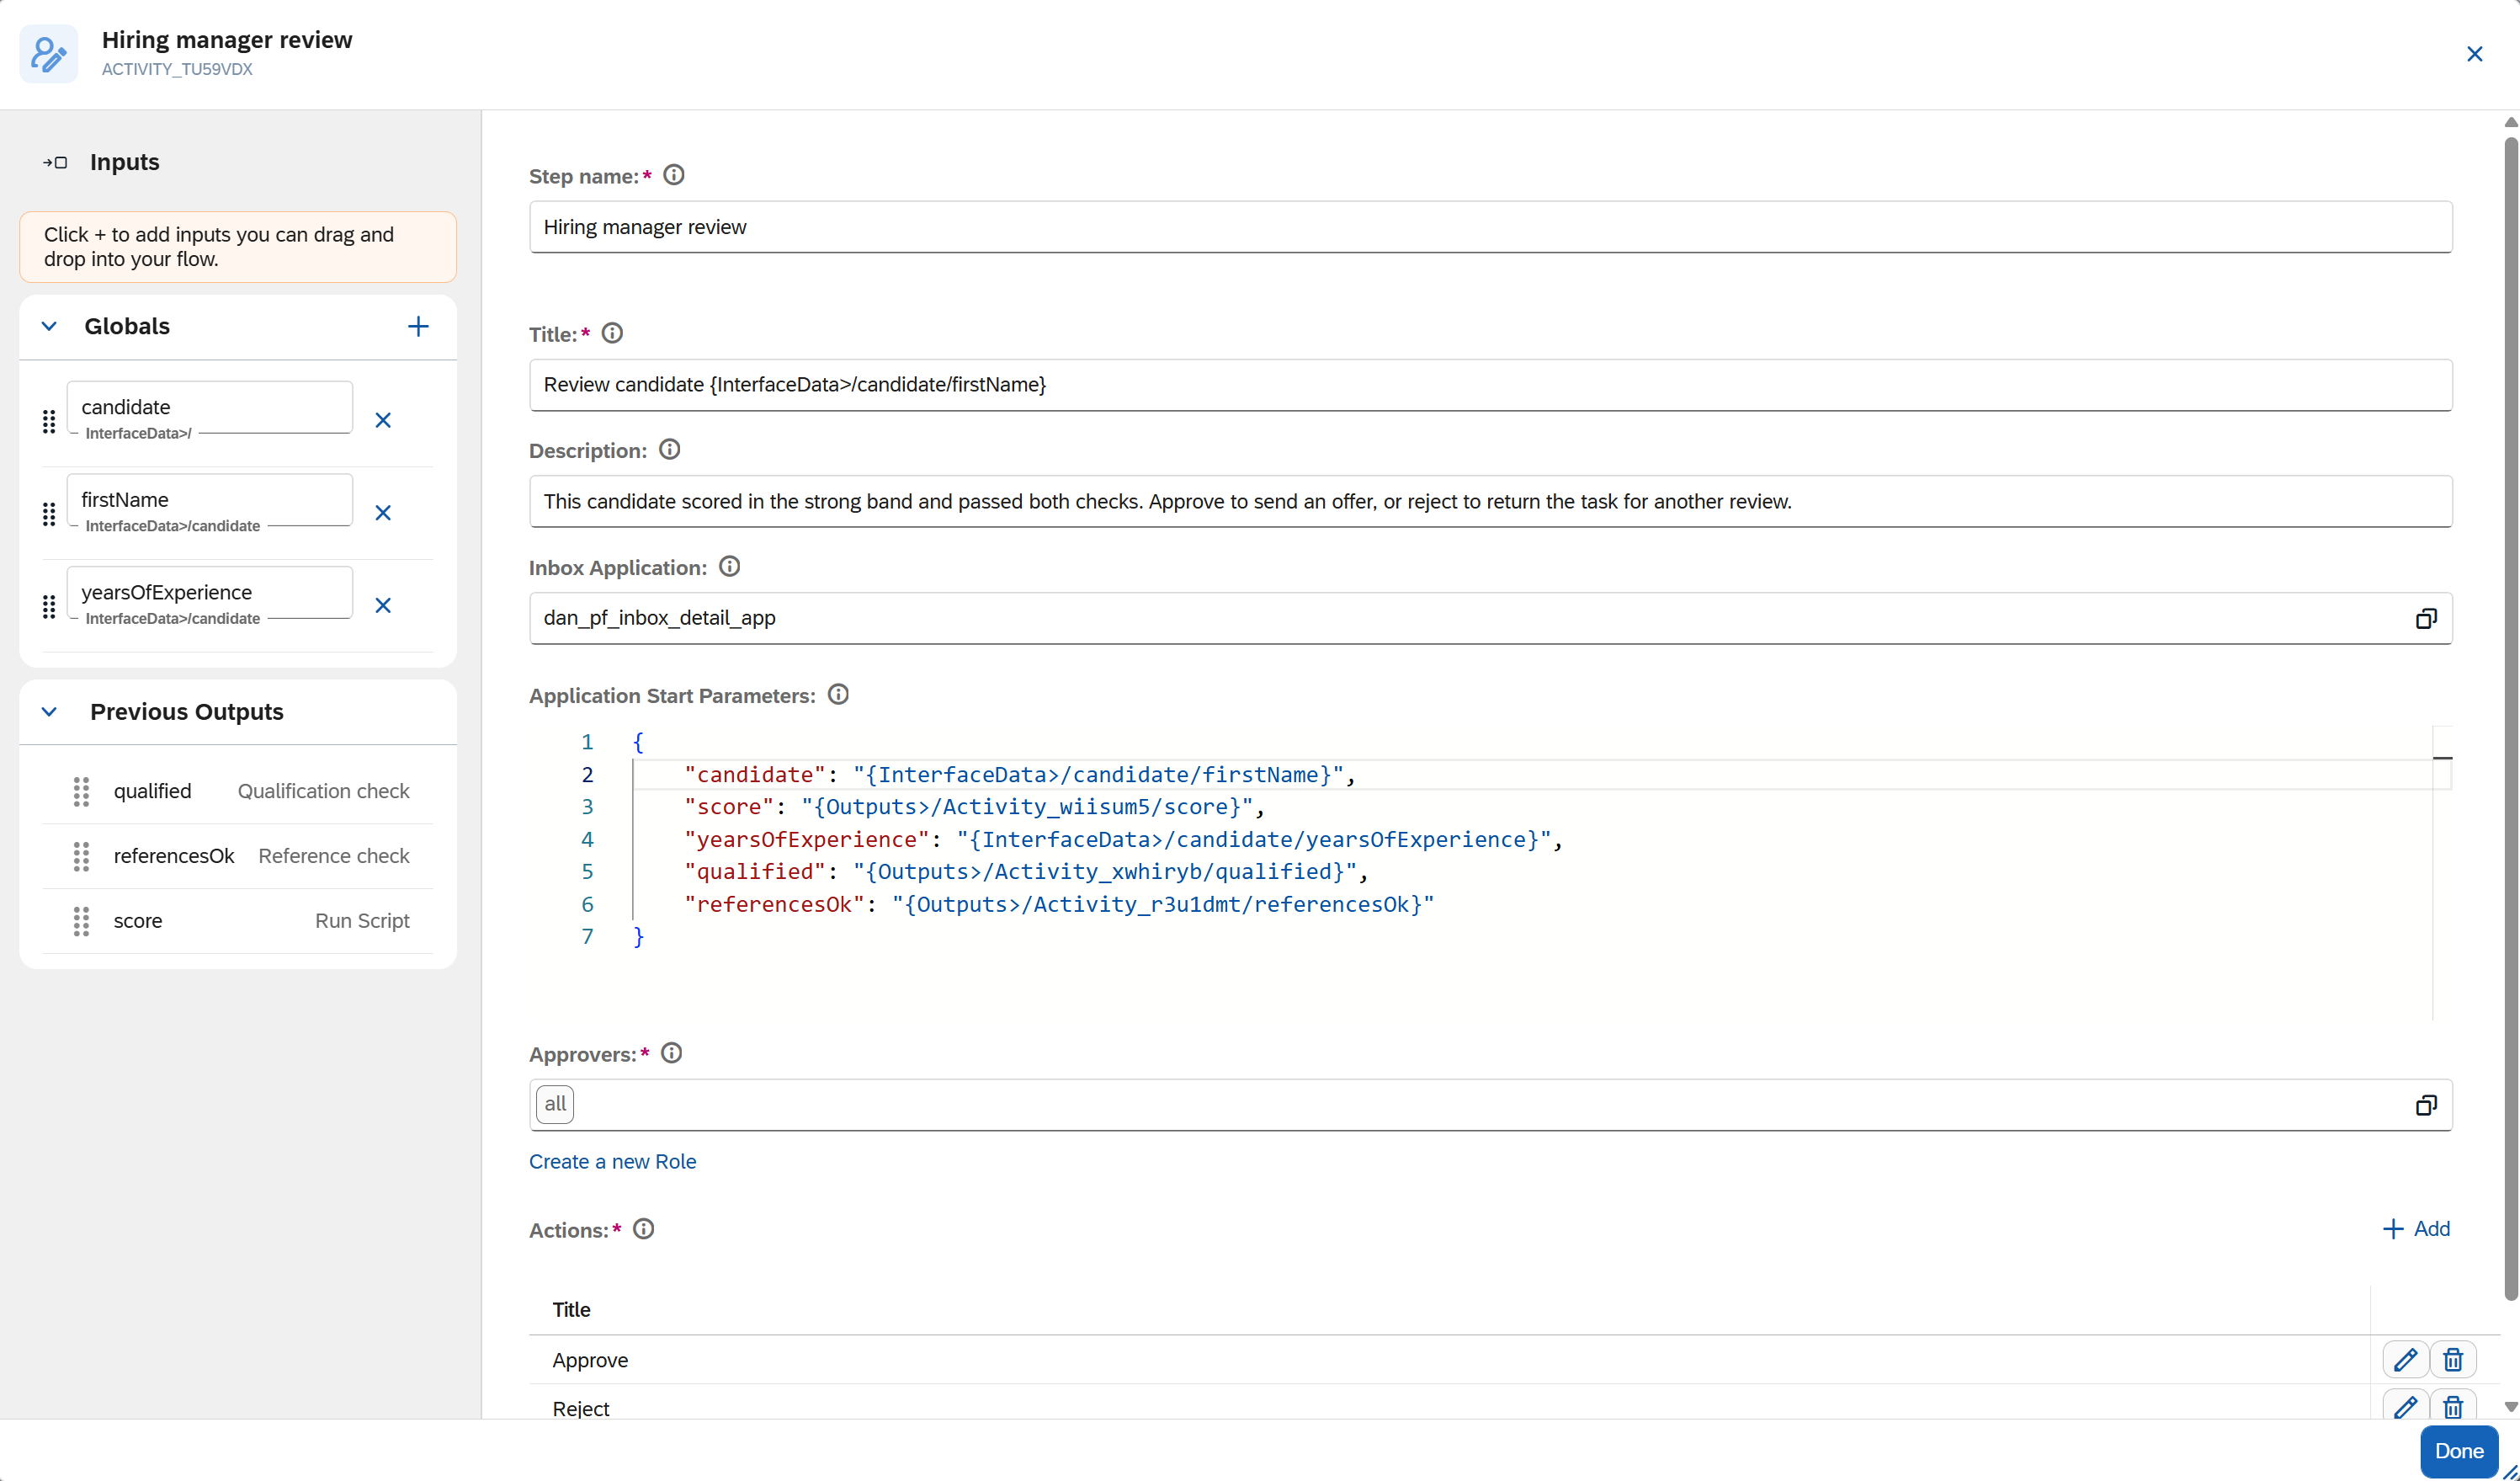
In Step name, enter a meaningful name, for example
Hiring manager review. The step name labels the node on the canvas, separate from the Title below. -
Enter a Title and a Description. This is what the assigned people see. For this example:
- Title
-
Review candidate {InterfaceData>/candidate/firstName} - Description
-
This candidate scored in the strong band and passed both checks. Approve to send an offer, or reject to return the task for another review.
-
In Approver Group, select the group whose members receive the task.
-
Under Actions, define the buttons the person can select. Each action has a Title, which is the button text, and a Value, which is written back into the process flow’s data when that button is selected. A new User Task comes pre-loaded with
ApproveandRejectactions, which this example keeps. -
Optional: add Inbox Application to embed an application in the task notification. Select a type of application, select the application to embed, and add any start parameters it needs.
Start parameters are a JSON object. A value can be a constant or a binding to the process flow’s data, for example:
{
"reviewer": "hiring",
"candidate": "{InterfaceData>/candidate/firstName}",
}
Whether or not you set start parameters, the user task always adds a
_processFlowobject to the data it sends to the embedded app:{ "_processFlow": { "id": "...", "executionId": "...", "activityExecutionId": "..." } }It holds the process flow id, the run’s execution id, and the user task’s activity execution id. When you set parameters, the app receives them alongside
_processFlow.The embedded app receives this data as a JSON string. It must parse the string into an object, for example with
JSON.parse, before reading the values. -
Select Done.
-
Add a Decision node after the User Task to route on the action the person selected. Build it the same way as in Add a decision:
-
In Step name, enter
Approver decision. -
Add a condition that reads the action. From the Previous Outputs list in the Inputs panel, drag
approverDecisiononto the left operand, then compare it toReject. Connect this condition back to the User Task, so a rejected task loops round for another attempt. See Branching, parallel paths, and looping.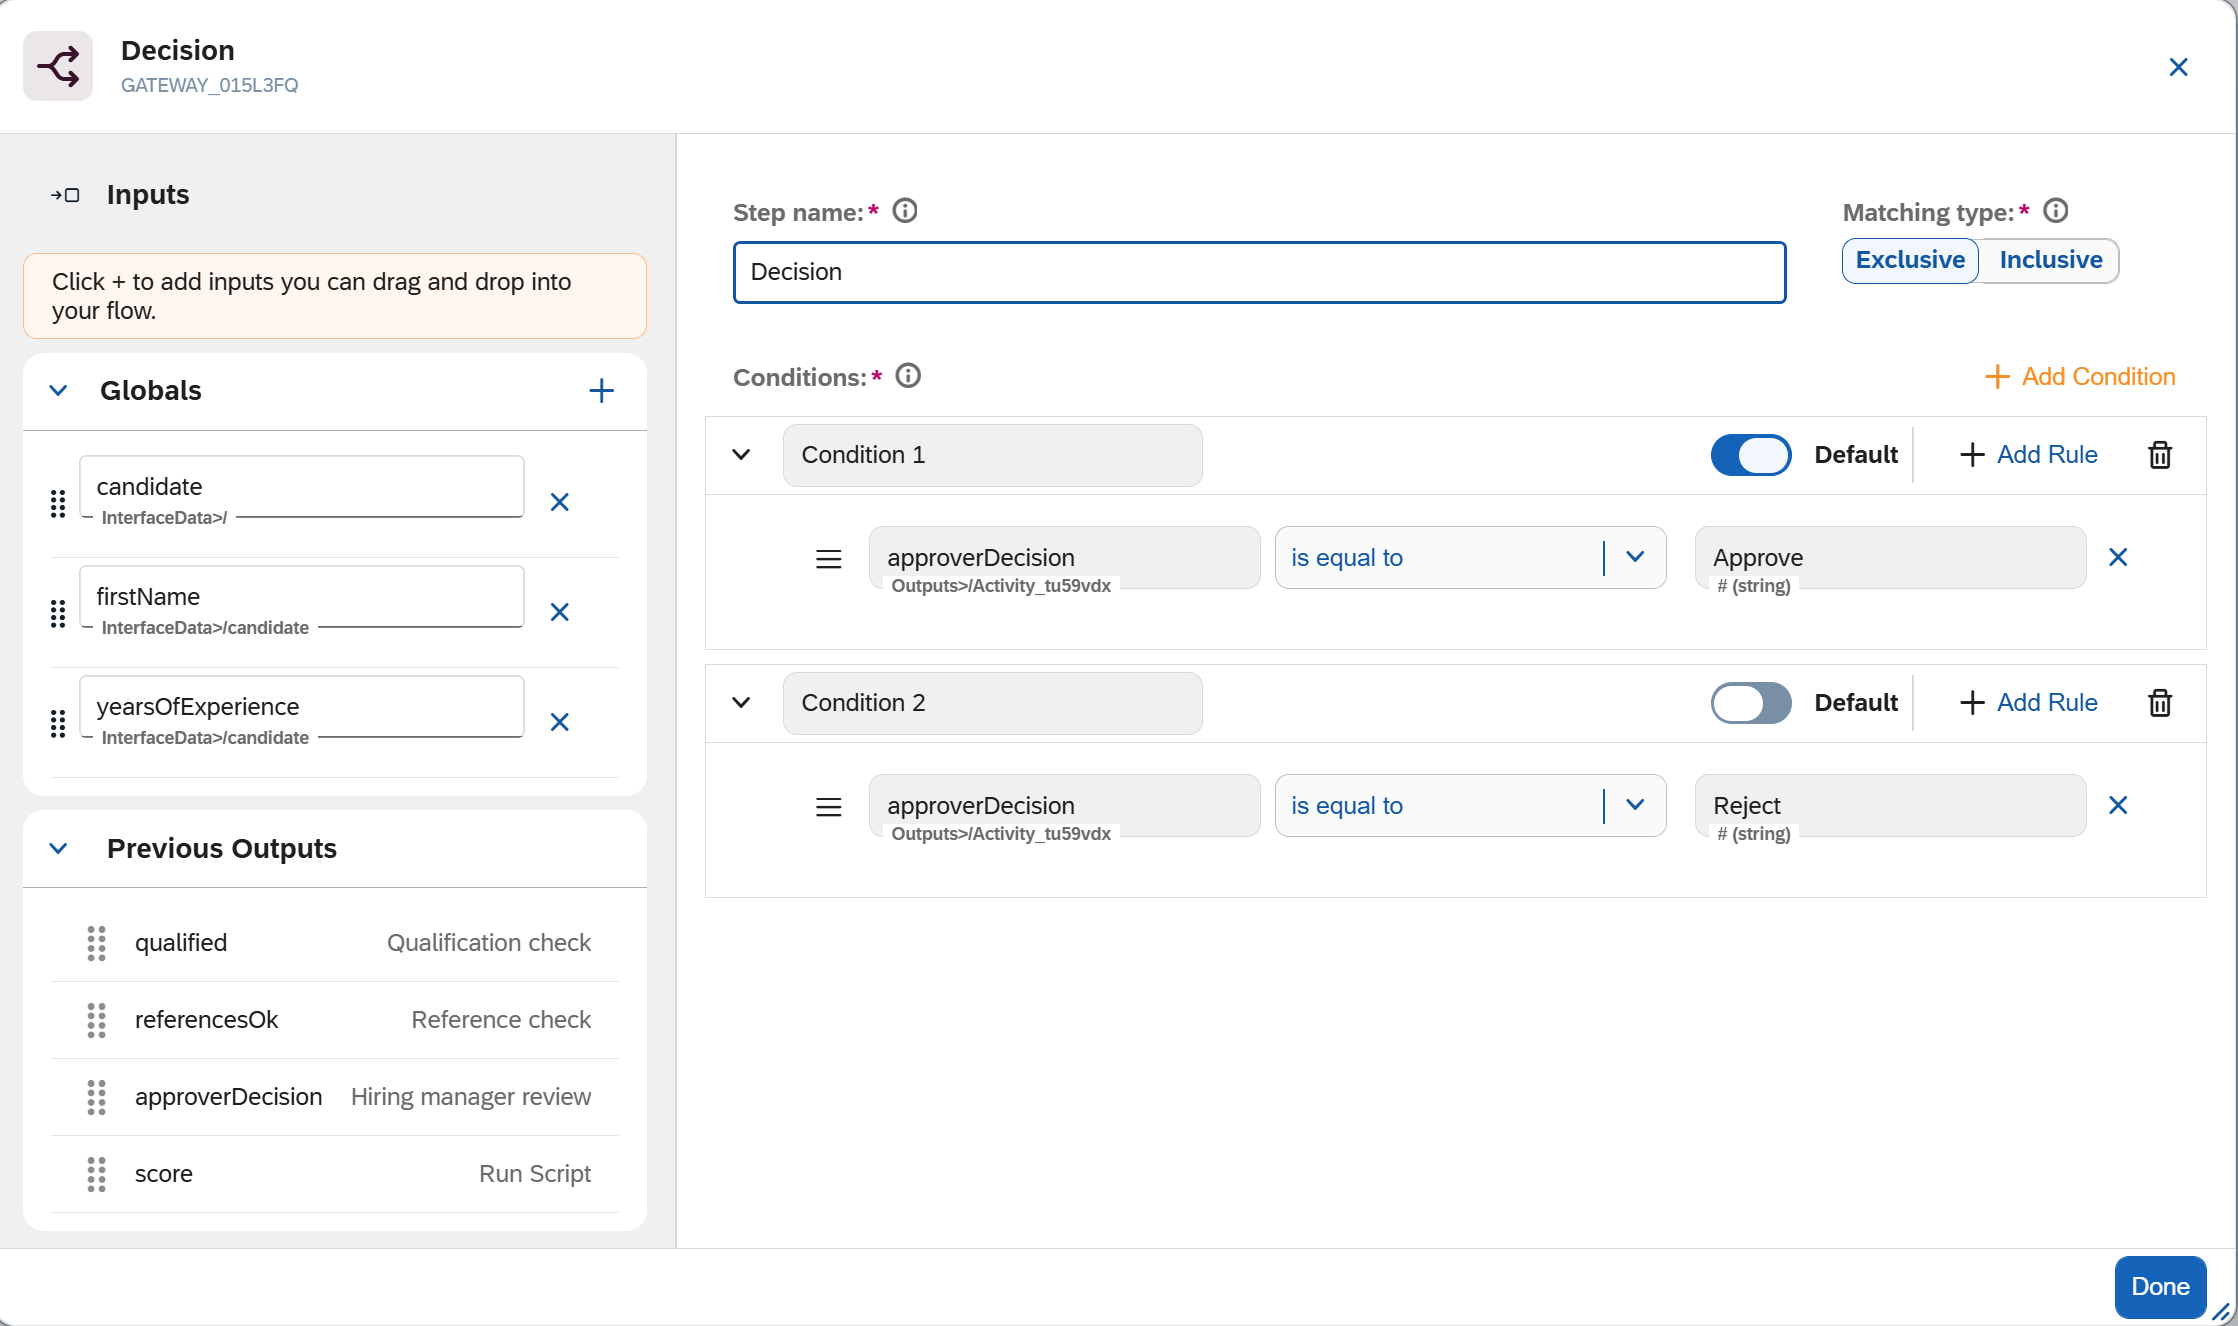
-
Mark the remaining path as the default. This is the approve path that continues the process flow.
-
Results
-
The process flow pauses on the User Task until an assigned person selects an action.
At run time the process flow pauses on this User Task until an assigned person acts. The person completes it in the Process Flow Inbox app by selecting Approve or Reject, and you can follow the paused run in the Process Flows Overview. See Monitor a run. -
The selected action’s value is available to the next step as the task’s output, for example
{/approverDecision}. See Binding syntax reference. -
The Approver decision routes a rejected task back to the User Task for another attempt.
-
The approve (default) path has no target node yet. You connect it to the outcome email when you build the Send Email node in Send an email.