Application With Generic Binding
Introduction
Bindings connect data to UI. In this cookbook, you’ll learn how to add a generic binding to your Neptune application, add data to the binding and display that data in a table.
Procedure
Open App Designer
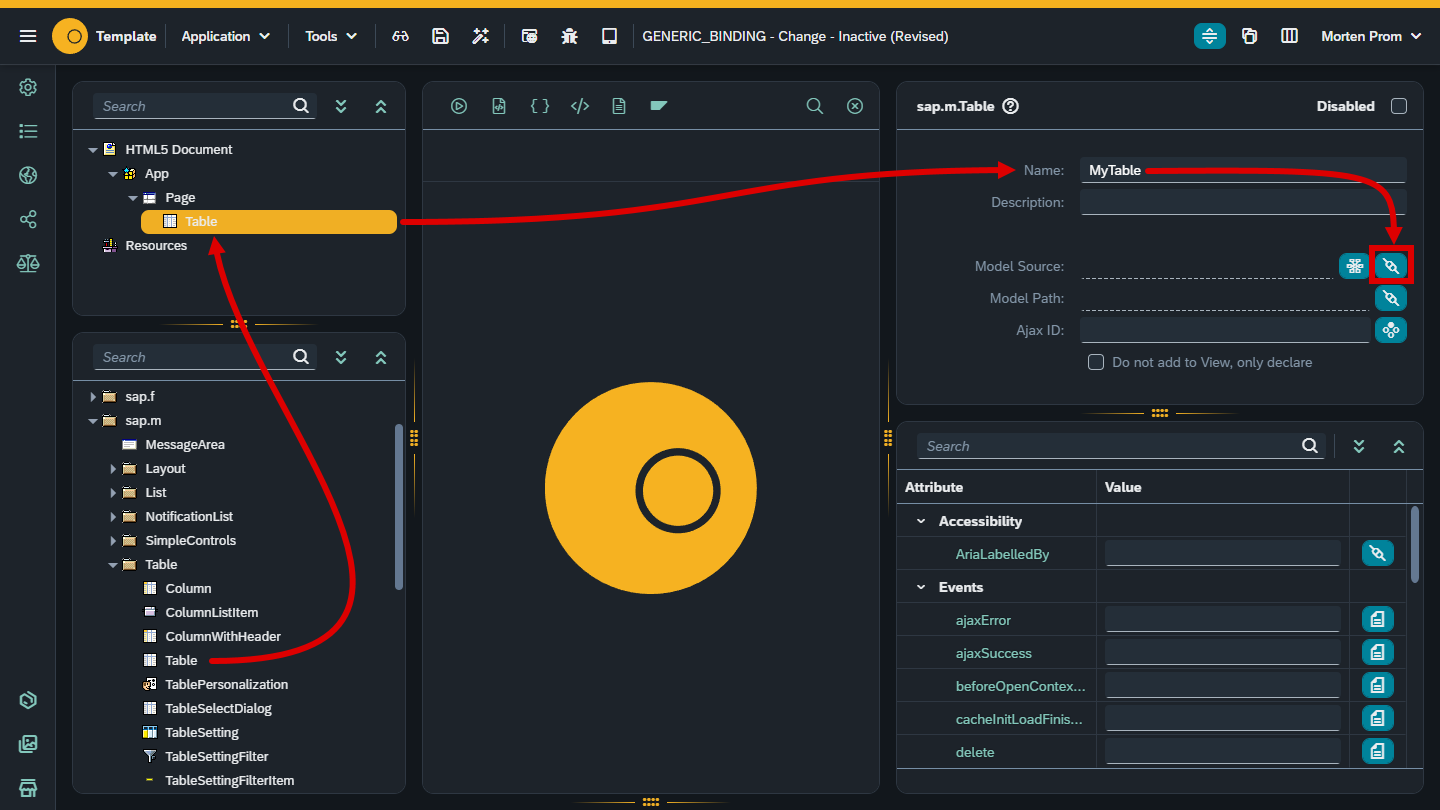
Create a new Neptune application and add a sap.m.Table object to your object tree and name it "MyTable". Click the binding button…
…and choose "Generic Array".
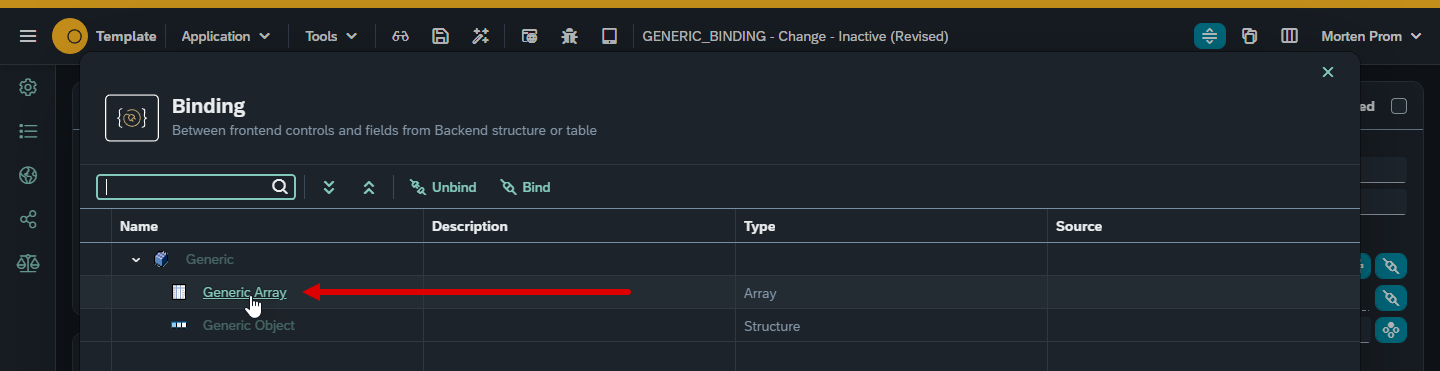
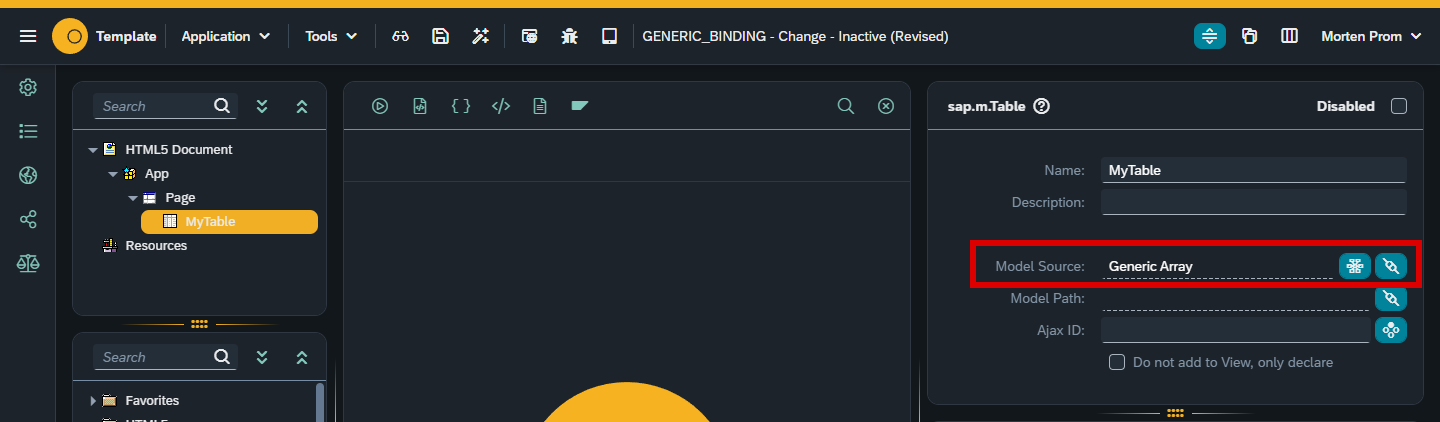
Now the MyTable object is bound to a generic array. It’s generic because we haven’t specified any fields for the table. Whatever we add later from the data source will be available for binding. We’ll bind to structures and tables with properly defined fields later in this XXX Cookbook.
When you add a binding to any objects in the object tree, like we just did with the MyTable object, some objects and functions will be defined by Neptune in the background. One of these objects is a model object. So, if you have an object named MyTable with a binding, a model object with the same name prefixed with model will be created. MyTable & modelMyTable. This new model has some useful methods that will use a little further down.
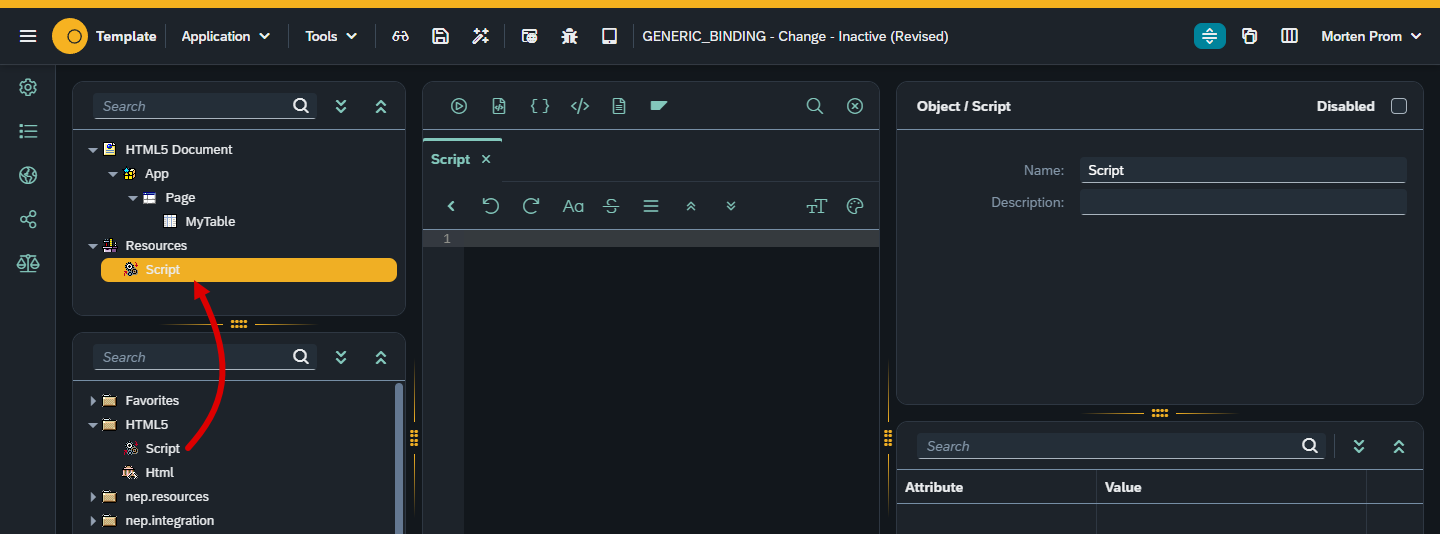
All binding must be in either JSON or OData format. You should always choose JSON if you have the choice! Neptune does not rely on the slow and complicated OData layer in SAP. Neptune works directly over HTTP with JSON data. With generic bindings, data is added in the front end, data can come from a vast variety of sources. In this very simple cookbook, we’ll just hardcode the data in a JSON array. We can add some data directly in Javascript. First, you need to add a script object to the Resources folder
Add this code to the script object:
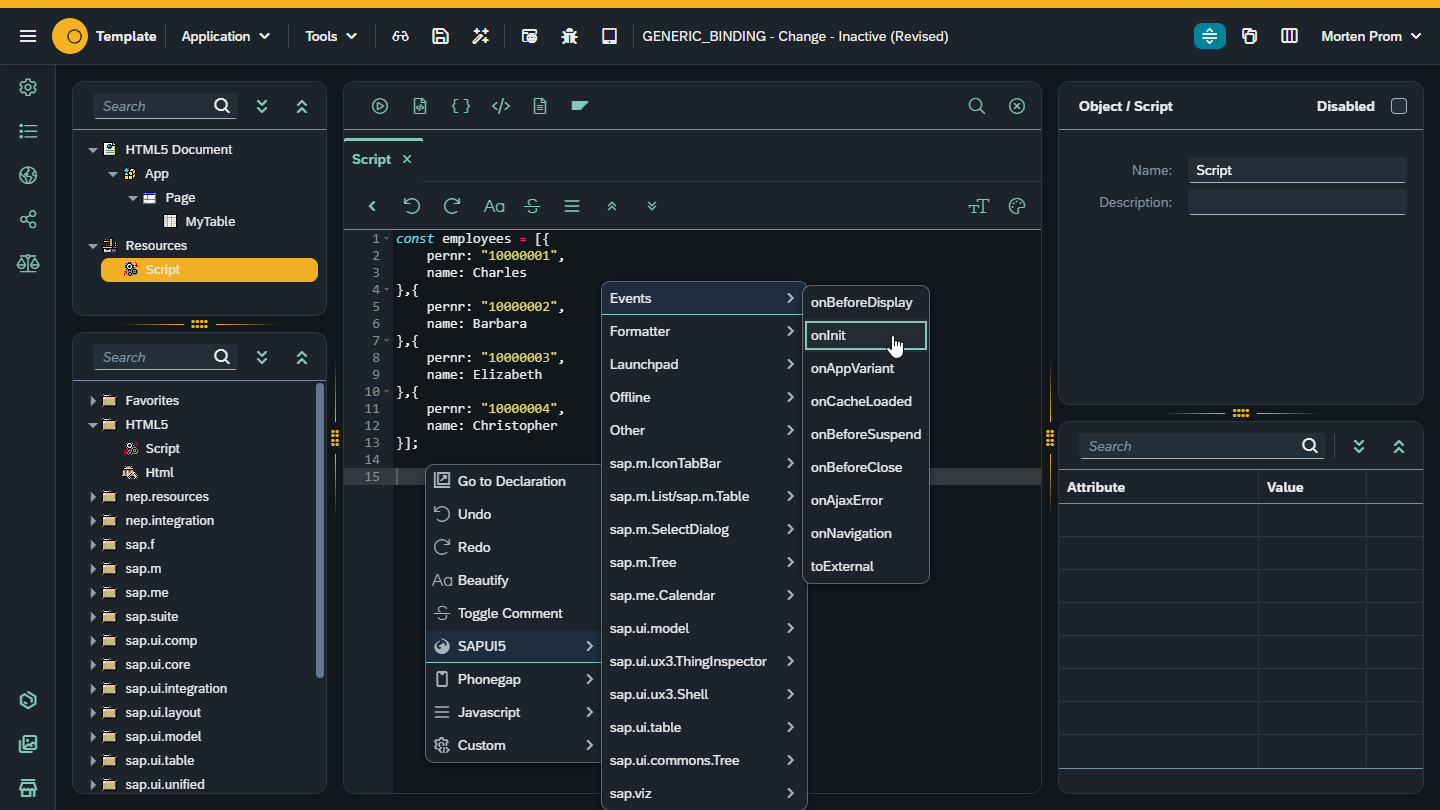
const data =
[{
    pernr: "10000001",
    name: Charles
},{
    pernr: "10000002",
    name: Barbara
},{
    pernr: "10000003",
    name: Elizabeth
},{
    pernr: "10000004",
    name: Christopher
}];
Now you need to add the data to the table. We need to wait until the UI5 framework is loaded, we therefore need to wrap our code in an onInit event handler. Right-click in the script window and choose the onInit code snippet.
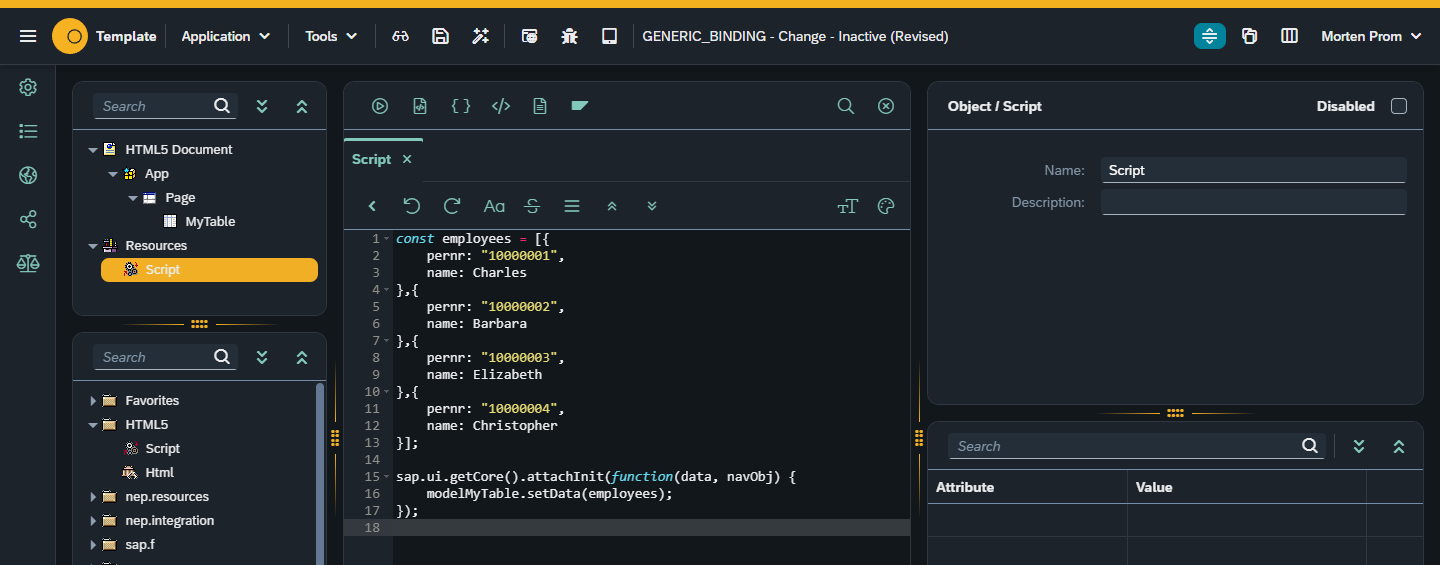
In the onInit event handler, we use this code to add the JSON data to the model:
sap.ui.getCore().attachInit(function(data, navObj) {
    modelMyTable.setData(employees);
});
Now we need to add some fields to the table that will display the data. If the data model was based on a real structure, we could have used the wizard, but let’s leave the no-code approach for later and do it the low-code way.
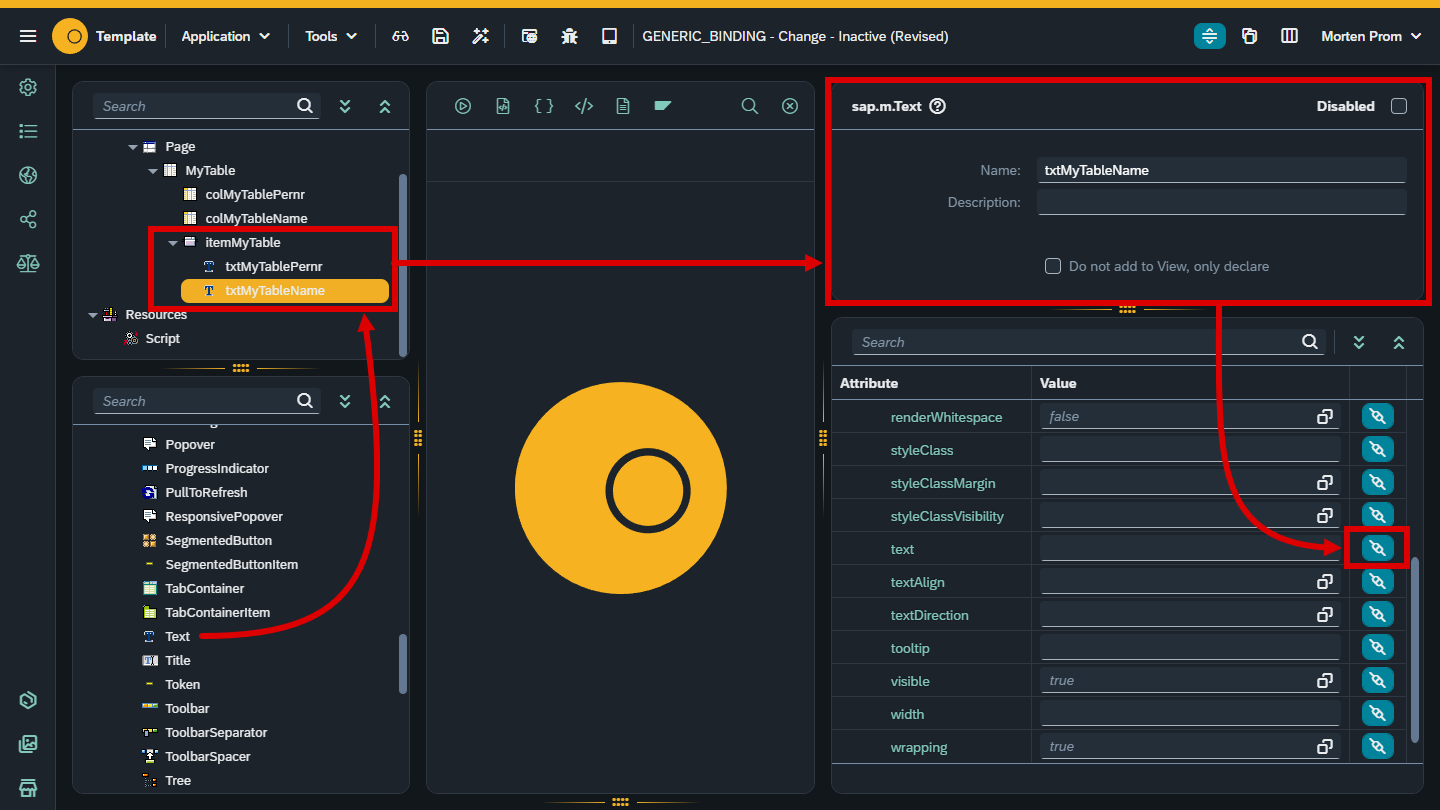
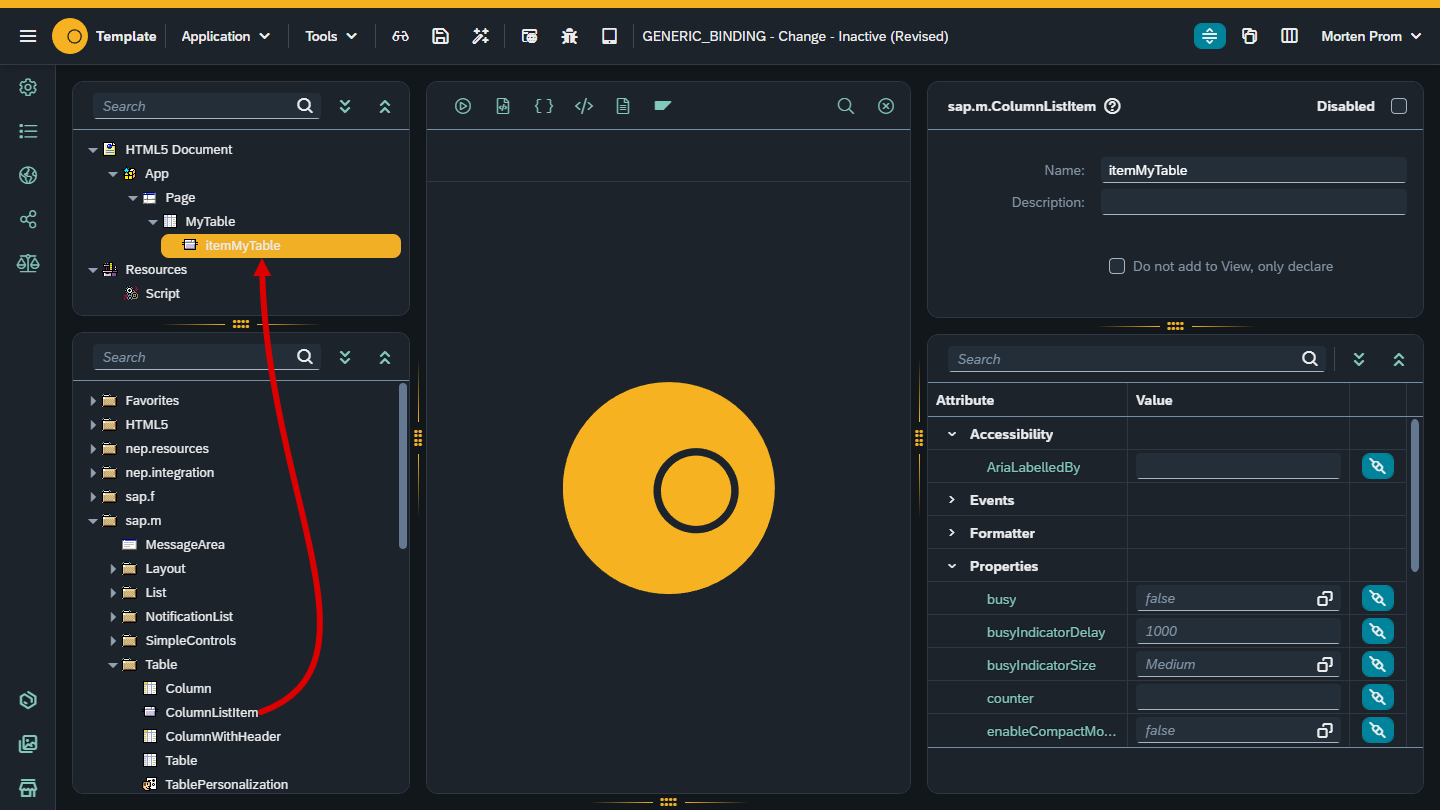
Add ColumnListItem to MyTable and name it itemMyTable.
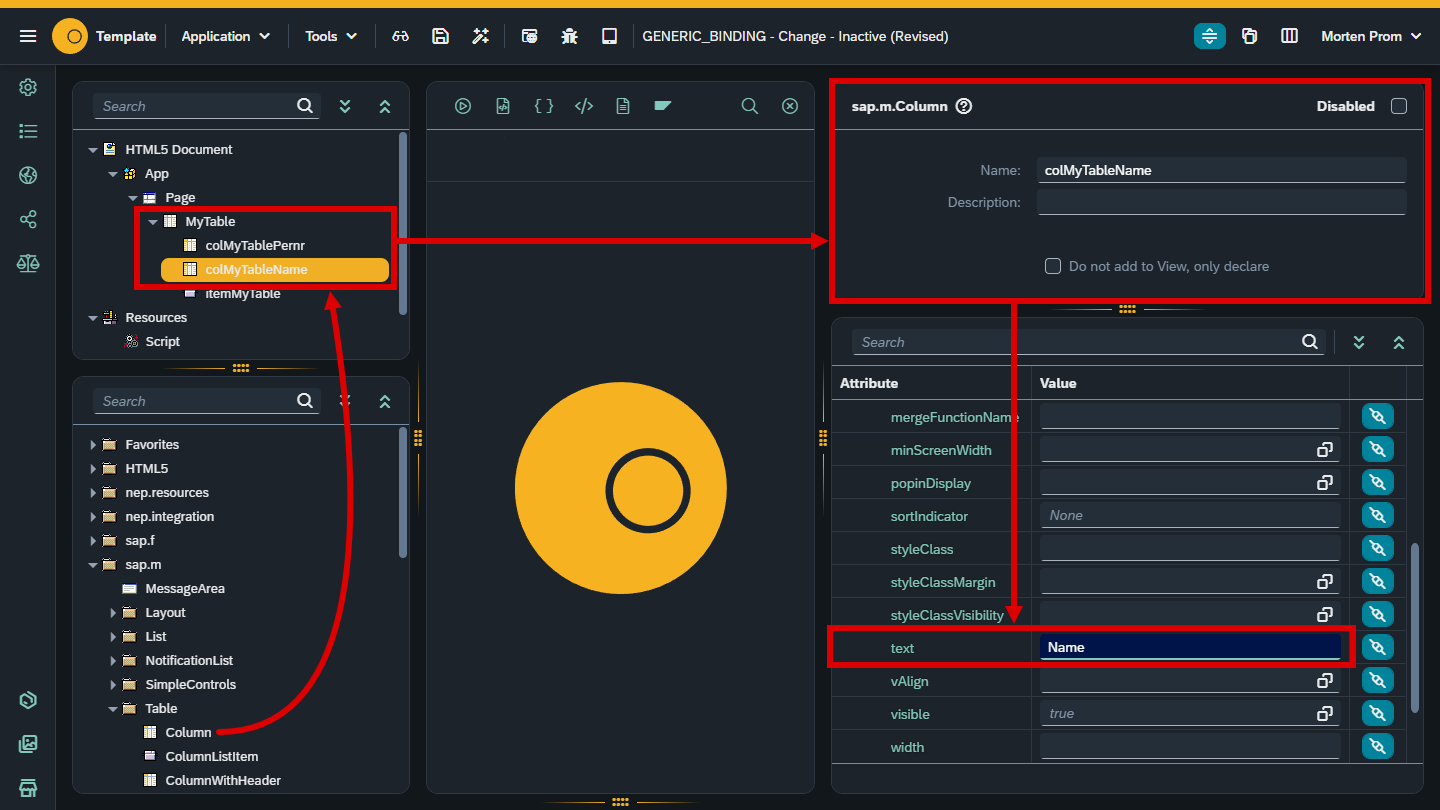
Add a couple of sap.m.Column objects to the MyTable object. Add object name and column text.
Add a couple of sap.m.Text objects to the itemMyTable object. Add the object name and click on the binding button for each text object.