Mobile Client Push Notifications with Firebase
This chapter explains how to set up Push Notifications using Firebase Cloud Messaging service provided by Google.
It is possible to send notifications on Mobile devices from SAP System. But for this, a mediator (or a middle-man) is always required between Mobile clients (users) and SAP system. For this SAP allows the admins to have some SSL connections established with third party tools using SSL certificates from STRUST transactions. Even SAP has one mediator tool for Mobile Clients called SAP Mobile Platform (a.k.a SMP). Also, there are other tools like Pushwoosh and Firebase which can be used.
In this guide, you can find detailed steps for Firebase set-up and usage of the same.
Set up SSL Connection between Firebase and SAP
-
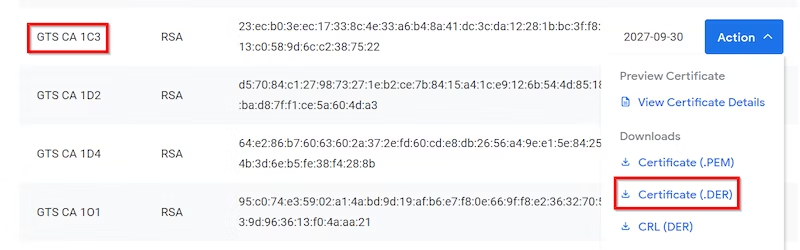
Get a certificate from Google FCM. Google Trust Service is part of Google Internet Authority for providing trust certificates. Go to this link Google Trust Services and look for a certificate name GTS CA 1O1 (issuer: GS Root2, make sure it has validity in the future):
 Click on link DER, this downloads a .cert Certificate.
-
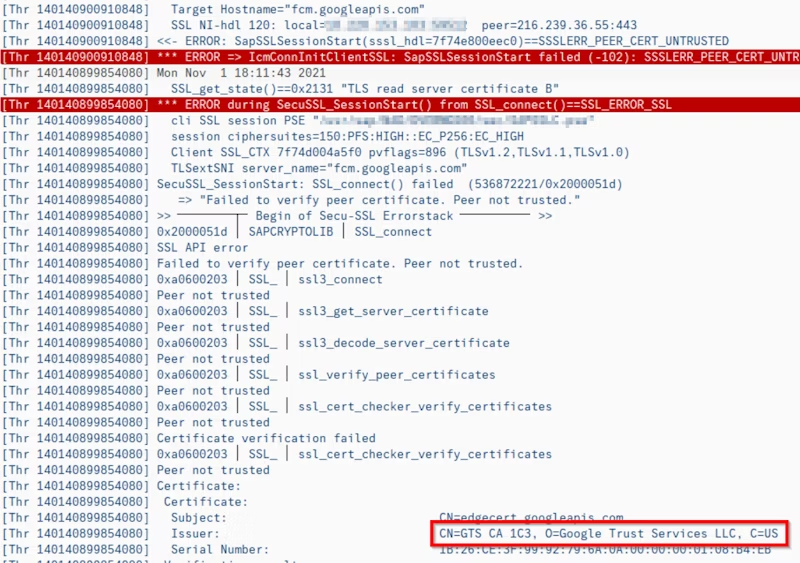
Update November 2021: In case you encounter SSL issues later on when trying to actually send push notifications, you most likely need a different certificate from Google (Google Trust Services):
How do you know which certificate you need? In case of SSL errors the SAP ICM Trace will help you, just follow this detailed guide. At the time of writing the picture looked like this:
-
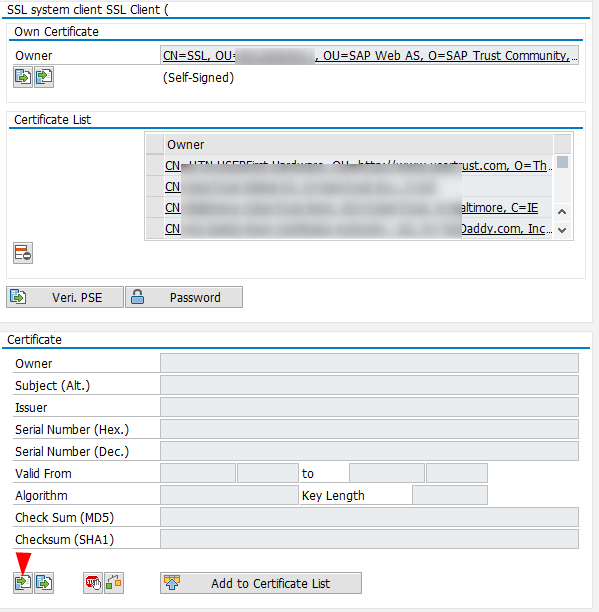
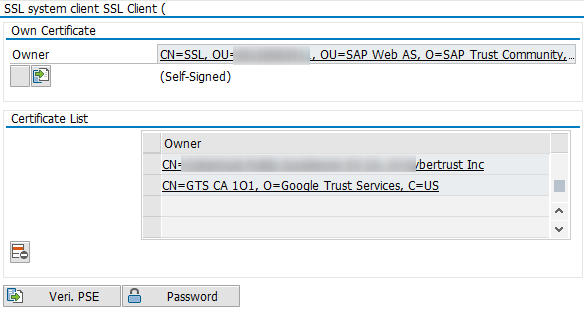
Open Transaction Code STRUST of SAP Front End System, identify the node 'SSL Client (Standard)' with CN = SSL:

-
Import the downloaded certificate (from Google Trust Service) into the node SSL Client (Standard) by clicking on import button:
-
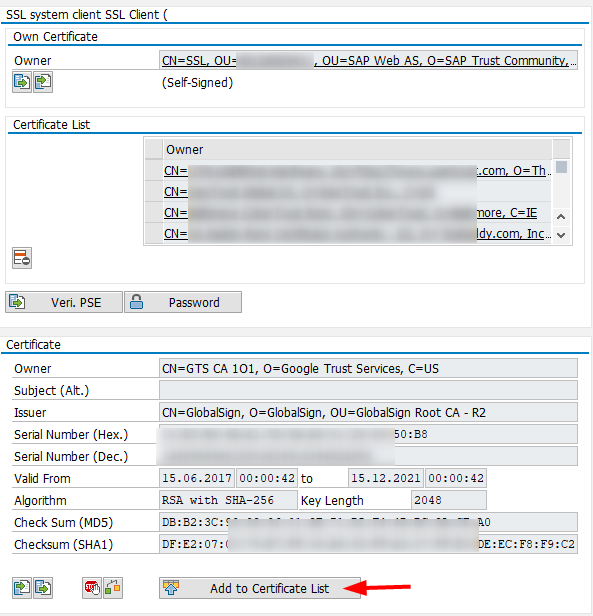
Once imported, click on 'Add to Certificate List' button
-
Save the changes. Now you will be able to see the added certificate in the Certificate List:
Set up Firebase Project
-
First step of this is get a Google Account, and log in to Firebase: https://firebase.google.com/
-
Navigate to Firebase Console (or you can log in to console directly here: https://console.firebase.google.com/u/0/ )
-
Create a project by clicking on 'Add Project / Create a Project' to create a new Project (It is required to use one project per app)
-
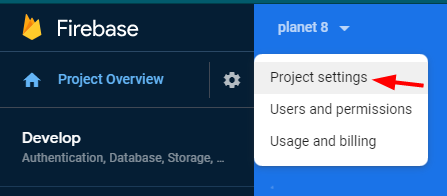
Once the project is created, go to project settings:
-
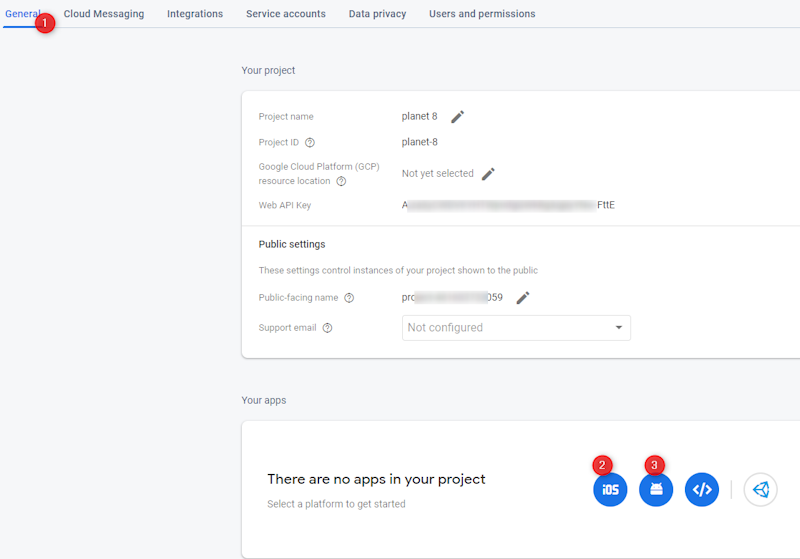
Navigate to 'General' tab, and you would notice that 'There are no apps in the Project':
-
Select the platforms that you would like to create a bridge for. In our case we select iOS and Android
iOS Configuration
-
When you click on iOS from above step, a wizard opens to provide details of the Mobile App:
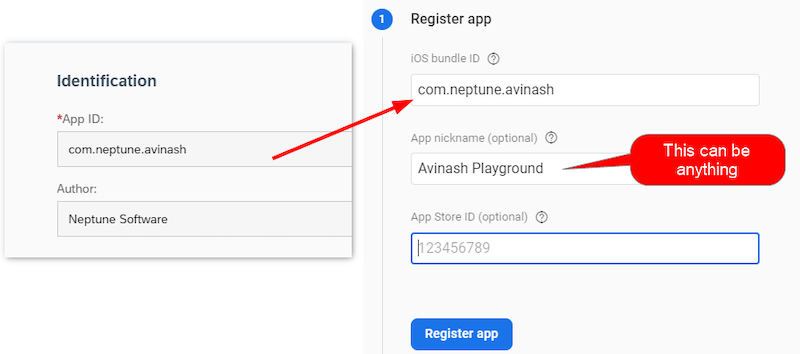
The iOS bundle ID in firebase should be same as App ID from Neptune Mobile Client config ( can be seen from Neptune Cockpit)
TeamID needs to be obtained from Apple Developer Account.
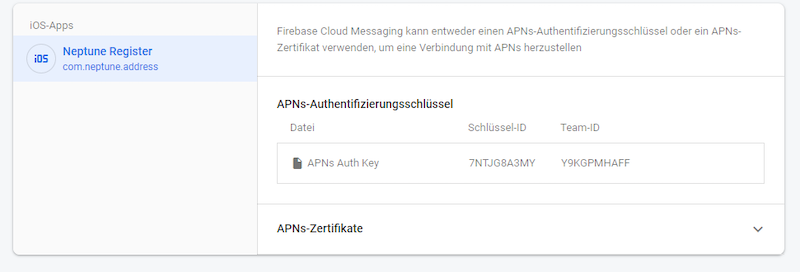
You also need to add Apple Push Notification Key to your App. You can also get it from your Apple Developer Account.
Click on Register app
-
Now, Firebase service provides a config file 'GoogleService-info.plist'. Download this in to your local machine and would be used later in Neptune Cockpit.
-
Steps 3,4 and 5 of the Wizard are optional in our case
-
Close the wizard and you would see iOS app in the list of Apps in the Project
Android Config
-
When you click on Android icon from above step, a wizard opens to provide details of the Mobile App:
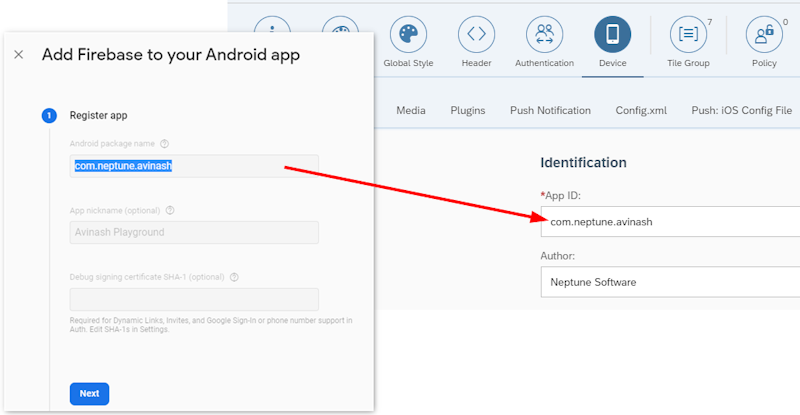
The Android Package name in firebase should be same as App ID from Neptune Mobile Client config (can be seen from Neptune Cockpit)
Click on 'Register app'
-
Now, Firebase service provides a config file 'google-services.json'. Download this in to your local machine and would be used later in Neptune Cockpit.
-
Steps 3 and 4 of the Wizard are optional in our case
-
Close the wizard, and you would see Android app in the list of Apps in the Project
Set up in Neptune Cockpit
-
After firebase is set up, go to Neptune Cockpit → Mobile Client and open the Mobile Client that is in consideration.
-
Navigate to tab Device and sub-tab Push Notifications.
-
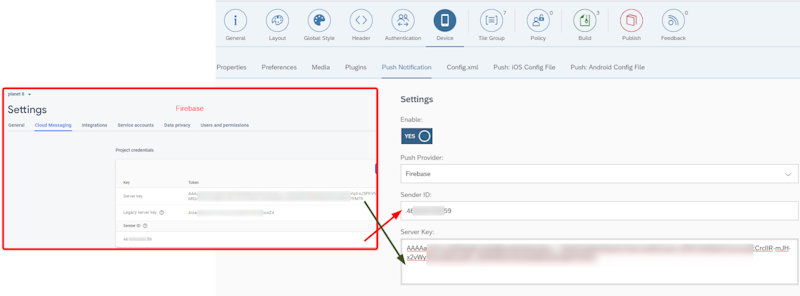
Enable the Push Notification and select 'Firebase' as provider:

-
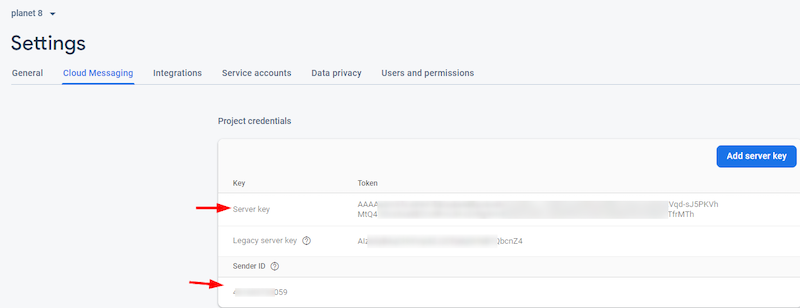
Look back into Firebase Project Settings, under 'Cloud Messaging' tab you will find Server Key and Sender ID:
-
The Server key and Sender ID has to be mapped to Neptune Cockpit:
-
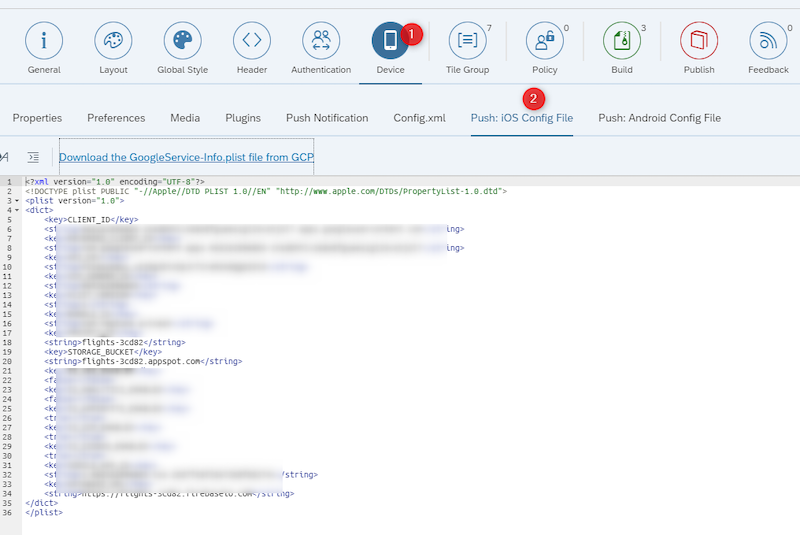
Navigate to sub-tab Push: iOS Config File, and paste the contents of 'GoogleServices-Info.plist' file in the text area:
-
Navigate to sub-tab Push: Android Config File, and paste the contents of file 'google-services.json' in the text area provided:

Save the Mobile Client, and now you can build the Mobile Hybrid App using Phonegap (refer here)
Trigger Notification via Firebase:
As it is evident from Neptune DXP, that everything is possible through ABAP. So, we can even trigger a notification from ABAP Class.
When you want to trigger a notification during any process, you can use /NEPTUNE/PUSH_FIREBASE to send the message to the users with this Mobile App to their Mobile Devices.
Conclusion
It can be seen that setting up Firebase is very easy and Neptune DXP supports this out of the box. and seems like Google Firebase Cloud Messaging seems to be free of cost (when this chapter was written: Firebase Pricing). But of course, Firebase has a limitation that it does not support Windows10 Apps out of the box.