Upgrading SAP to SAP S/4 HANA (including S/4 HANA 2025)
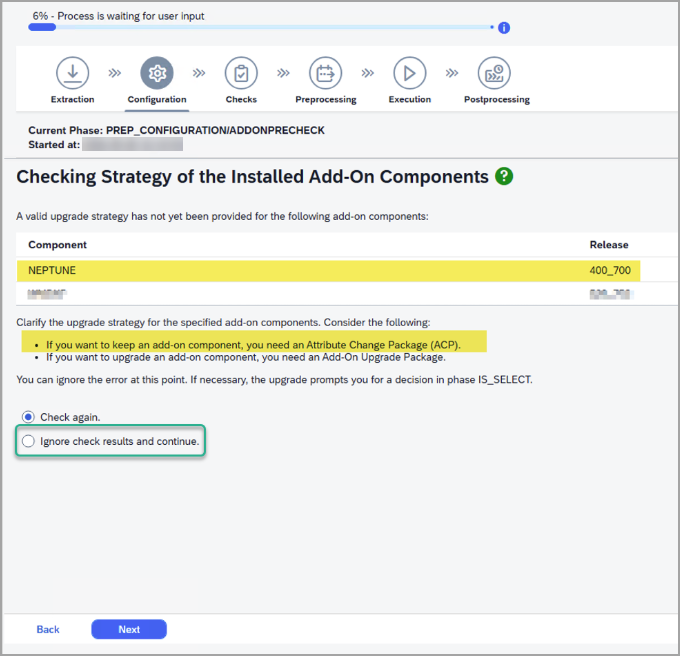
Neptune DXP - SAP Edition is ready and certified for S/4HANA, including S/4HANA 2025. Depending on your installation history, there are minor prerequisites to address before proceeding with the upgrade. In particular, if Neptune DXP - SAP Edition version 4.x or older (previously, Neptune UX Platform) was ever installed on your system (even if you are currently running a newer version), an Attribute Change Package must be applied before starting the upgrade process.
What is an Attribute Change Package?
An Attribute Change Package (ACP) is a small technical OCS package file, typically only a few kilobytes in size. It does not contain functional changes. Instead, it carries only the import attributes for another ABAP OCS package — such as a Support Package or add-on installation and upgrade package.
Applying an ACP updates the compatibility metadata of an installed software component, allowing the SAP upgrade tooling (SUM) to recognize it as compatible with the target system version.
For further information, see SAP Add-On Assembly Kit documentation.
Apply the Attribute Change Package
When this is required: An ACP must be applied before starting the S/4HANA upgrade if either of the following is true:
-
Your system is currently running Neptune DXP - SAP Edition version 4.x or older (previously, Neptune UX Platform).
-
An older version of Neptune was installed via SAINT at any point, even if you are currently running a newer version of Neptune DXP - SAP Edition.
| If you have already started the SUM process, it must be restarted after completing this procedure. |
Step 1: Determine the NEPTUNE software component release
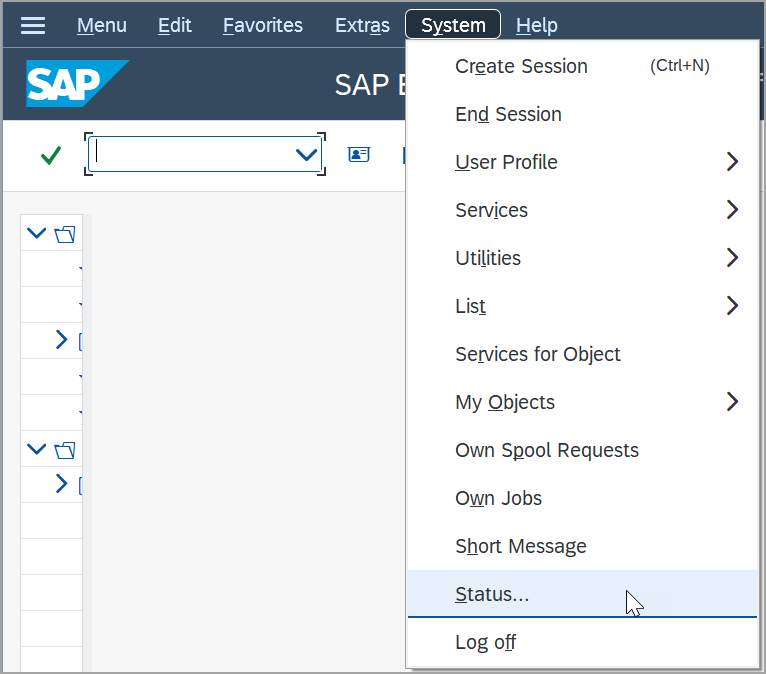
In the SAP menu, go to System → Status.
Locate software component NEPTUNE and note the release value shown.
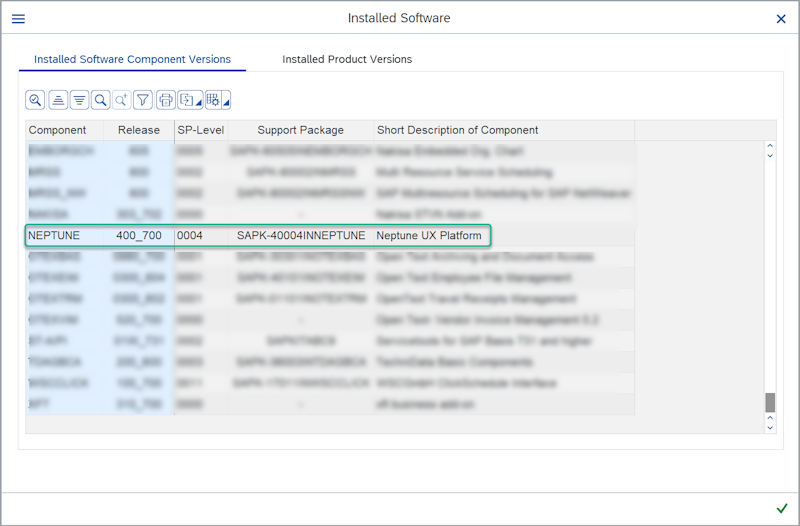
Use the release value to identify the correct ACP file from the ACP file selection table.
Step 2: (For release 400_700 only) Check the SEPS Inbox
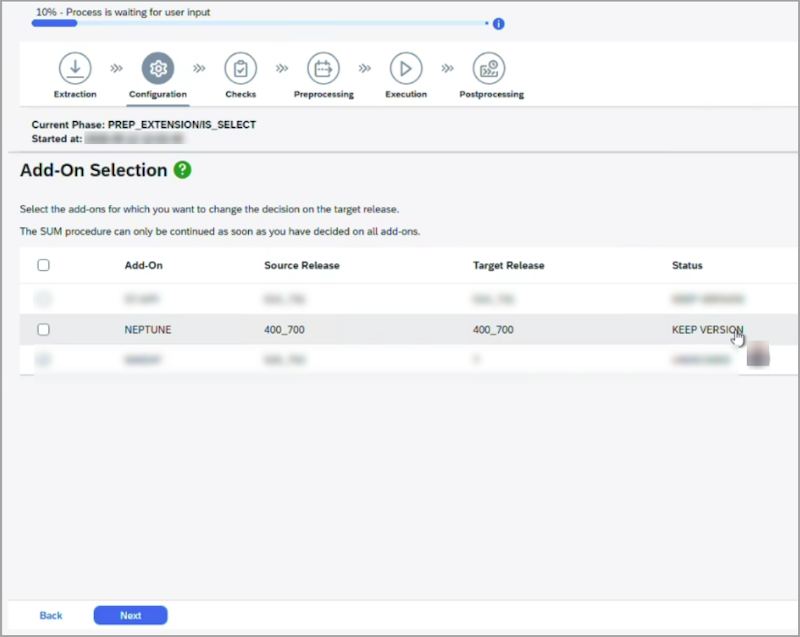
If the NEPTUNE release is 400_700, an additional check is needed to determine
which installation package was used, as different ACP files exist for different
package numbers.
-
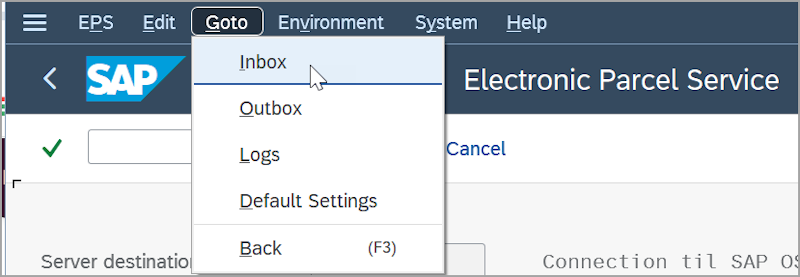
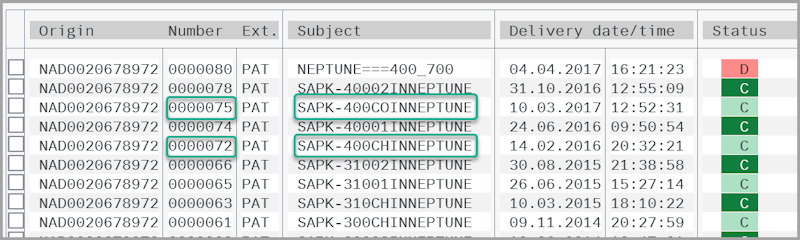
Open transaction SEPS and go to Goto → Inbox.
-
Search for
NEPTUNE.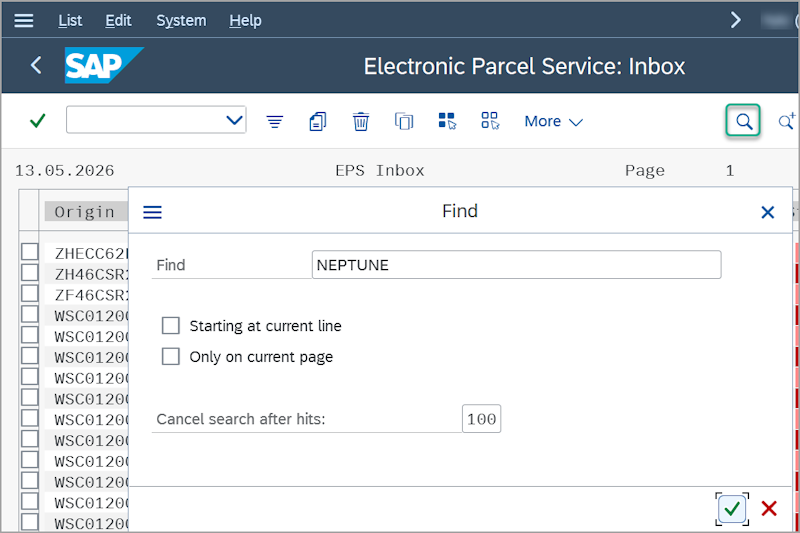
-
Identify the relevant entry:
-
If the system was upgraded from an earlier release: look for the entry beginning with
SAPK-400*CH*. -
If this was a fresh installation at version 4.0: look for the entry beginning with
SAPK-400*CO*.
-
-
Note the file number shown in that entry.
-
Use the file number to select the correct ACP file from the ACP file selection table.
Step 3: Ensure previous ACP entries are marked as deleted
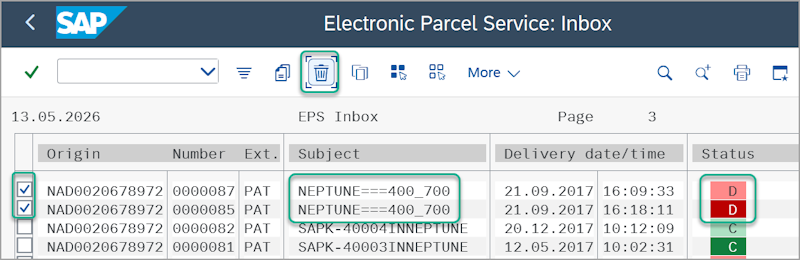
Before uploading the new ACP file, check that any previous ACP uploads for NEPTUNE
at this release are marked as deleted in the SEPS Inbox. The subject line for these
entries follows the format NEPTUNE===400_700.
Step 4: Install the ACP file via transaction SAINT
-
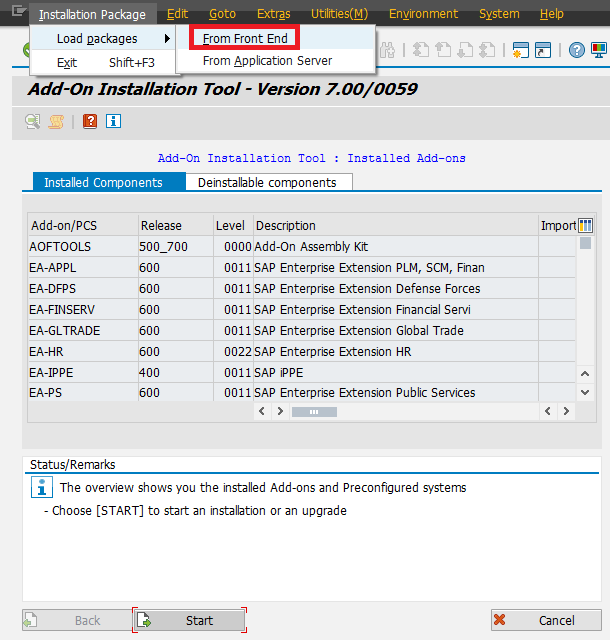
Open transaction SAINT.
-
Go to Installation Package → Load Packages → From Front End.
-
Select the
.PATfile you downloaded. -
Select Decompress.
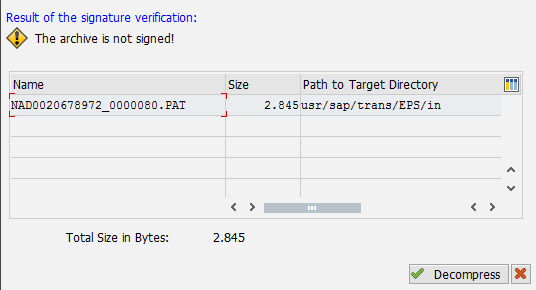
| There is no need to select Start. The ACP is applied automatically at this point. |
Apply the HTTP Handler syntax fix
When this is required: This fix applies only if your current Neptune DXP - SAP Edition version is below 5.2.0. Versions in this range contain a syntax error in the HTTP handler class that must be corrected manually.
-
Open transaction SE24 and locate class
/NEPTUNE/HTTP_HANDLER. -
Go to method
TWO_FACTOR_CHECK. -
Find the type declaration for variable
lv_validity. -
Change the type from
stringtoi.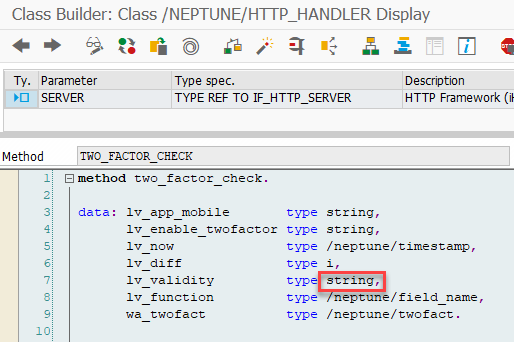
-
Save and activate the class.
| Neptune DXP - SAP Edition 5.3.1 or higher is recommended for full compatibility with S/4HANA 1809 and later. The browser-based App Designer will not function on versions below 5.3.1. |
ACP file selection
Use the NEPTUNE software component release (found in System → Status) to identify which ACP file to download.
| NEPTUNE release | Condition | ACP file |
|---|---|---|
|
— |
|
|
— |
|
|
SEPS Inbox file numbers 72 / 73 |
|
|
SEPS Inbox file numbers 75 / 76 |
For instructions on how to look up the SEPS Inbox file number, see Apply the Attribute Change Package, Step 2.
Neptune DXP - SAP Edition version compatibility
| Neptune DXP - SAP Edition version | S/4HANA compatibility |
|---|---|
5.3.1 or higher |
Fully compatible with S/4HANA 1809 and higher, including S/4HANA 2025 |
5.2.0 – 5.3.0 |
Compatible after applying the HTTP handler syntax fix |
Below 5.2.0 |
Requires the HTTP handler syntax fix; App Designer not functional |
Application server buffer reset commands
These commands reset specific buffers on the application server and are entered directly in the SAP command field.
| Command | Buffer reset |
|---|---|
|
All application server buffers |
|
CUA (Common User Access) buffer |
|
Table buffers |
|
Name tab buffer |
|
Screen buffer |
|
Export/Import Shared Memory buffer |
|
Program (PXA) buffer |
Troubleshooting
ICF node error after installation
Symptom: After installation, testing any Neptune ICF node produces an error.
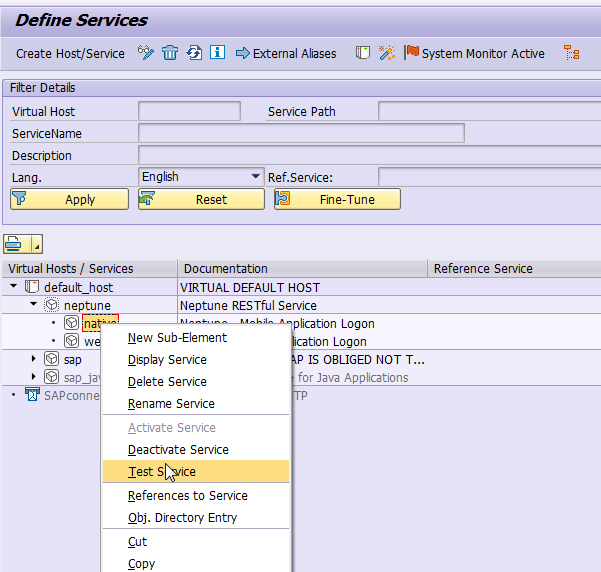

Resolution:
-
Open transaction SE24 and attempt to open class
/NEPTUNE/HTTP_HANDLER. -
If the class cannot be opened, the application server buffers need to be reset.
-
Execute the buffer reset commands listed in the Application server buffer reset commands table, starting with
$SYNC. -
Retry opening the class and testing the ICF node.