Building Neptune Client for Windows 10 in Visual Studio 2017
This guide provides updated instructions for installing Neptune Client on Windows 10 using Visual Studio 2017. Please note that Visual Studio 2019 does not fully support Cordova apps in its pre/alpha phase, so it is recommended to use Visual Studio 2017.
This guide covers both Neptune DXP - SAP Edition and the Neptune DXP - Open Edition module.
Prerequisites
-
Install Node.js
-
Install Cordova globally
-
Install Visual Studio 2017
-
Install the Visual Studio workload for Mobile Development with JavaScript
Procedure
-
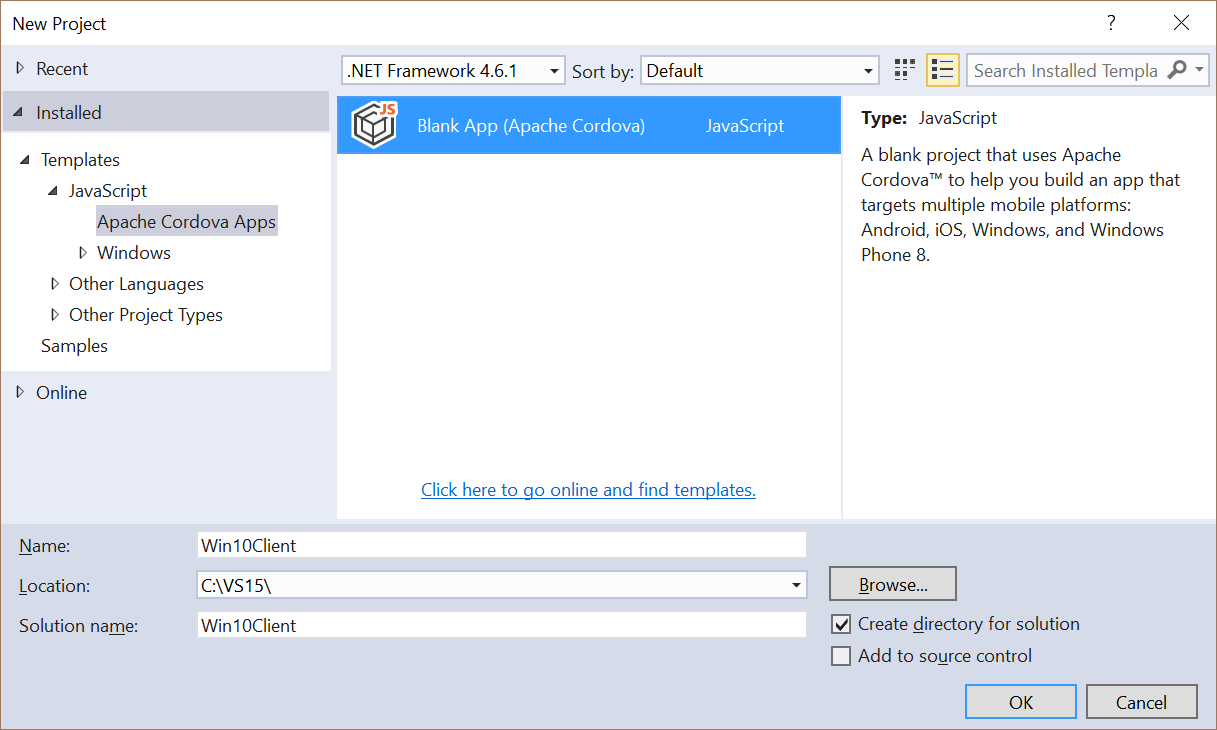
Open a new project using the "Blank App" (Apache Cordova) template.
To access the Cordova Toolset, make sure it is installed in Visual Studio 2017. Go to "Tools" → "Get Tools and Features" → "Individual Components."
-
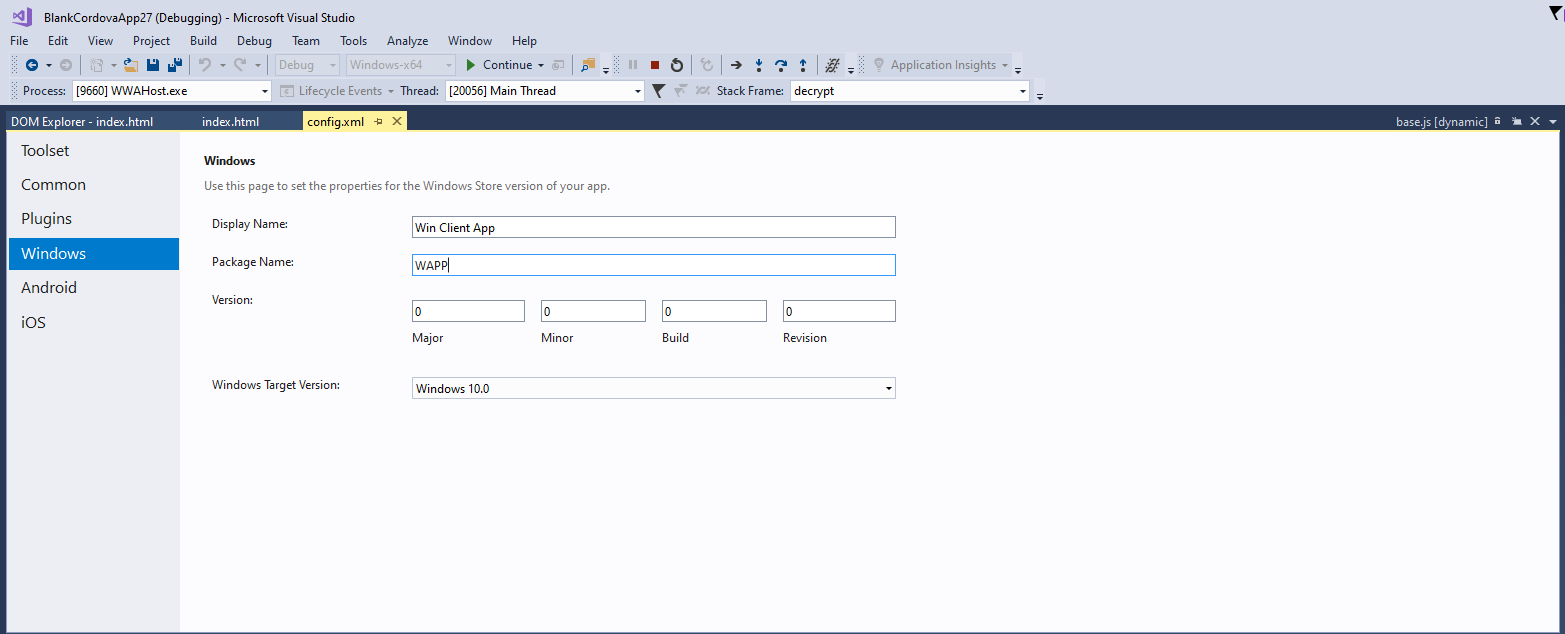
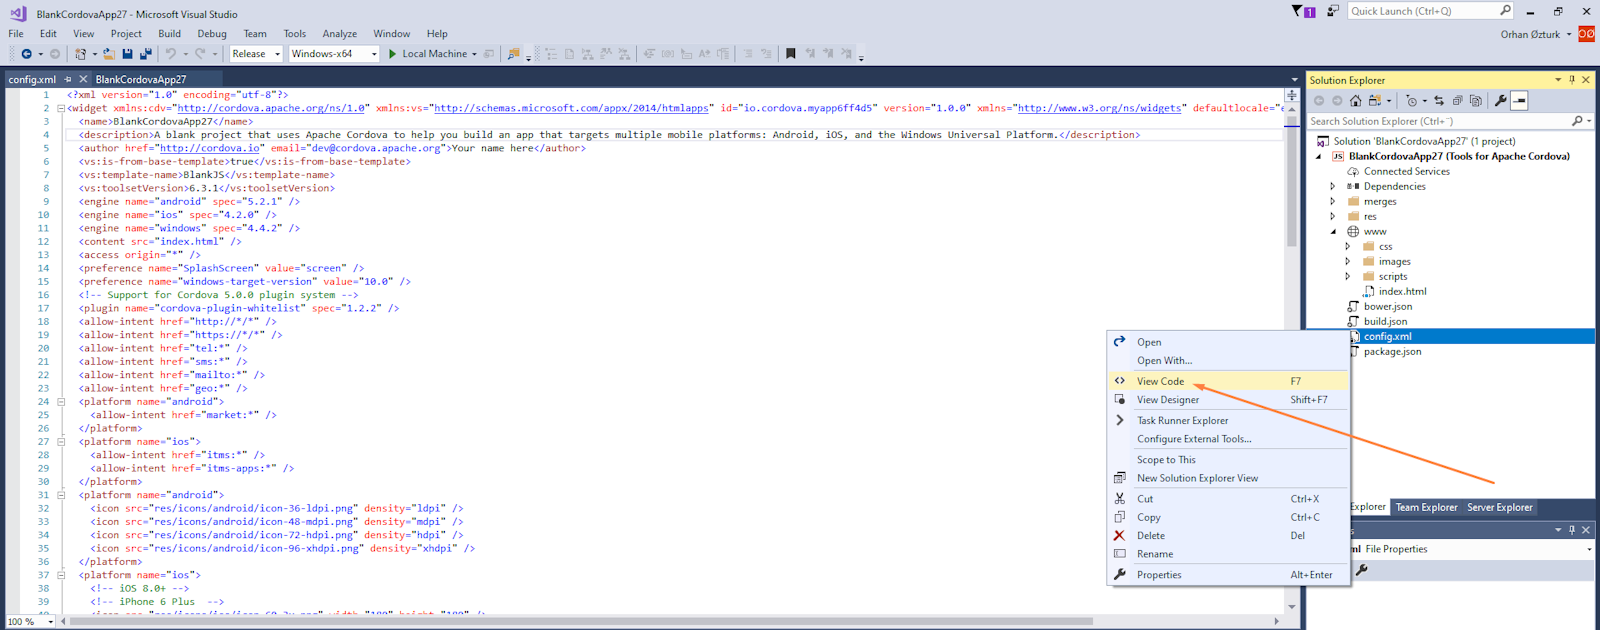
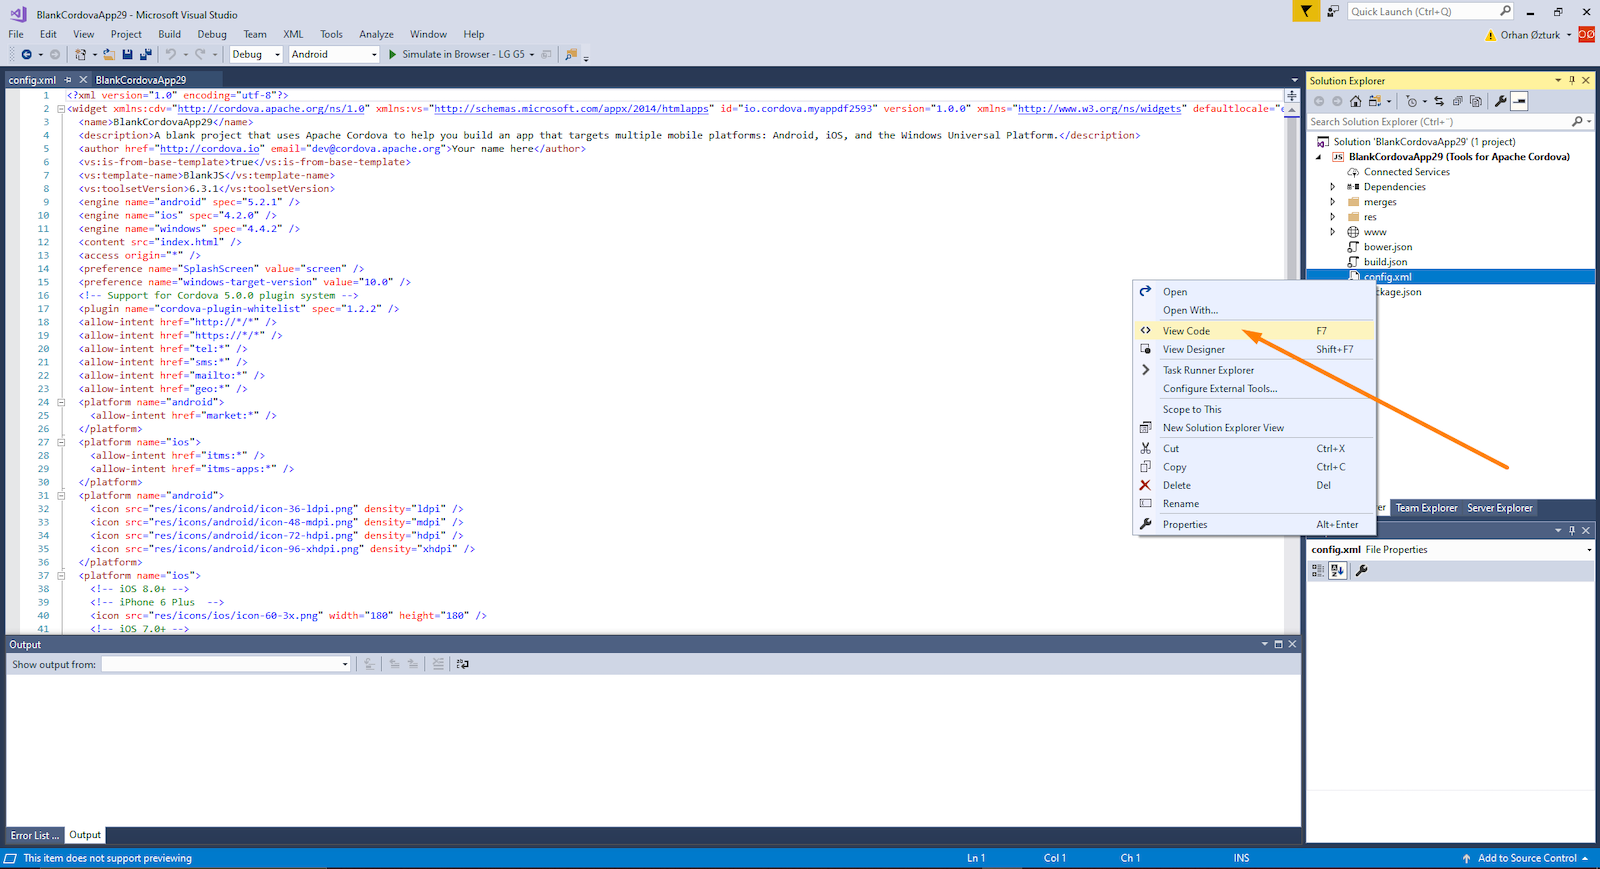
Open the Config.xml file and set the target version to Windows 10. Fill in the other Windows properties, such as the display and package name.
-
In the Config.xml file, under Toolset, select the version of Cordova CLI you want to use. At the time of writing this documentation, we used CLI version 9.0.0. Make sure to use a compatible Cordova CLI version supported by your Visual Studio 2017 installation.
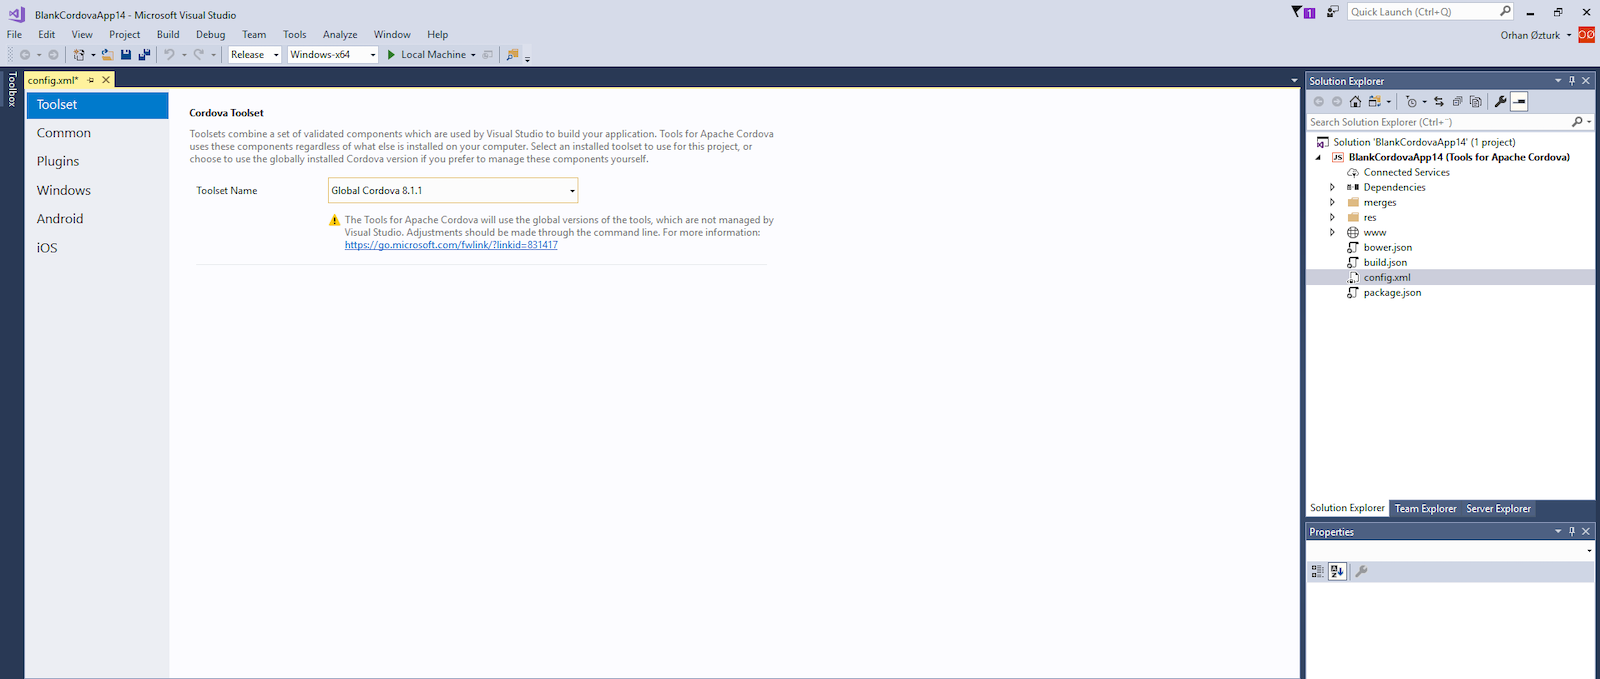
If Visual Studio is not detecting your globally installed Cordova, you can edit the config.xml file in the code editor.
For example: <vs:toolsetVersion>9.0.0</vs:toolsetVersion>
-
In the Config.xml file, under Plugins, add the desired plugins.
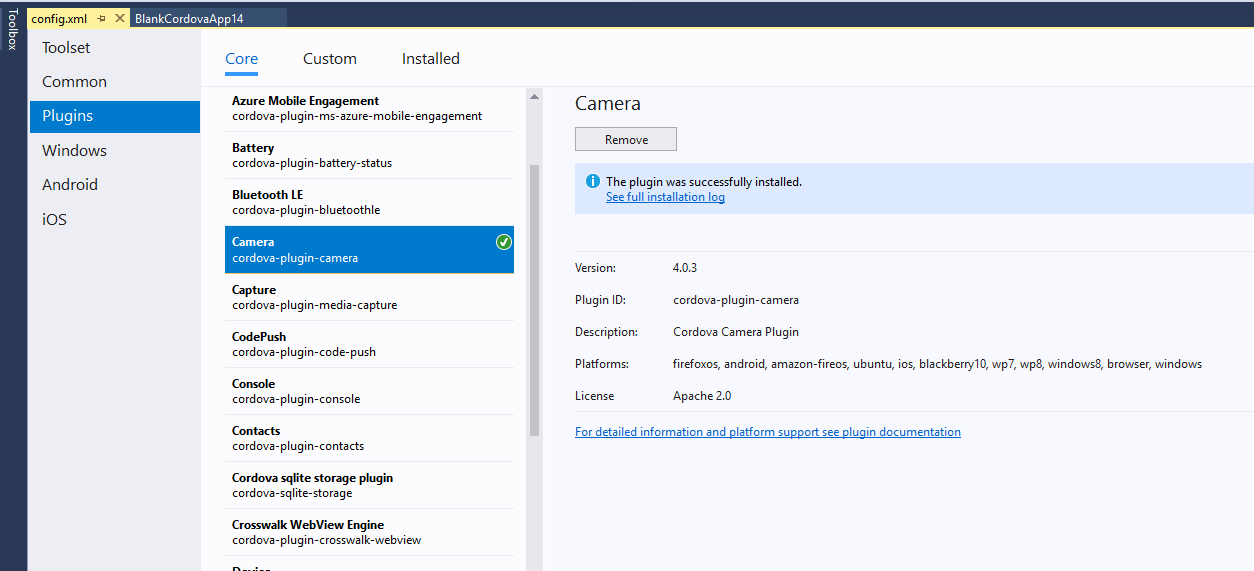
You can select the most commonly used Cordova plugins directly in Visual Studio 2017 or add custom plugins from sources like GitHub.
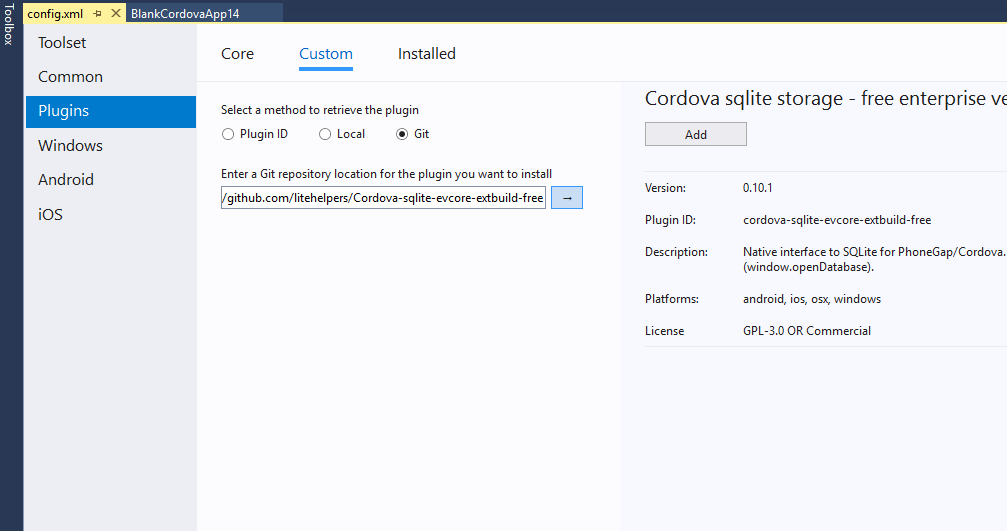
If you are using the SAP.N.database in your app, you also need to import the SQLite plugin: https://github.com/litehelpers/Cordova-sqlite-evcore-extbuild-free
If your build fails after adding this plugin, you can refer to the solution provided in this post: https://community.neptune-software.com/posts/build-app-in-visual-studio-for-win10
-
Go to Neptune DXP → Run → Mobile Client and export a VS 2017 Build by selecting "Build PhoneGap."
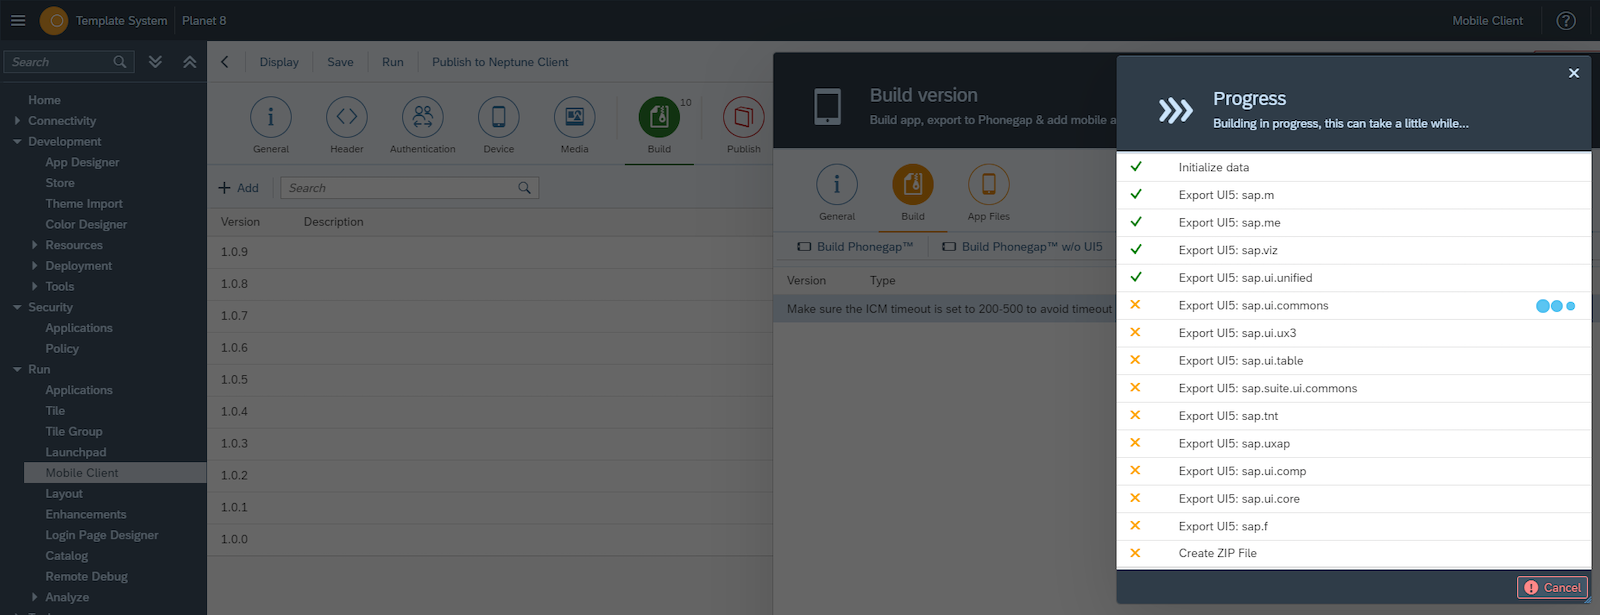
Once the build is finished, download the Windows build.
-
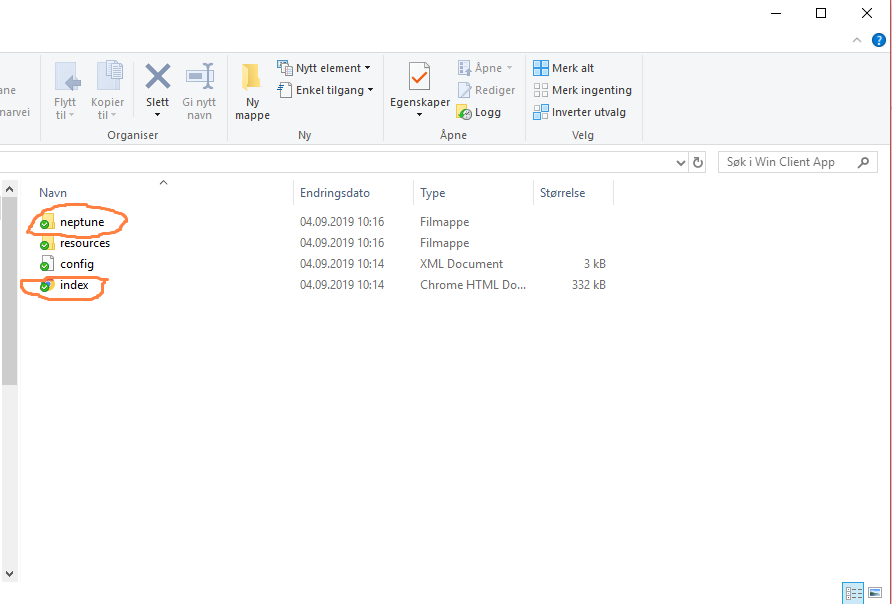
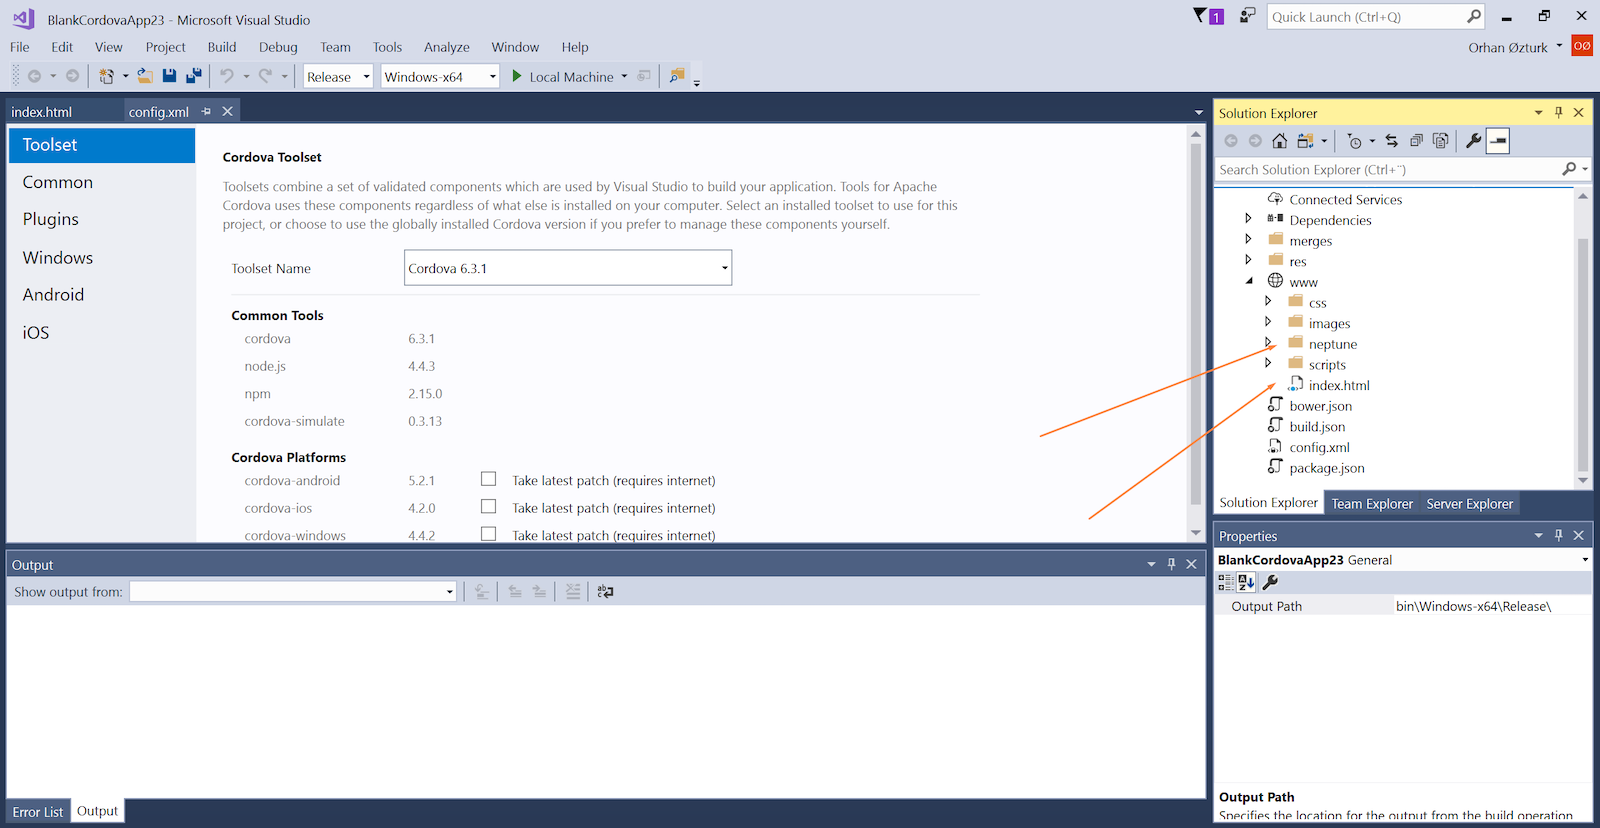
Unzip the downloaded file and copy/paste the Neptune folder and the index.html file into the "www" folder of your Cordova project in Visual Studio 2017.
-
Insert the necessary files under the "www" folder as shown below:
-
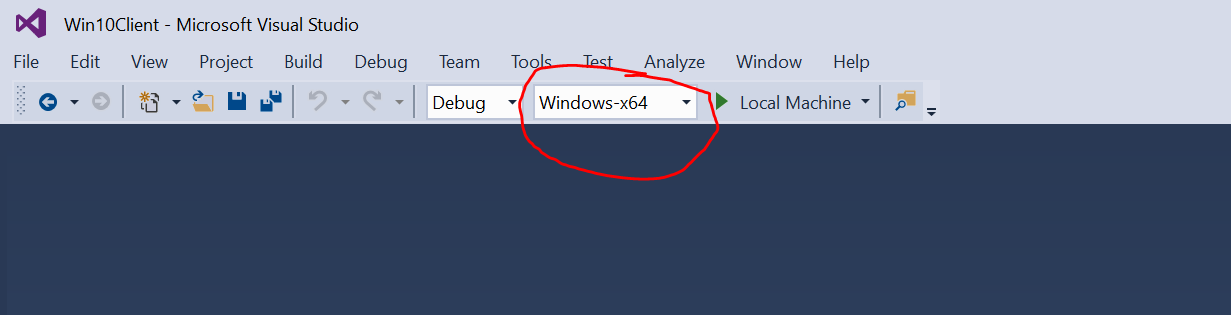
Before you start your build, some of your plugins might require the Architecture to be set. Set the Architecture in the VS2017 menu bar
-
Build to "Local Machine" in order to test on your PC and debug in VS 2017.
The App will now be built and deployed to your machine. After starting up when the app is running you might see some errors being thrown. These might be related to JS errors that can be fixed on the fly. If you are experiencing build errors, it might be related to the Cordova version you are using.
-
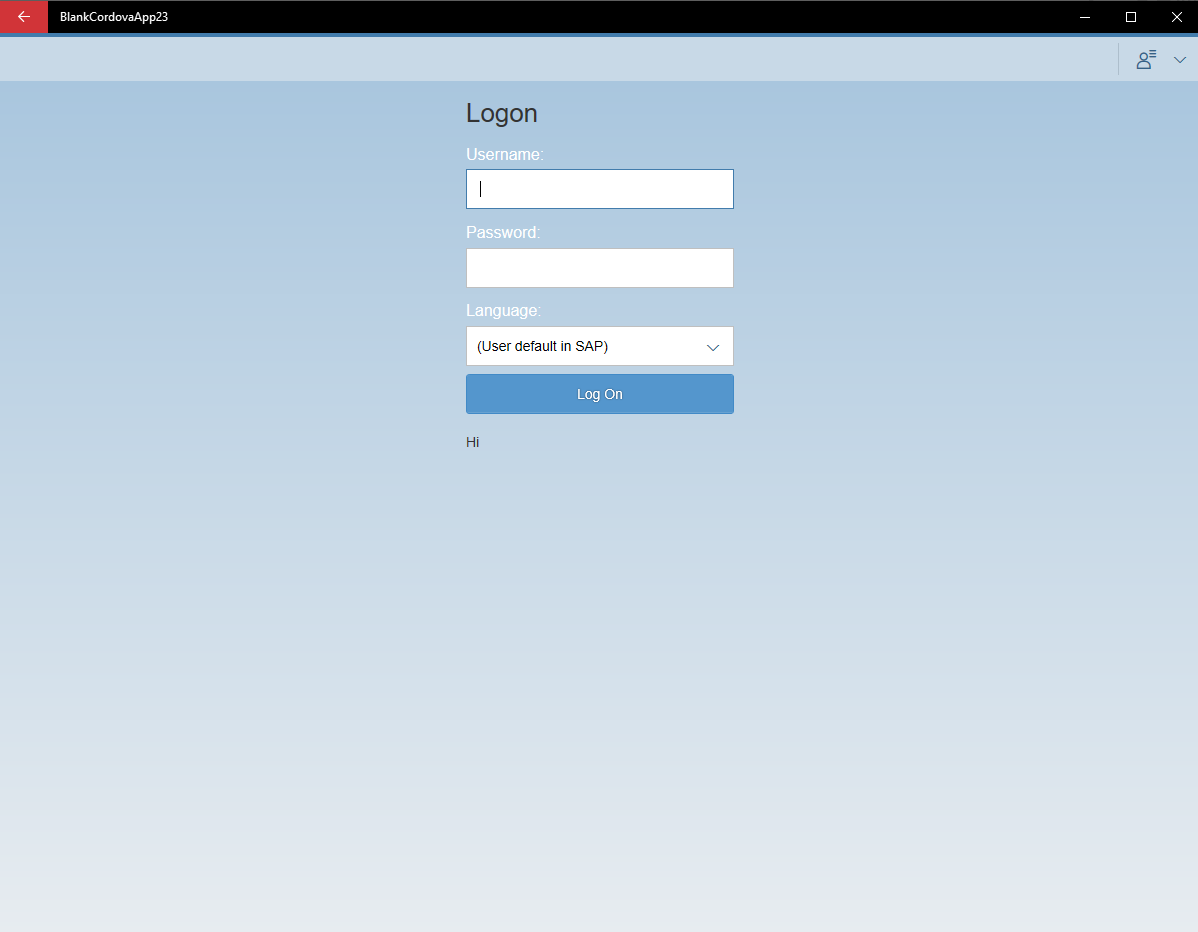
The App should now start, and you can try it out while in debugger mode in VS 2017. Below is an example from our Neptune Internal client:

-
Adding Icons and Splashscreen has to be done directly into the config.xml file. In a Cordova project, there is no manifest file with a "Designer" view to do this.
<platform name="windows">
    <icon height="150" src="res/icons/windows/Square150x150Logo.scale-100.png" width="150" />
    <icon height="360" src="res/icons/windows/Square150x150Logo.scale-240.png" width="360" />
    <icon height="30" src="res/icons/windows/Square30x30Logo.scale-100.png" width="30" />
    <icon height="310" src="res/icons/windows/Square310x310Logo.scale-100.png" width="310" />
    <icon height="44" src="res/icons/windows/Square44x44Logo.scale-100.png" width="44" />
    <icon height="106" src="res/icons/windows/Square44x44Logo.scale-240.png" width="106" />
    <icon height="70" src="res/icons/windows/Square70x70Logo.scale-100.png" width="70" />
    <icon height="71" src="res/icons/windows/Square71x71Logo.scale-100.png" width="71" />
    <icon height="170" src="res/icons/windows/Square71x71Logo.scale-240.png" width="170" />
    <icon height="50" src="res/icons/windows/StoreLogo.scale-100.png" width="50" />
    <icon height="120" src="res/icons/windows/StoreLogo.scale-240.png" width="120" />
    <icon height="150" src="res/icons/windows/Wide310x150Logo.scale-100.png" width="310" />
    <icon height="360" src="res/icons/windows/Wide310x150Logo.scale-240.png" width="744" />
</platform>
<platform name="windows">
    <splash height="300" src="res/screens/windows/SplashScreen.scale-100.png" width="620" />
    <splash height="1920" src="res/screens/windows/SplashScreen.scale-240.png" width="1152" />
    <splash height="1920" src="res/screens/windows/SplashScreenPhone.scale-240.png" width="1152" />
</platform>
We recommend keeping the original file names and replacing the desired images in the "/res/icons/windows" and "/res/screens/windows" folders.
Tip 1: The SplashScreen image does not fill the entire screen if the app window is larger than the SplashScreen image. Choose a SplashScreen graphic with a background color that you can extend to fill the entire SplashScreen. Set the background color using the preference:
<preference name="SplashScreenBackgroundColor" value="0x00000000" />Tip 2: To make the icon on the Windows taskbar full-size, add the following images:
<icon src="res/icons/windows/Square44x44Logo.targetsize-48.png" target="Square44x44Logo" /> <icon src="res/icons/windows/Square44x44Logo.targetsize-48_altform-unplated.png" target="Square44x44Logo" /> -
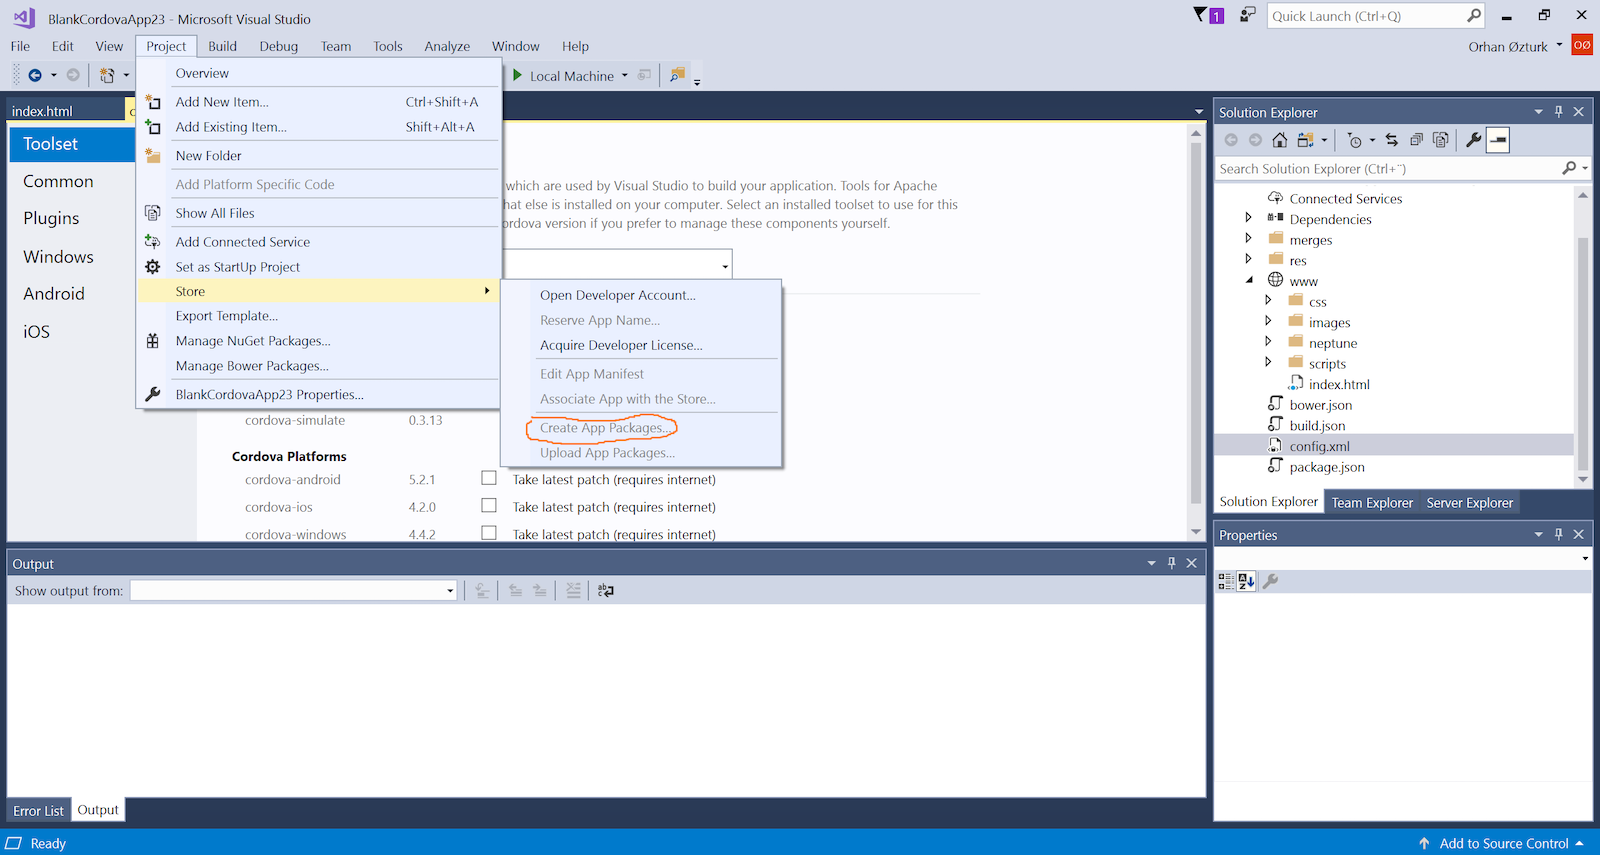
Create installation files Right-click on your project in Solution Explorer. Select Store→Create App Packages…
If the create app packages button is disabled follow this link to downgrade Visual Studio 2017 to a prior version to fix the issue. https://docs.microsoft.com/en-us/visualstudio/productinfo/installing-an-earlier-release-of-vs2017
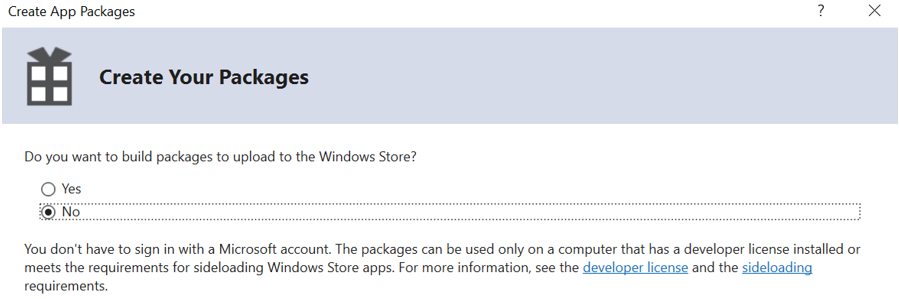
Unless you are building for Windows Store, select No.
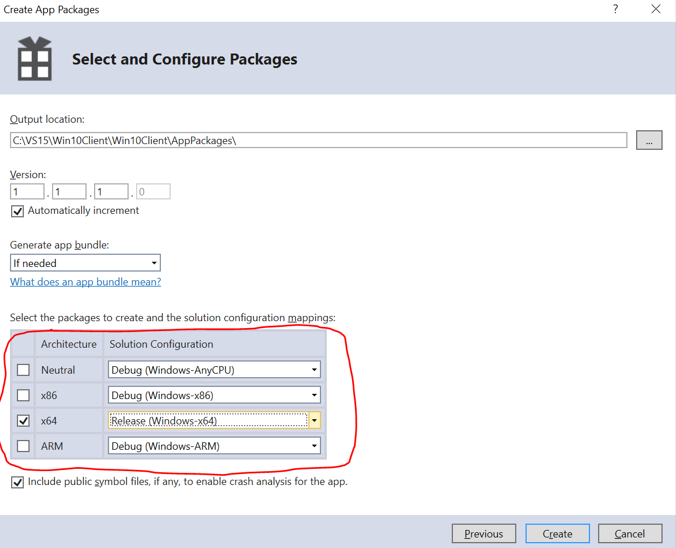
Then select the Architecture for the build and the Solution configuration (Debug/Release)
-
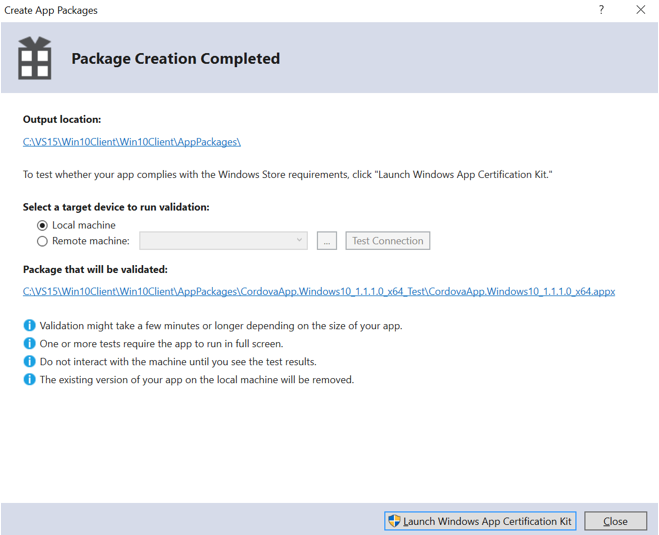
When the Creation of the Application files is done, you can find the .appx files in your selected output location.
-
The Windows App can be installed in several ways. Please discuss with the Windows deployment team/manager to find out what is their preferred way to distribute Apps. This is usually done with some Windows management tool.
For limited testing and distribution, the App can be installed by something Windows calls Sideloading.
-
Open PowerShell in Administrator mode
-
Go to the folder with your .appx file
-
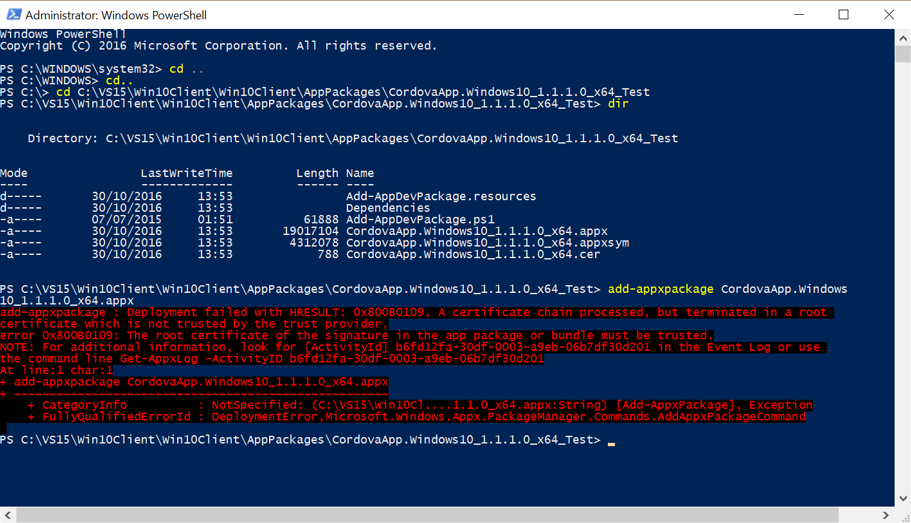
Install the App by running the command: add-appxpackage .appx
This will give you an error if the root certificate for the App is not installed on your machine.
To install the root certificate:
-
Double-click on the .cer file in the same folder as the .appx
-
Choose "Install Certificate".
-
Choose «Local Machine».
-
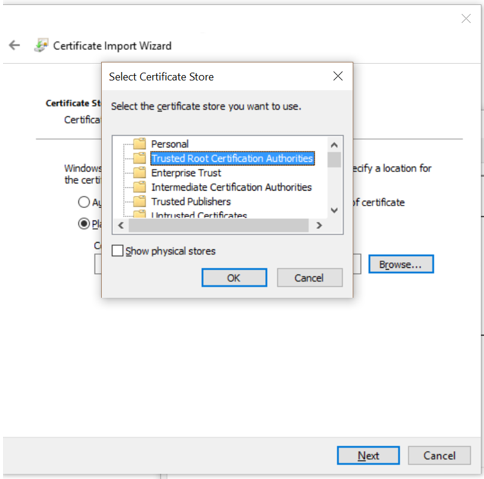
Choose «Place all certificates in the following store" and "Browse".
-
Select "Trusted Root Certification Authorities".
-
Choose "OK".
-
Choose "Next".
-
Choose "Finish".
Run the add-appxpackage .appx command again in PowerShell, and the App should be installed.
-
-
The App is now installed and can be launched as any other Windows application, from the Start menu:
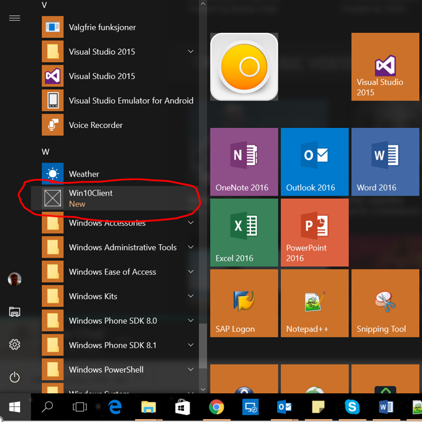
In this example, we did not add an icon, therefore the default image is shown. Select your newly installed Windows 10 and start it: