Integration Card Test
The "Integration Card Test" tool allows you to render an SAP Integration Card by providing either the manifest.json of that card directly or by supplying a URL which will return the manifest.json with a GET request. So it will help you during the creation process of your integration card.
Testing with the API Factory Cockpit Application
After you have created the API Factory Class, which will return the following:
-
manifest.json
-
header data
-
content data
You might want to test if the API Factory Class works correctly.
To test it you must navigate to Connectivity / Rest API / API Factory in our Cockpit.
In the Overview, you should find your newly created API Factory Class.
By clicking on the row you will navigate to its details.
In there, you first have to make this API Factory class executable as a Rest API. You can achieve this by assigning corresponding Policies or enabling the "Unrestricted API Engine".

| You must switch to edit mode with the "Edit" Button and also save your adjustments with the "Save" Button afterward. |
All API Factory Classes are not executable by default to keep the access restrictive, so this is a mandatory step.
You should then be able to navigate to "Swagger UI" and see your newly created endpoints header content and manifest.
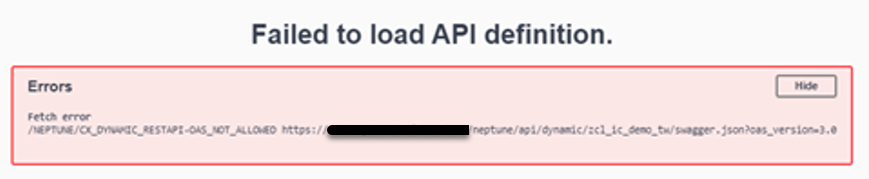
| If your SAP User does not fit into the Policy Settings you will get the following error in Swagger UI: |
By clicking on the relevant Endpoint and then "Try out" and "Execute" you can invoke the corresponding REST API HTTP Request.
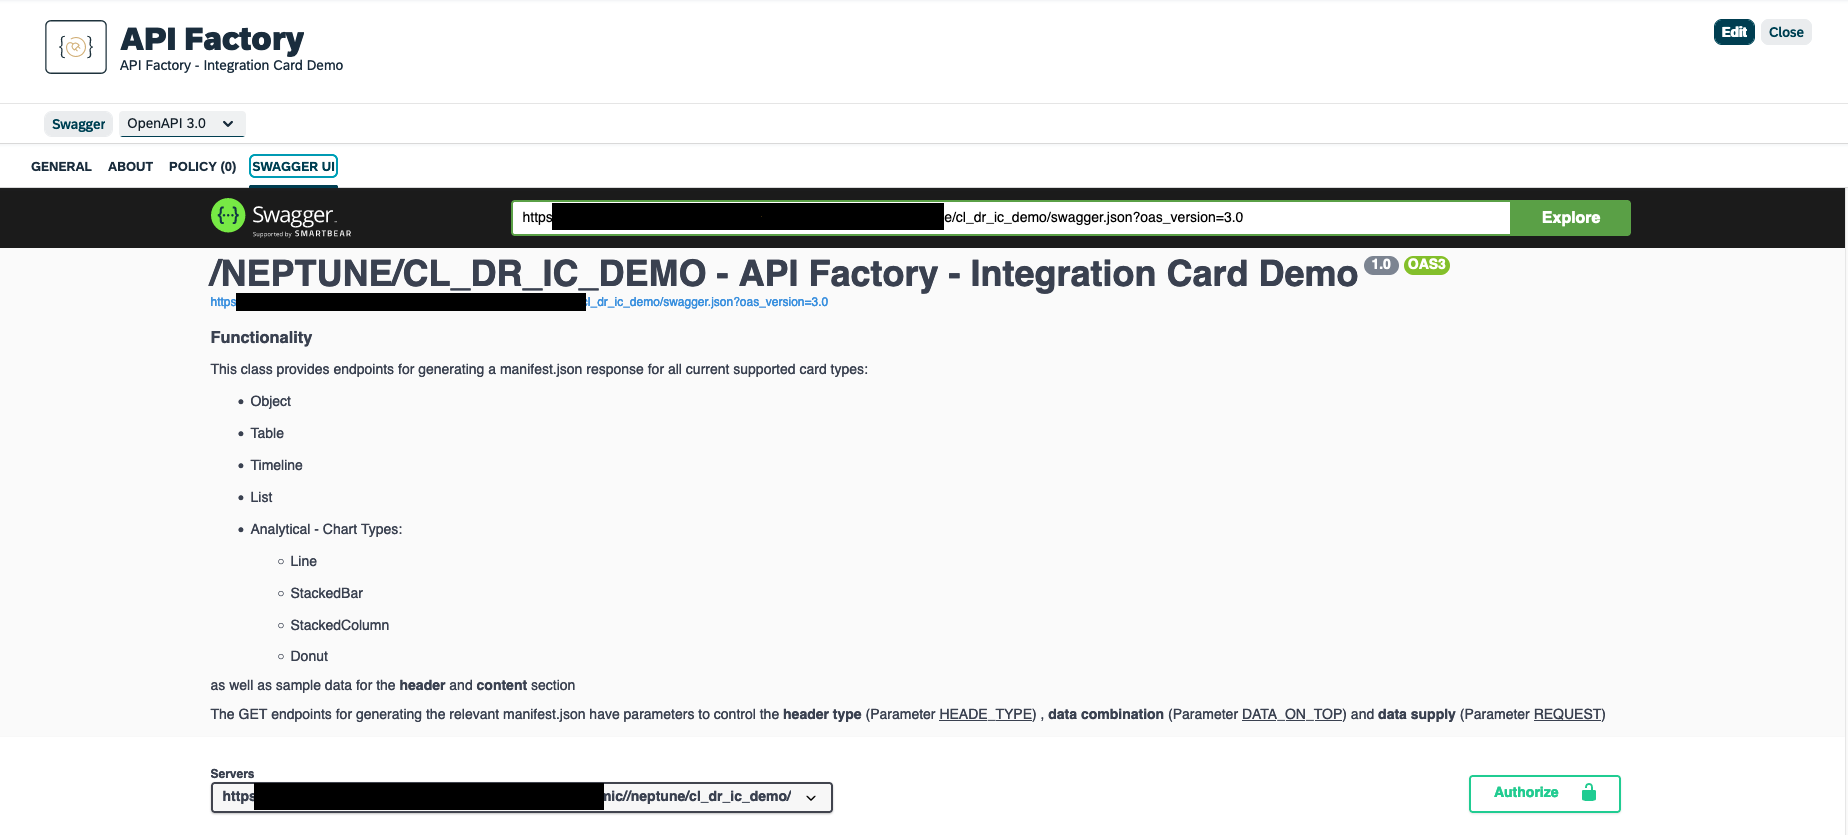
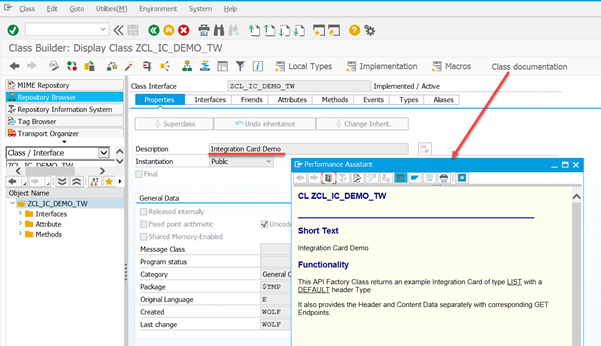
| The Class Description and Class documentation will also be reflected in Swagger UI. Even with formatting Options for the Class documentation. |
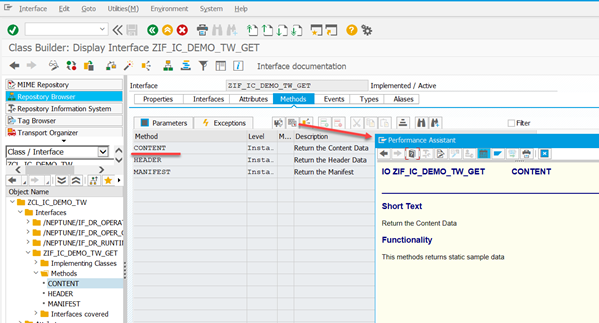
Also, the Method Description and Method documentation will be reflected in the corresponding endpoint.
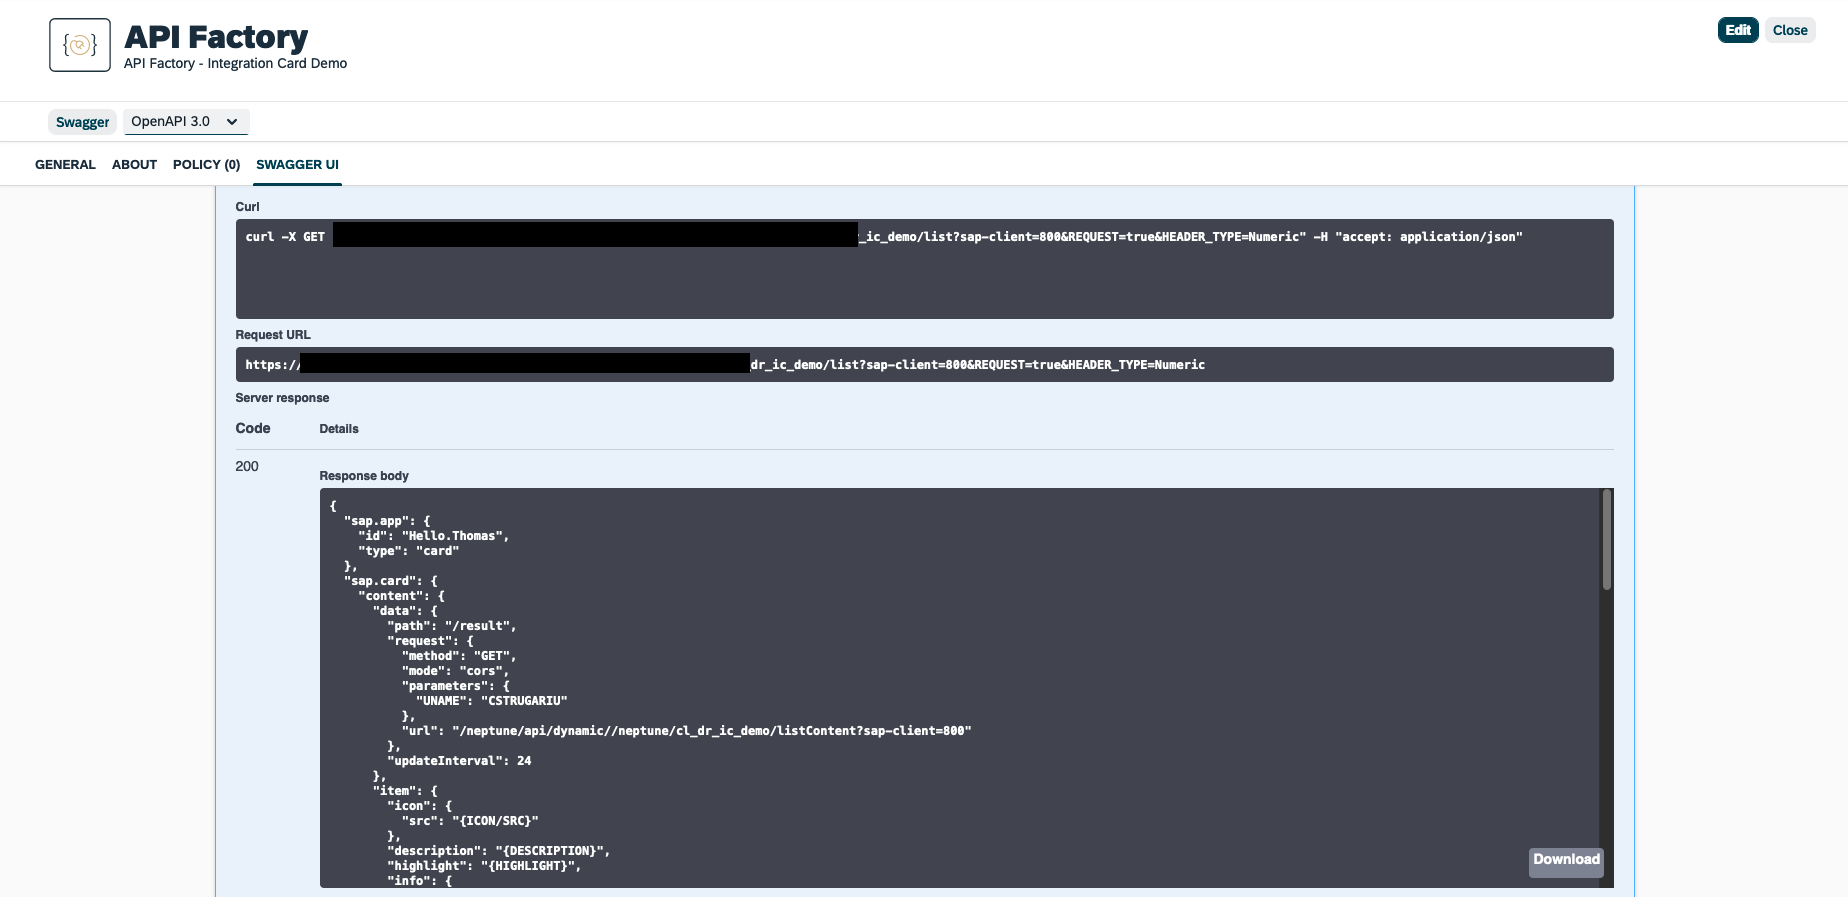
On each endpoint, you should get a valid JSON structure.
You can now copy the resulting JSON Structure from the GET manifest endpoint into your clipboard and paste it into the "Integration Card Test" Cockpit Application.
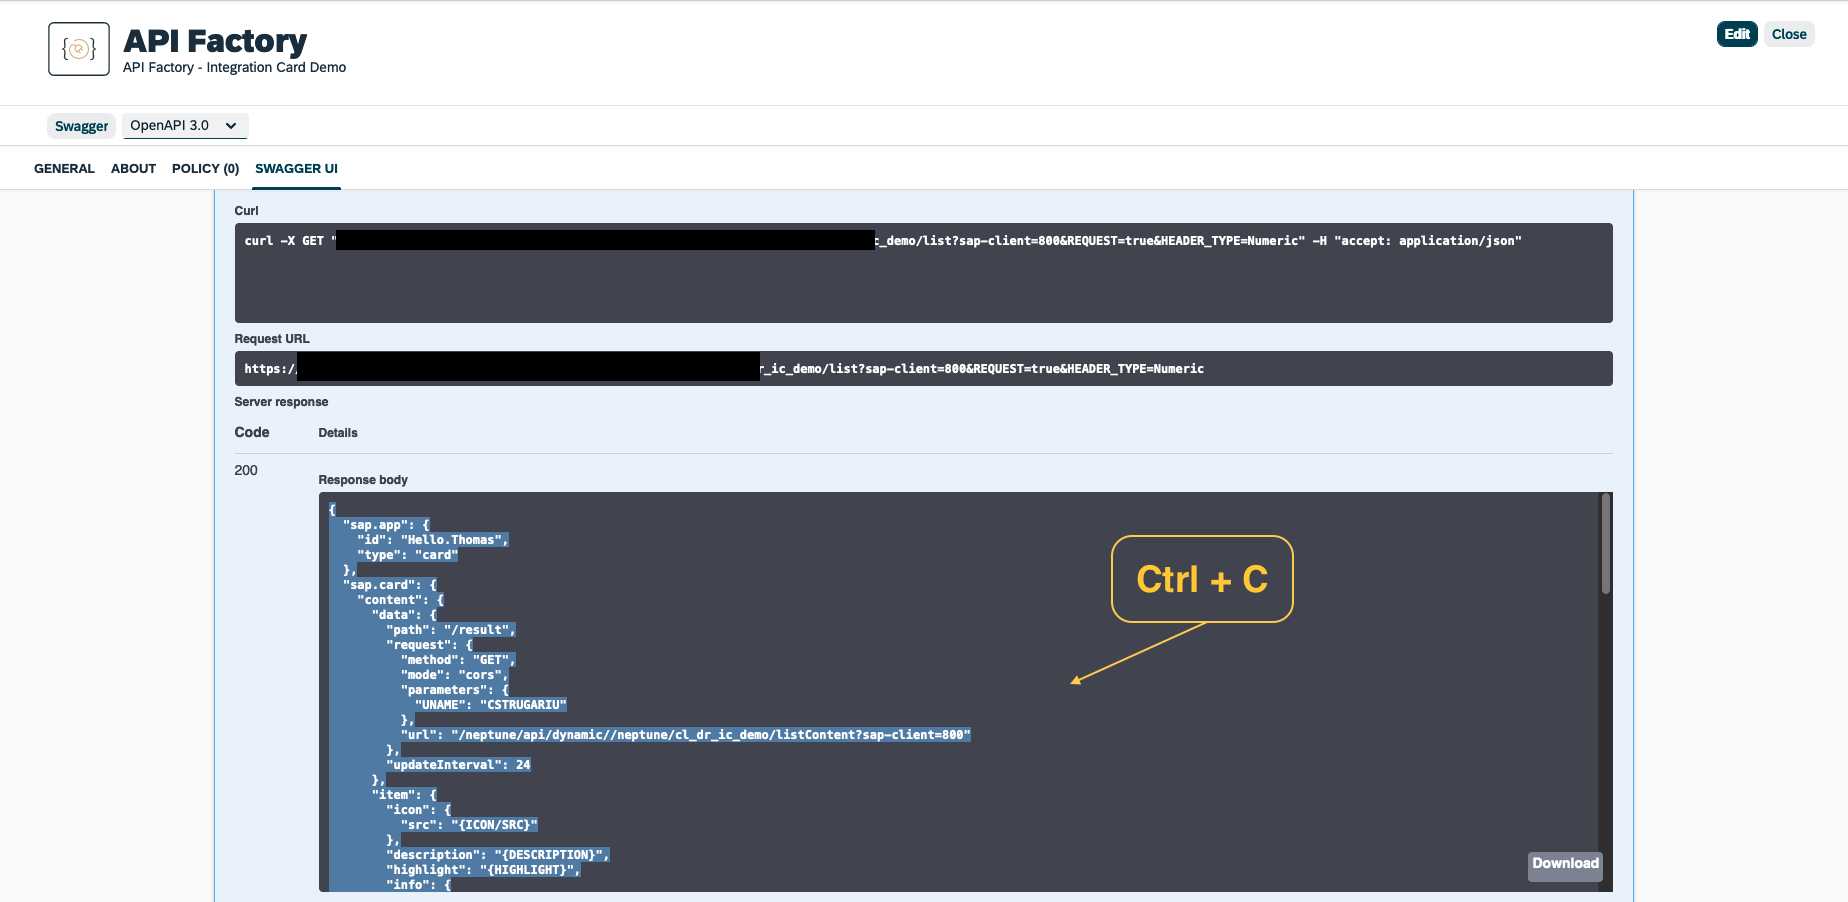
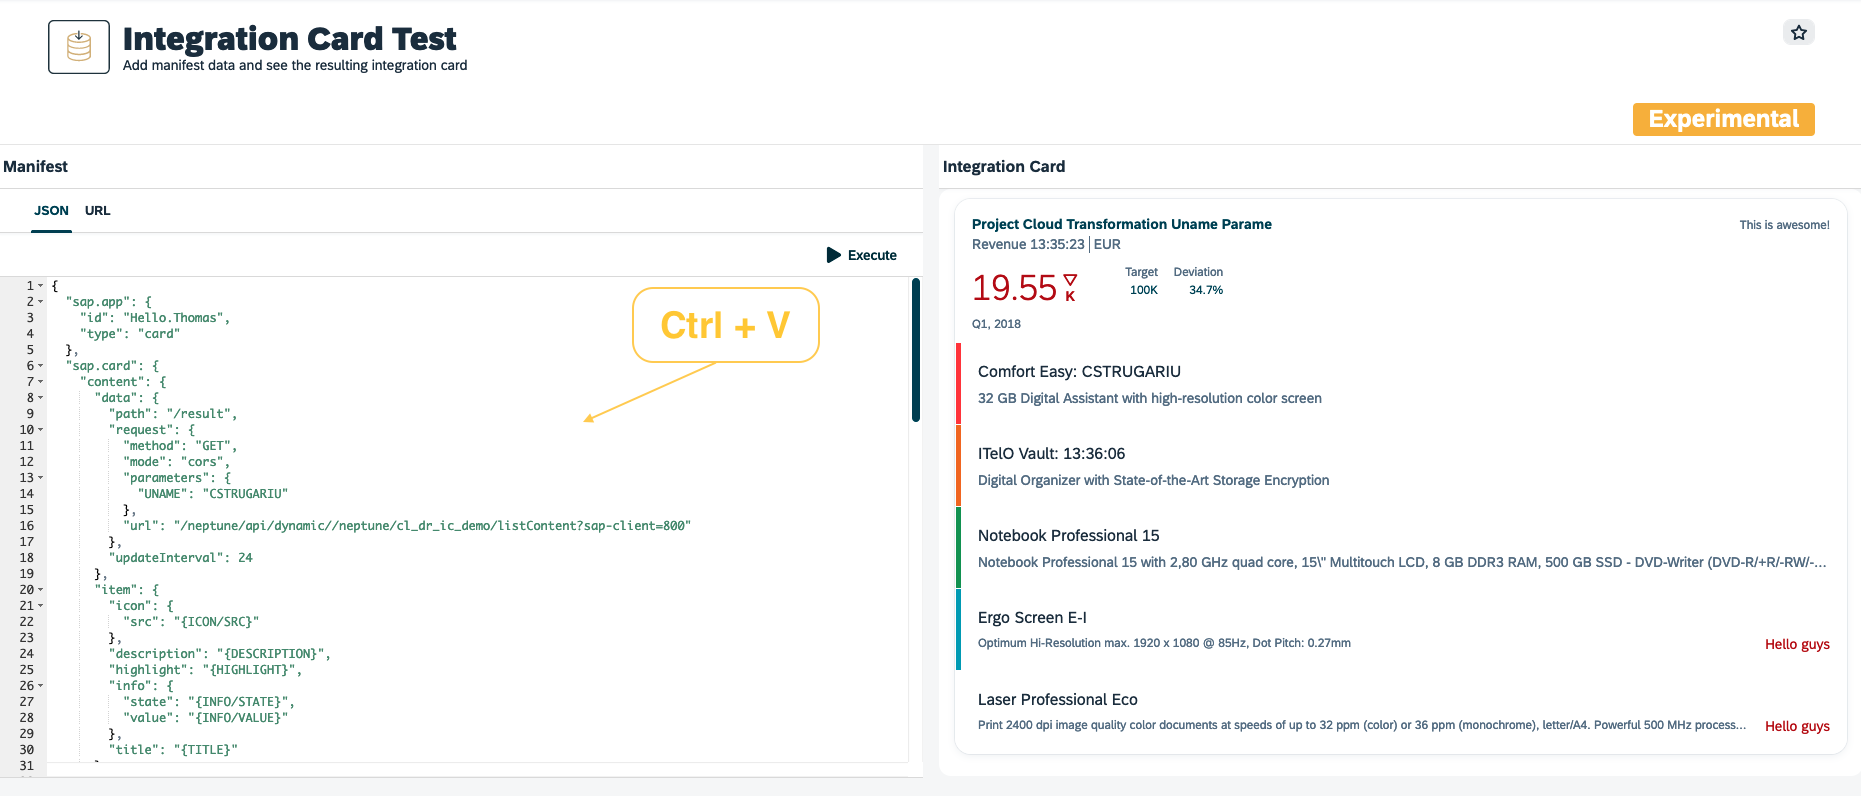
When you then hit the "Execute" Button you should see your Integration Card on the right side.
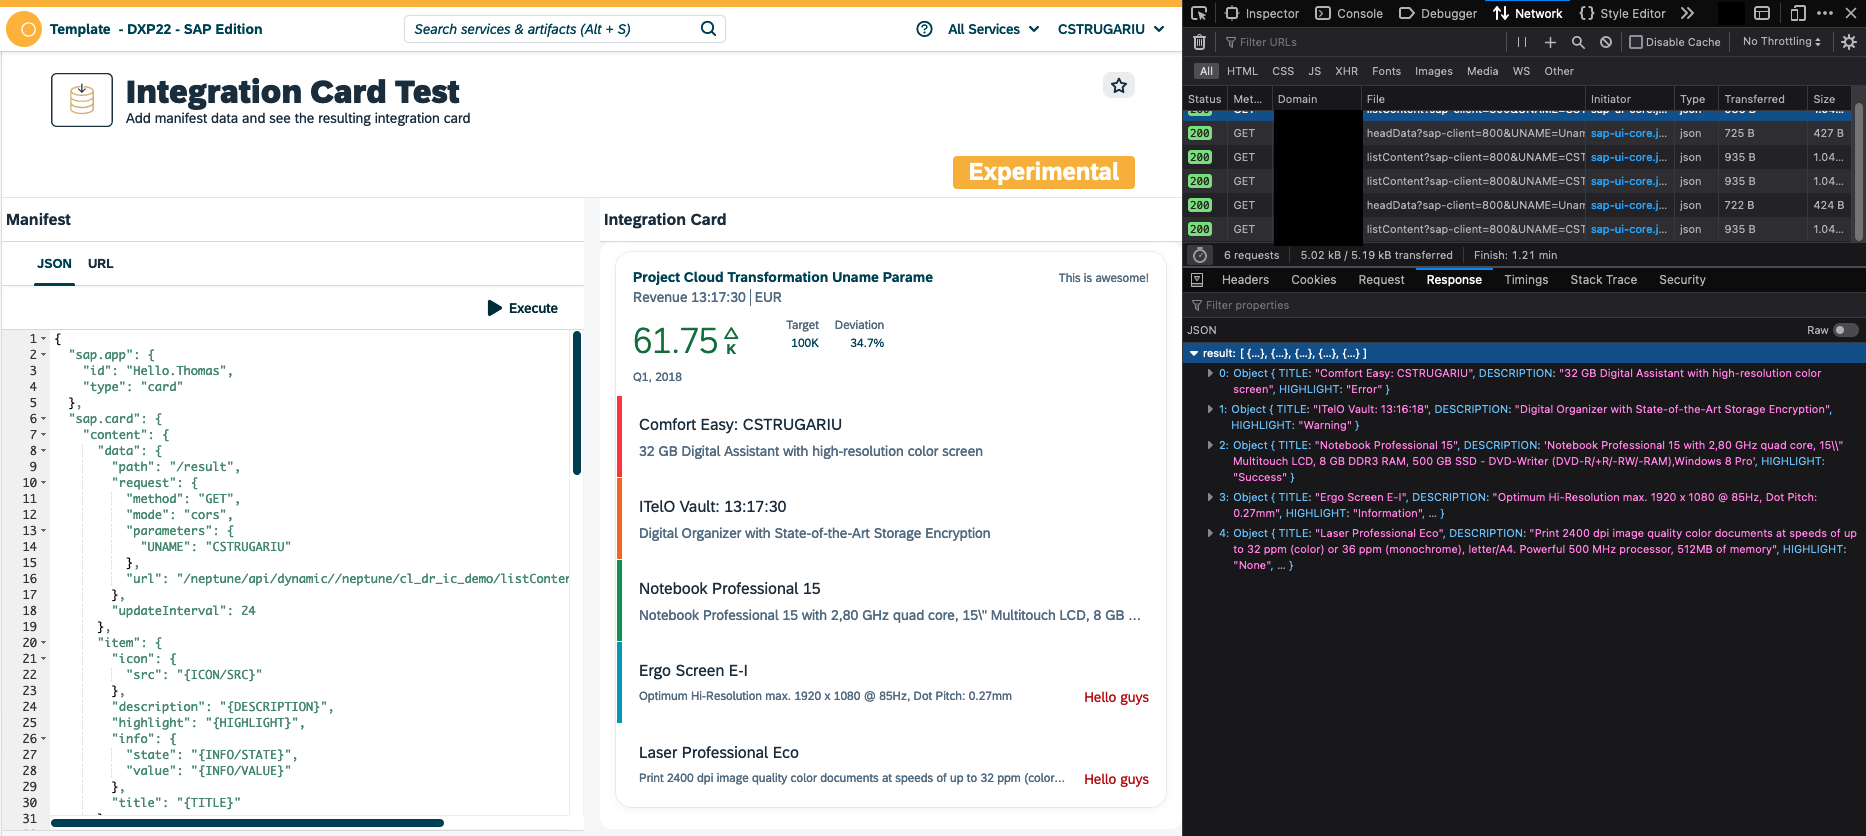
Analyzing the network traffic
When you create the Integration card like in the example above the manifest.json does not contain any data itself.
Instead, the Integration Card will trigger individual HTTP GET Requests with the specified update Interval to the other endpoints GET header and GET content to fetch the data which will then be displayed in the card. You can review those HTTP Requests with your Browsers Development Tools.
How to create an Integration Card?
Integration Cards are defined via their manifest.json which basically describes their appearance but also contains the information where the card should fetch its data from (when not directly embedded which is also possible).
Their appearance is divided into a "header" and a "content" section. You can also supply the data of those sections independently.
You find more information about the SAP Integration Cards with many examples and explanations on the SAPUI5 Card Explorer:
Currently, there are two header types available:
Default

Numeric
And many card types that define the content section of the Integration Card.
Table
Object
Timeline
List
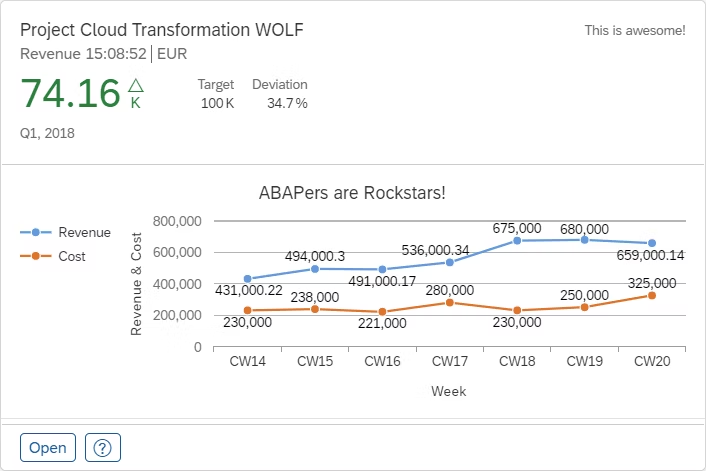
Analytical - Line
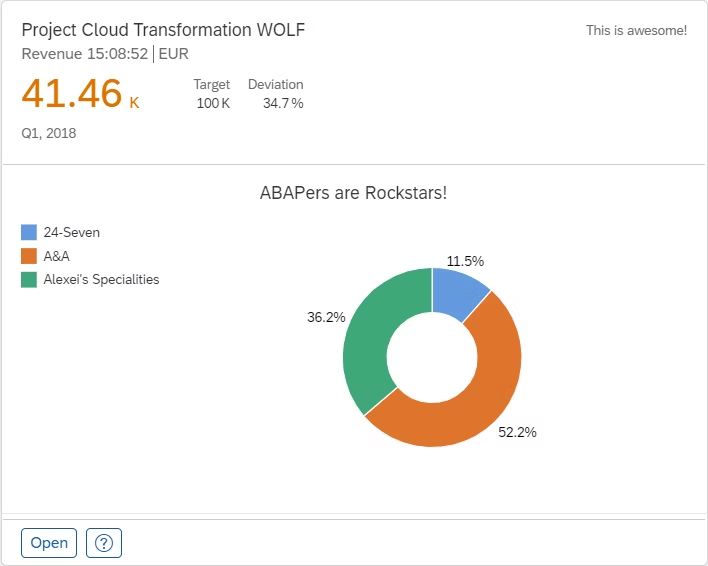
Analytical - Donut
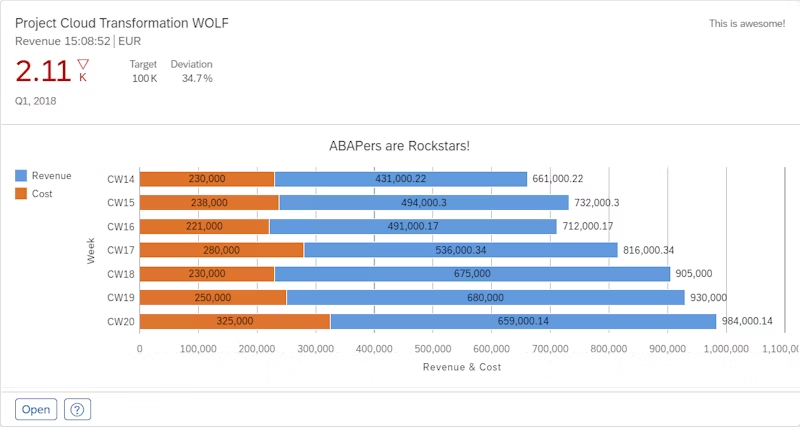
Analytical - Stacked Bar
Analytical - Stacked Column
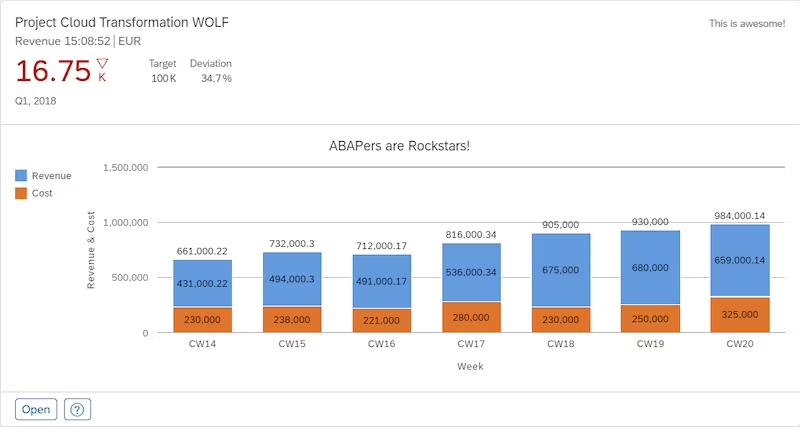
We do support both Default and Numeric Headers.
Currently, we support generating this manifest.json with plain ABAP Code via an "API Factory Class".
There are two main steps necessary for creating this manifest.json:
-
Create an ABAP Class which provides it as an Exporting or Returning Parameter.
-
The actual ABAP Coding inside this class to generate the manifest.json.
Creating the API Factory ABAP Class
Since we want this ABAP Class to be able to provide the manifest.json as an REST API we are using the concept of the API Factory.
If you want to learn more about the API Factory in general please take a look at the documentation here:
To make it easy for you to create such an API Factory Class we will ship you a SAP GUI Transaction called 8/NEPTUNE/AF_WIZARD*.
When you start this transaction you will be presented our API Factory Wizard which guides you through the process of generating the necessary ABAP class(es) and interface(s). Each step is also documented in detail.
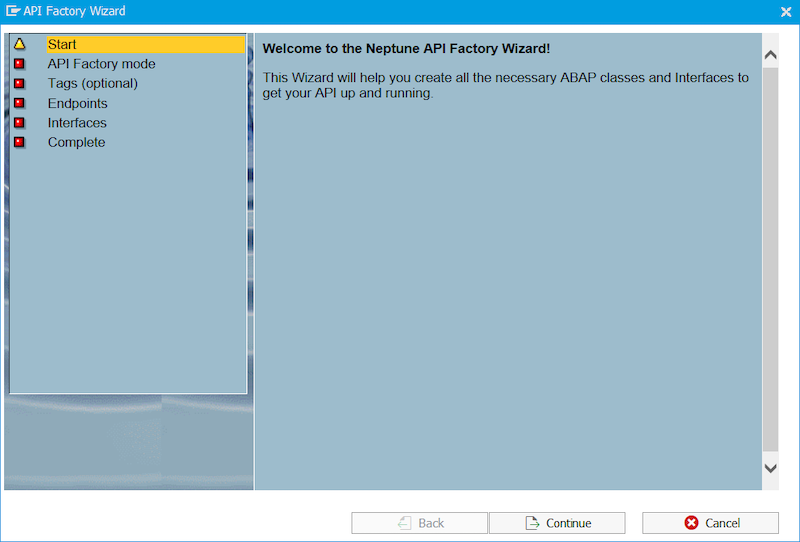
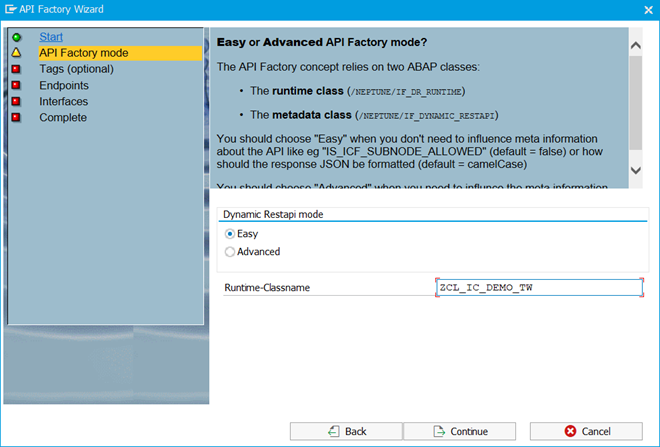
In most cases you should be fine with the API Factory mode set to "Easy" and you won’t need any Tags.
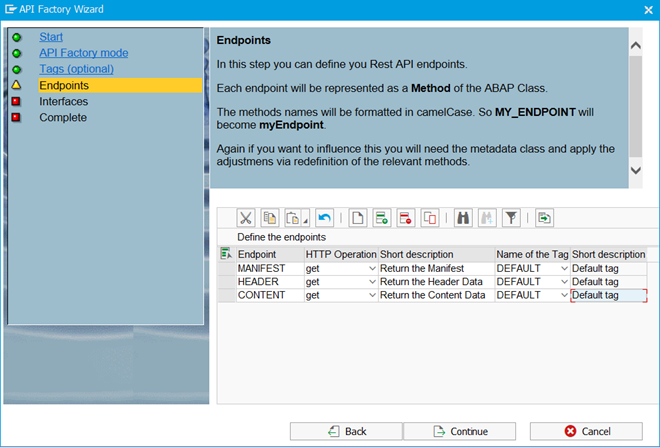
You will probably want to provide the actual data of the Integration card separately from the manifest.json which makes data and manifest.json more reusable. So you will need 2 or 3 endpoints to provide:
-
Manifest.json
-
Header Data
-
Content Data
| Each API endpoint will be represented as an Interface Method. |
You can define them as follows (just an example):
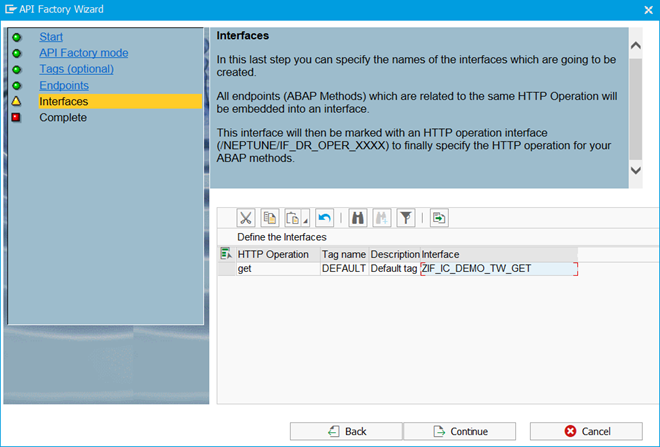
In the next step, you can specify the names of the interfaces that are going to be created.
All endpoints (ABAP Methods) that are related to the same HTTP Operation (get, post, put, delete) will be embedded into an interface.
This interface will then be marked with an HTTP operation interface (/NEPTUNE/IF_DR_OPER_XXXX) to finally specify the HTTP operation for your ABAP methods.
A name for this new interface has already been proposed by the wizard.
After pressing "Complete" in the "Complete" Step, the relevant ABAP class(es) and Interface(s) will be created.
You will be asked to assign a package and if <> $TMP also a Transport. After the creation, you will directly be guided to SE80 to the newly created runtime class.
Now, you have successfully created an API Factory class.
When you activate the newly created development artifacts, the API Class will automatically show up in the API Factory Section of the Cockpit.
| All API Factory classes are initially not executable as a REST API. You must first either assign a Policy to it that suits your SAP User or enable it globally. |
Creating the ABAP Coding for the Integration Card
We now want the newly created ABAP class to return the cards manifest.json as well as the header and content data.
We have a wizard for this as well, and it will provide you with some sample data.
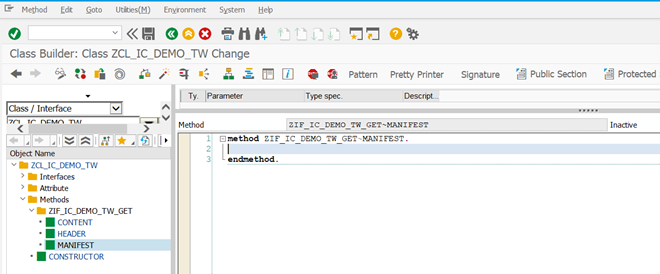
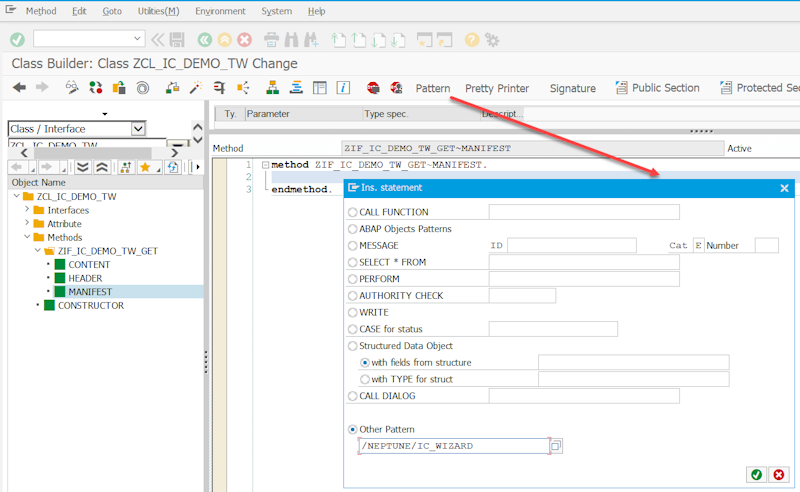
So inside the "ZIF_IC_DEMO_TW_GET~MANIFEST" Method, you will need to call a Custom "Pattern" which you also ship, called /NEPTUNE/IC_WIZARD.
In case the Pattern is missing please follow the instructions mentioned here:
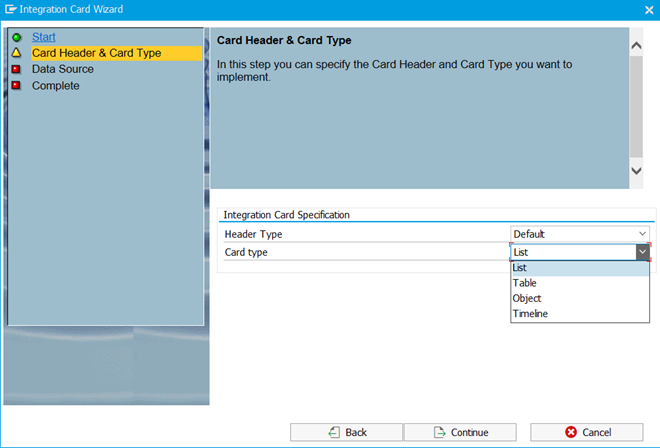
This wizard guides you through the settings relevant to the ABAP Coding that will be generated.
First you will be asked to specify the Header Type (Default or Numeric) and which card type you want to use for the content section of the integration card. Currently, we support the following:
-
List
-
Table
-
Object
-
Timeline
Additionally, you need to specify how the data will be supplied to the integration Card.
You can choose to supply the header and content data individually or together. Also, you need to specify if the data should be directly embedded into the manifest.json or retrieved separately via another Rest API call (to an API Factory Class).
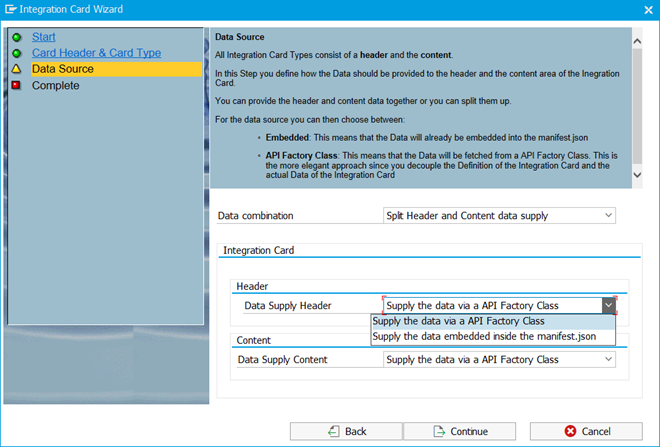
Since we already created dedicated endpoints not only for the manifest but also for the header and content data we will choose the Options: Split Header and Content data supply and Supply the data via an API Factory Class.
After you complete the Wizard you will get the generated ABAP Code even with some sample data.
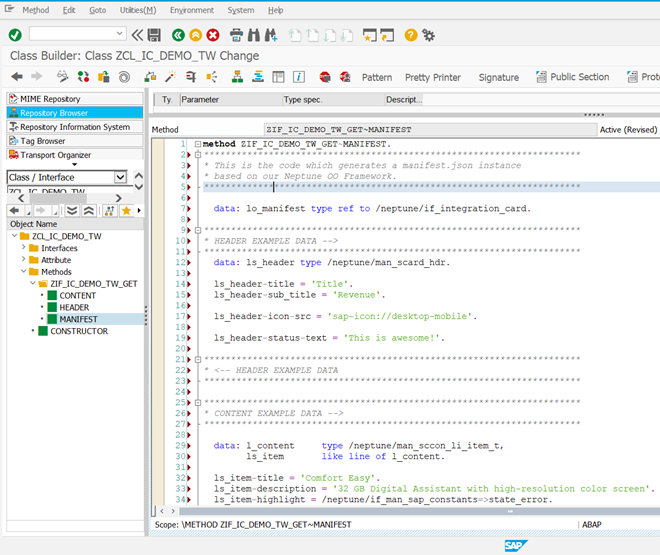
The generated ABAP Source code is also structured into multiple blocks which are surrounded by big comment blocks. Like:
******************************************
* HEADER EXAMPLE DATA -->
******************************************
... ABAP Coding ...
******************************************
* <-- HEADER EXAMPLE DATA
******************************************
The only task that is left to do is to cut and paste those Coding Blocks into their corresponding methods and create corresponding exporting or returning parameters.
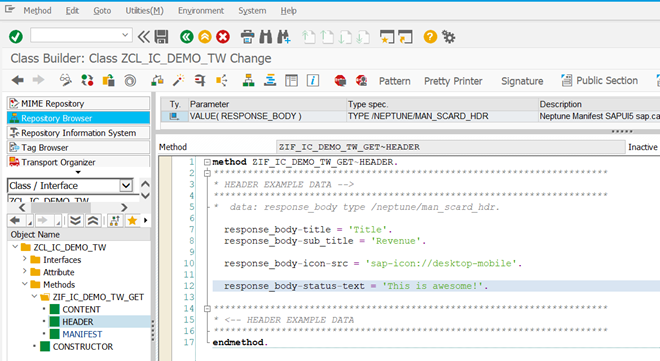
So you can start by cutting and pasting the HEADER EXAMPLE DATA Code section into the ZIF_IC_DEMO_TW_GET~HEADER method.
All Data declarations of the generated source code are declared locally, so you must now create a corresponding exporting or returning parameter.
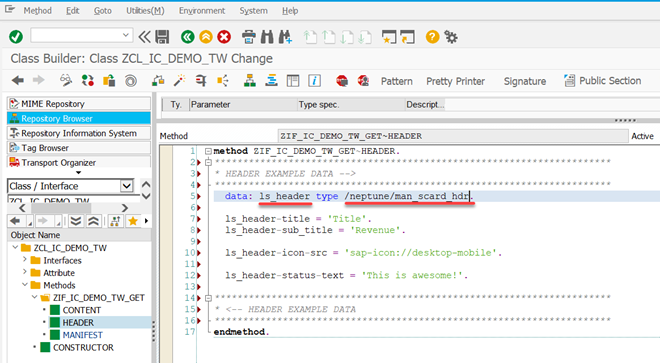
Additionally, you must replace all occurrences of the locally declared variable with the exporting/returning parameter name.
In the end, your method should look somehow like this:
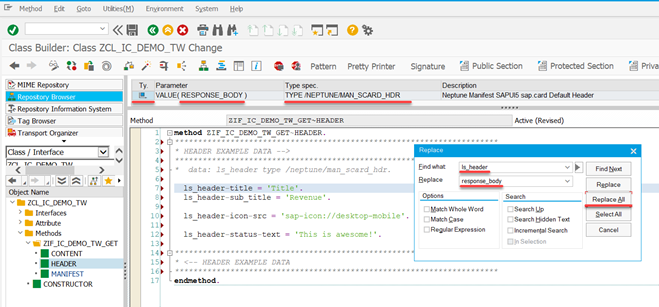
| You can control how the response body JSON Structure will be generated when the REST API is being called. |
If you have exactly one Exporting/Returning Parameter and name it "RESPONSE_BODY" the actual value of the parameter will be put as the root of the JSON structure. Whereas if you name it differently or you have multiple exporting parameters the name of the parameter will be the root component of the JSON structure.
Example: You define the following Returning Parameter
{
    "MANDT": "100",
    "CARRID": "LH",
    ...
}
When you define the Returning Parameter like this:
SFLIGH_STRUCTURE TYPE SFLIGHT
This will result in the following JSON Response Structure:
{
"SFLIGHT_STRUCTURE":
{
"MANDT": "100",
"CARRID": "LH",
...
}
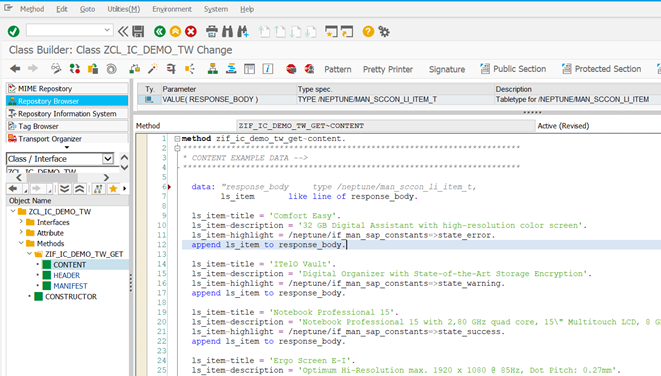
}Now you need to paste also the ZIF_IC_DEMO_TW_GET~CONTENT method, coding with the same approach.
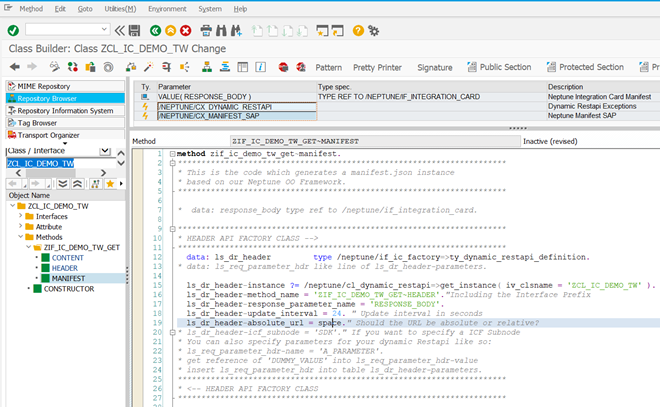
Finally, also the ZIF_IC_DEMO_TW_GET~MANIFEST Method needs to be adjusted.
Here you also need to return the locally declared integration card as an exporting/returning parameter.
Additionally, you need to "specify" three important parameters to the framework for the header and the content section:
-
Name of the API Factory class which returns the data
-
Name of the Interface-Method of that class which returns the data
-
Name of the exporting/returning parameter of that method which actually holds the data
You should also add the Exception classes /NEPTUNE/CX_DYNAMIC_RESTAPI and /NEPTUNE/CX_MANIFEST_SAP to the methods signature in order to return meaningful HTTP 500 Responses in the case of an error.
Additionally, you can define additional settings like an update Interval or an ICF Sub-node for the API Factory Class.
Your ZIF_IC_DEMO_TW_GET~MANIFEST method should then look like this:
After you have completed the above-mentioned adjustments you should be able to activate the class without any syntax errors.
You can now Test if the API Factory Class is properly returning the manifest.json, header and content data within the API Factory in Swagger UI.
Demo class /NEPTUNE/CL_DR_IC_DEMO
If you don’t want to create your Integration Card API Factory Class on your own but still want to see an example implementation of it, you can use /NEPTUNE/CL_DR_IC_DEMO which returns all supported Integration Card types with all Possible header types and data supply scenarios.