Neptune DXP - Open Edition MCP server quick start guide
About this quick start guide
This quick start guide walks you through connecting Claude Code to the Neptune DXP - Open Edition MCP server and using it to create your first artifact, from start to finish, in about five minutes.
You will add the server, authorize it once in your browser, confirm the connection by listing existing applications, and then create a new application with a single natural-language instruction.
By the end, you will have a working MCP connection and a new application that you can open in the Cockpit, created entirely through Claude Code.
This page is task-oriented and deliberately concise. For the full reference (every client, the complete authorization model, all available tools, and troubleshooting), follow the cross-references as you go.
Prerequisites
Make sure that the following are in place:
-
The Neptune DXP - Open Edition instance is running version 24.15 or later. Earlier releases do not include the MCP server.
-
The database is initialized. On a freshly downloaded binary you must run the initialization command once before the server can authenticate anyone or serve the MCP endpoint (see below).
-
The instance is reachable from your machine. In production, this must be via HTTPS;
http://localhostandhttp://127.0.0.1are accepted for local development. -
If you are connecting to a DXP Cloud instance, set the MCP public URL before you connect: in the Cockpit, go to the System Settings tool → AI → MCP, and enter the Public URL where the MCP server is reachable from clients.
This is required because cloud instances run behind a reverse proxy. Leave Public URL empty only for setups where the bind URL is already directly reachable. -
You have valid Neptune DXP - Open Edition user credentials, and your account has the
appdesignerrole. This quick start guide manages applications, which require that role. -
Claude Code is installed, and you can run the
claudecommand in a terminal.Initialize the database on a fresh install. A brand-new binary has no database schema, admin user, or access-control lists, so sign-in and the MCP OAuth flow will fail until you initialize it. Run the binary once with the
--initializeflag from the directory that contains it:./planet9 --initializeOn Windows the binary is
planet9.exe, so runplanet9.exe --initialize. The command sets up the schema, seeds the default admin user, and exits. Start the server normally afterward. Skipping this step is a common cause of "MCP won’t connect" on new machines.
| This quick start guide uses Claude Code because it runs on your machine and can connect to local, VPN-only, and public URLs directly. The same connection pattern applies to Claude Desktop, Cursor, and Windsurf — see Connect an MCP client for the client-specific steps. |
Step 1: Add the MCP server
-
Register the server in Claude Code at user scope so that it is available from any working directory. Replace
https://your-server:portwith the public URL of your instance:claude mcp add --transport http --scope user planet9 https://your-server:port/mcp -
Confirm that the entry was created:
claude mcp listResult: The
planet9server appears in the list and is reported as needing authentication. You have not signed in yet, so no tools are available at this point.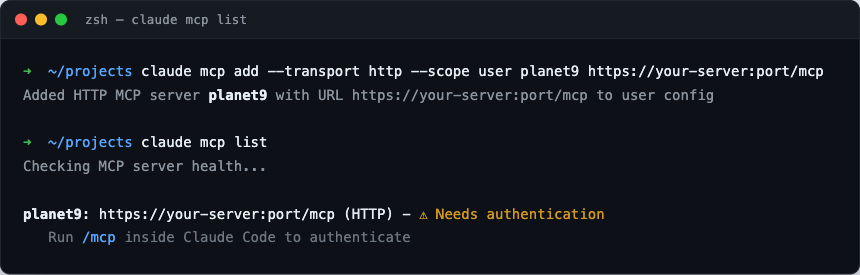 Figure 1.
claude mcp listreports theplanet9server as needing authenticationThe URL scheme must match how the server actually runs. Use
http://only for a local HTTP instance andhttps://only for an instance that terminates TLS. Pointing anhttps://URL at a plain-HTTP server (for examplehttps://localhost:8080while the server runs on HTTP) does not raise an error in Claude Code; the connection just never completes. The mismatch is only visible in the server log:info: SameSite:None can only be set for cookies when running on HTTPS. HTTPS is not enabled, reverting to StrictThe same rule applies to the server’s own MCP Public URL setting (config field
mcpPublicUrl): its scheme must match the server’s protocol. For local development leave it empty or set it to thehttp://URL. Set anhttps://value only when SSL is enabled or a TLS-terminating reverse proxy sits in front. A scheme mismatch there is now logged as awarnat startup.User scope keeps the server available from every directory. If you add it at the default localscope, it only appears when you run Claude Code from the directory where you added it. See Connecting an MCP client → Choosing a scope for the differences.
Step 2: Authorize the connection
The MCP server uses a one-time, browser-based authorization flow. Claude Code
starts it automatically on the first tool call. You can also start it manually
by running the /mcp slash command inside Claude Code and selecting the planet9
server.
When the flow starts:
-
Your default browser opens on the Neptune DXP - Open Edition sign-in page. Sign in with your credentials.
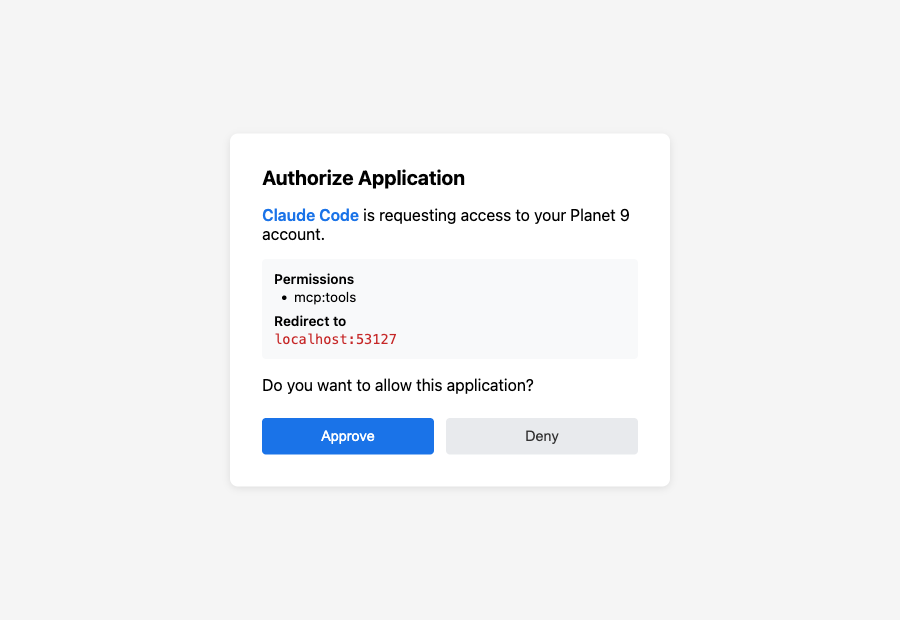
Result: A consent page is shown. It lists the requesting client, the requested scope (
mcp:tools), and the local redirect URL. -
Review these values and select Approve.
Result: After you approve, the browser shows a success page and Claude Code reports that the connection is live.
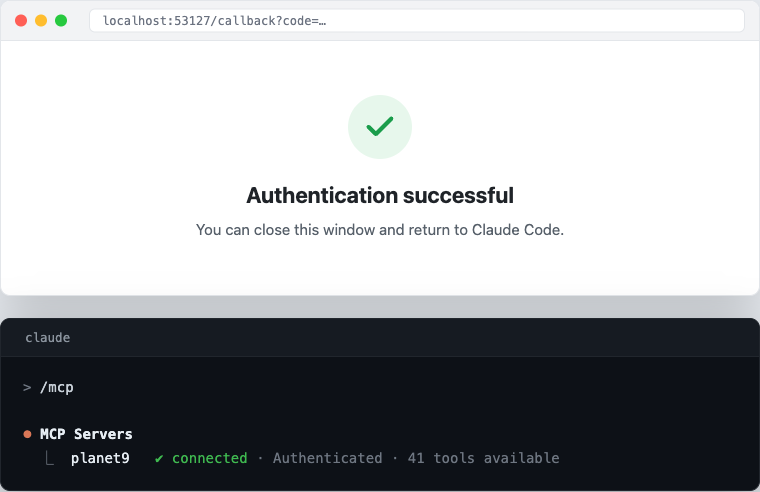
Result: After you approve, the browser shows a success page and Claude Code reports that the connection is live.
The access token is issued automatically. You do not configure any token or secret manually.
The access token is valid for one hour and is refreshed automatically. You only repeat this browser step if the refresh token expires or access is revoked. The full token model is described on the Authorization page.
Step 3: Verify the connection
Confirm that tools are reachable before you create anything. In Claude Code, enter:
list all appsResult: Claude Code invokes the list_apps tool and returns the applications
visible to your account, scoped to the packages your roles grant access to.
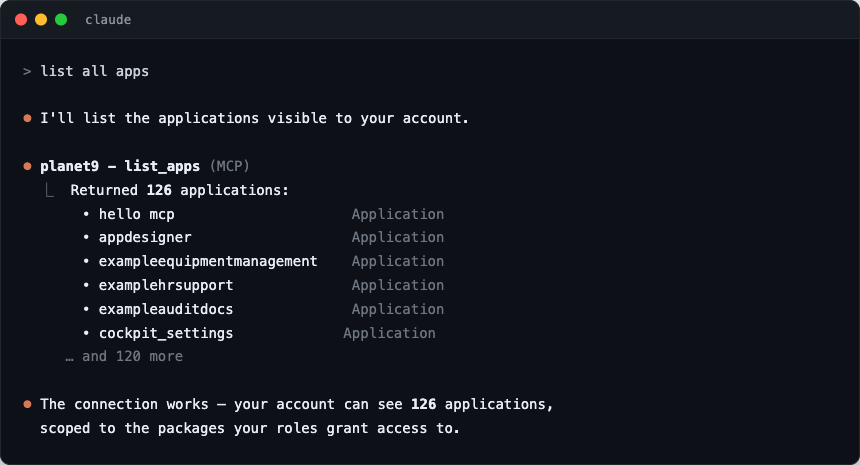
On a freshly built instance this list may be short. What matters is that the call succeeds and returns a result rather than an error.
If the call returns an access-denied error instead, your account is missing the
appdesigner role. See Troubleshooting → A tool returns an access denied error.
Step 4: Create your first application
Create an artifact with a single instruction. In Claude Code, enter:
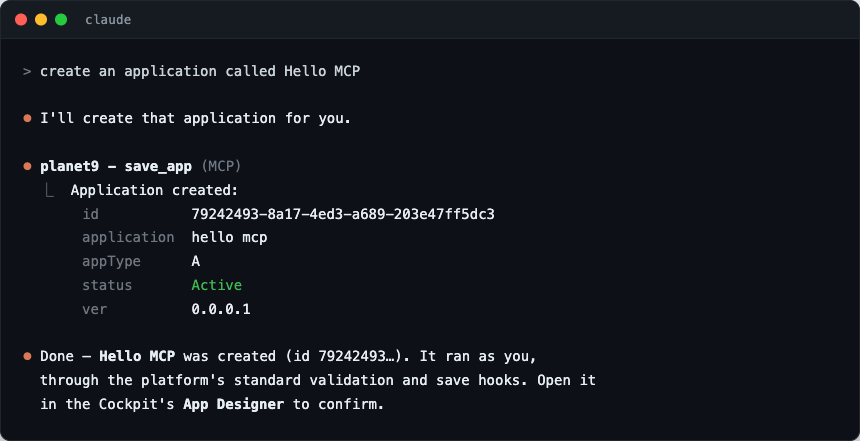
create an application called Hello MCPResult: Claude Code invokes the save_app tool with Hello MCP as the application
name. The action runs as you, the signed-in user, and passes through the platform’s
standard validation, access-control, and save hooks — exactly as if you had created
the application in the Cockpit.
On success, the tool returns the new application’s record, including its generated id.
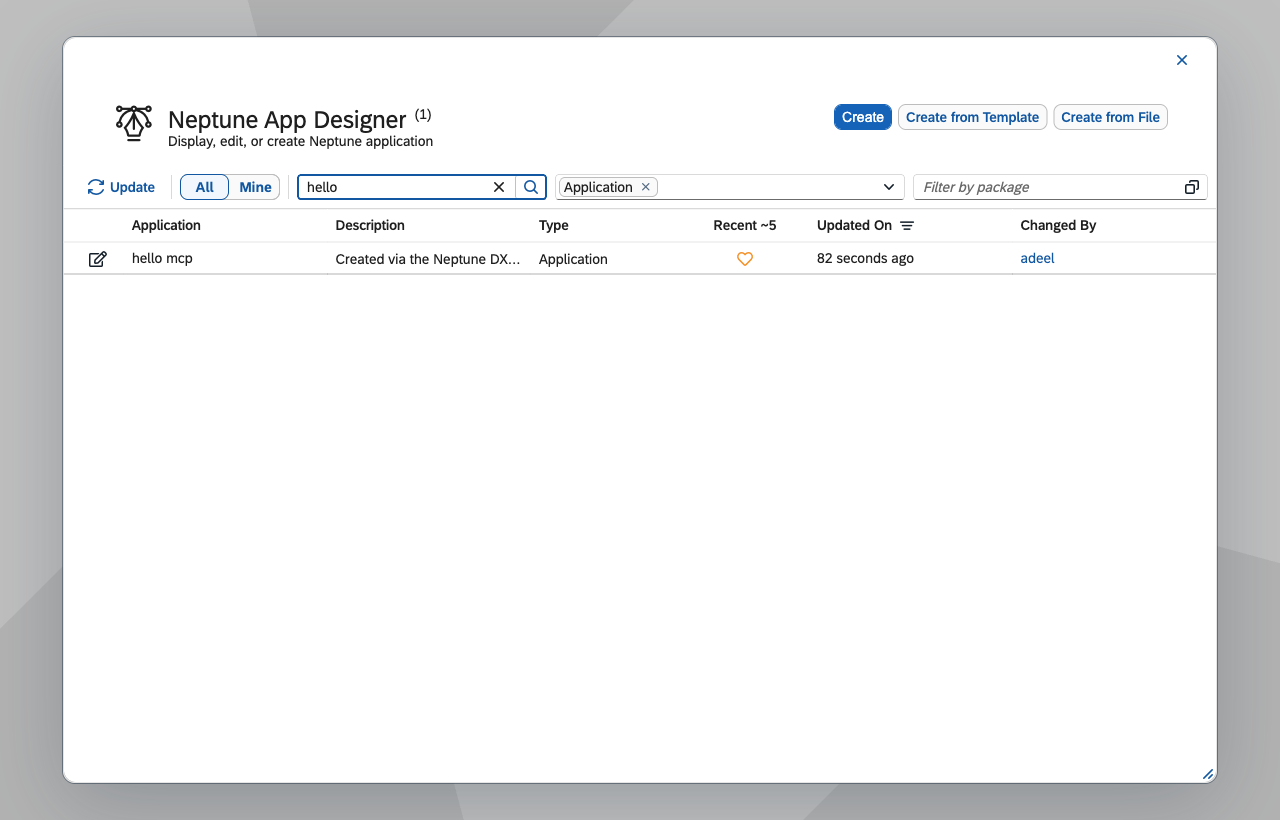
Step 5: Confirm in the Cockpit
Open the Cockpit, go to the App Designer, and search for Hello MCP.
Result: The application you created through Claude Code appears in the list, governed by the same rules as any artifact created in the Cockpit.
You now have a verified MCP connection and a real artifact created from natural language. From here you can ask Claude Code to update the application, add others, or work with different artifact types.
Troubleshooting
These are the following problems reported most often on new setups. For the full reference, see Troubleshooting.
mcp returns 404 or Claude Code reports the endpoint does not exist
The MCP route is not mounted, usually because mcpPublicUrl is invalid or HTTPS
is missing in production.
The connection silently fails on localhost
Almost always a scheme mismatch between mcpPublicUrl and how the server
actually runs.
What’s next
-
Manage more artifact types: The MCP server also exposes web apps, server scripts, adaptive entities, tables, APIs, and packages. See the Available tools overview and the per-artifact reference pages.
-
Understand authorization: Token lifetimes, refresh, and revocation are described in Authorization.
-
Connect a different client: For Claude Desktop, Cursor, or Windsurf, see Connect an MCP client.
-
Resolve connection problems: If a step above did not behave as described, see Troubleshooting.