Example use cases
Let’s show a practical example of utilizing Rules Engine on Neptune DXP - Open Edition for your no-code application.
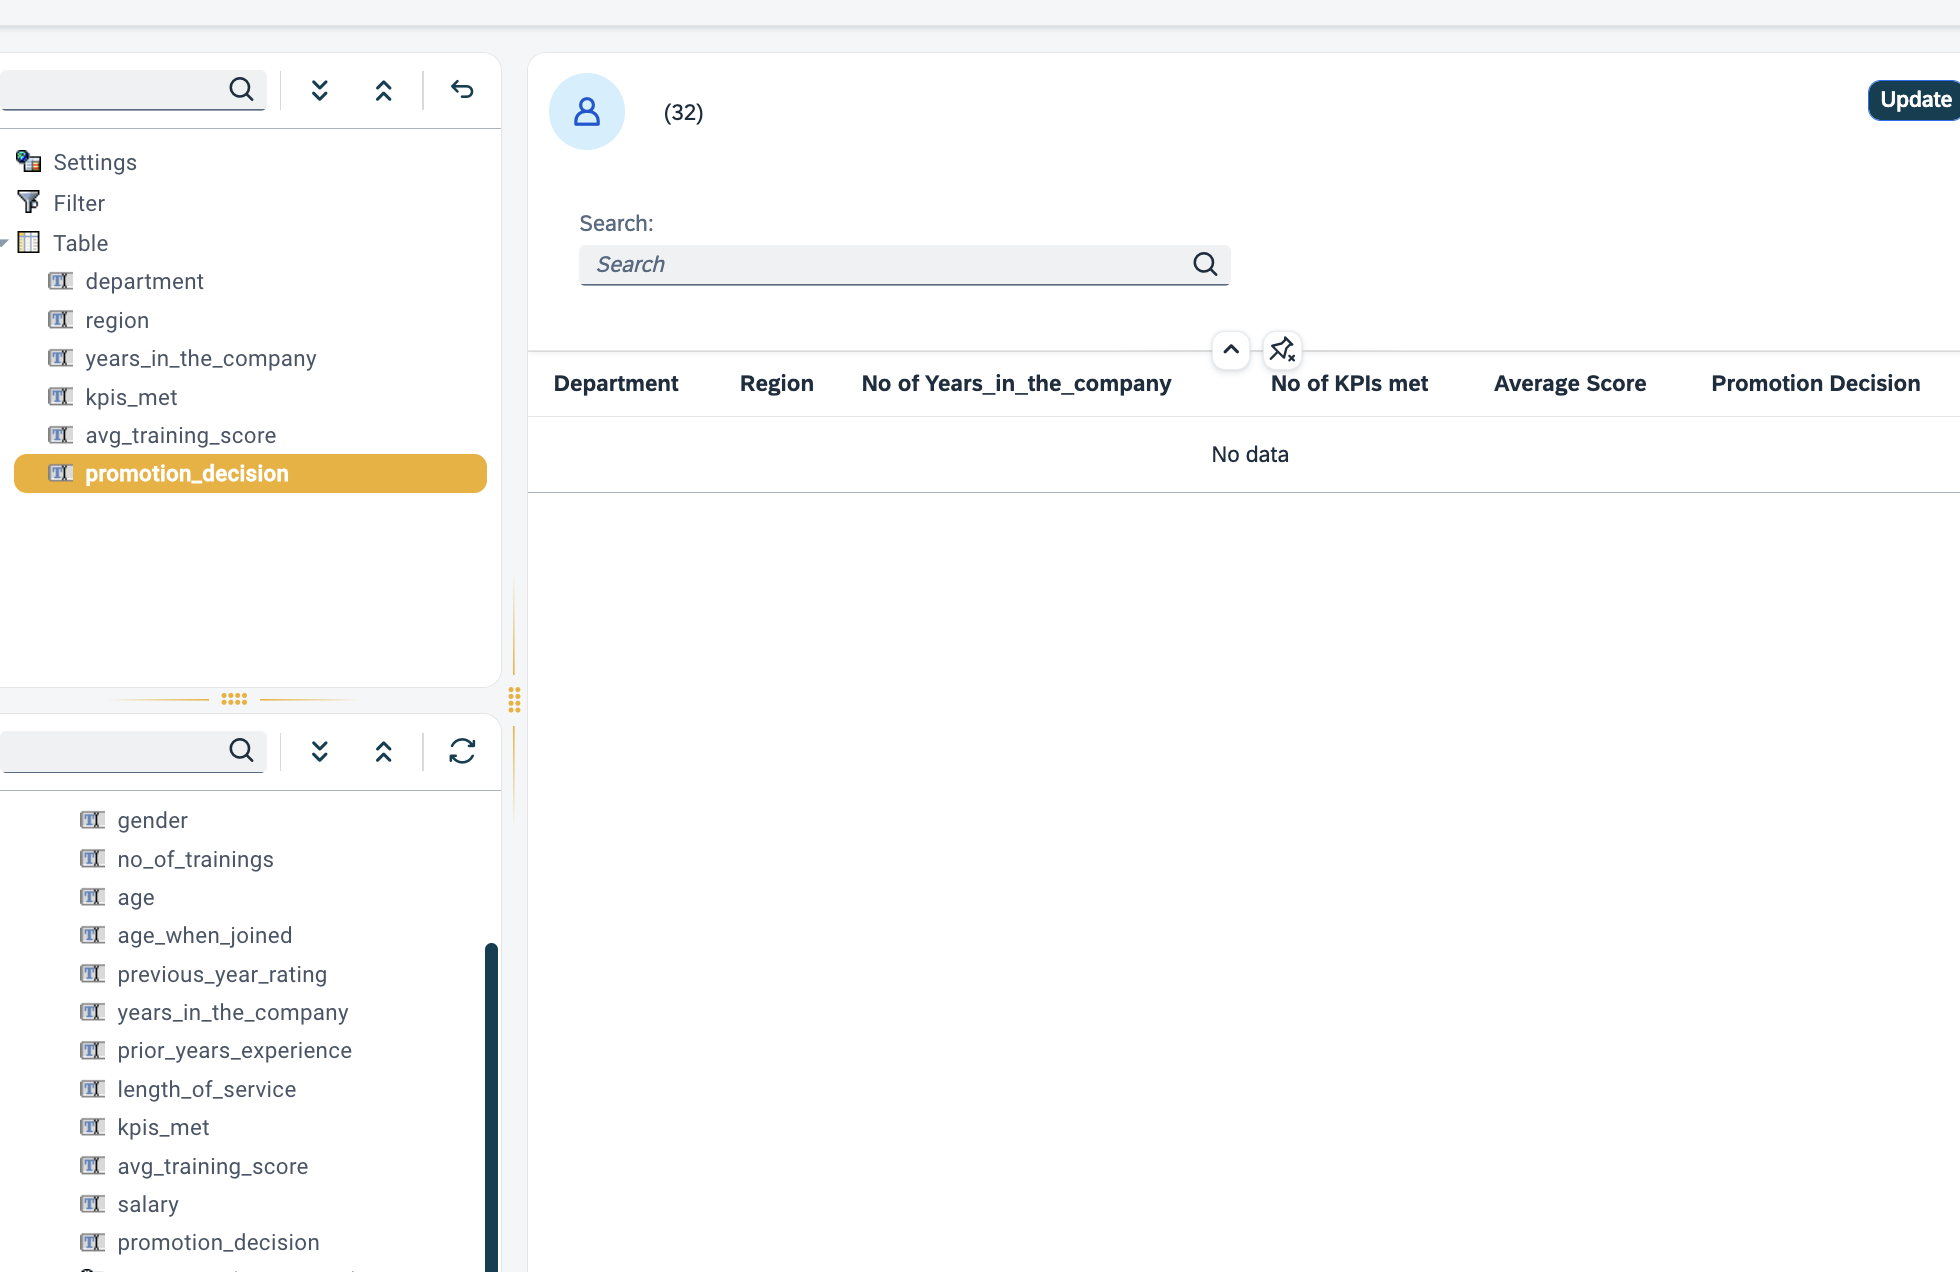
In this use case, we will use sample HR employee data to determine employees who would be promoted based on some rules we set up.
Create the rules
-
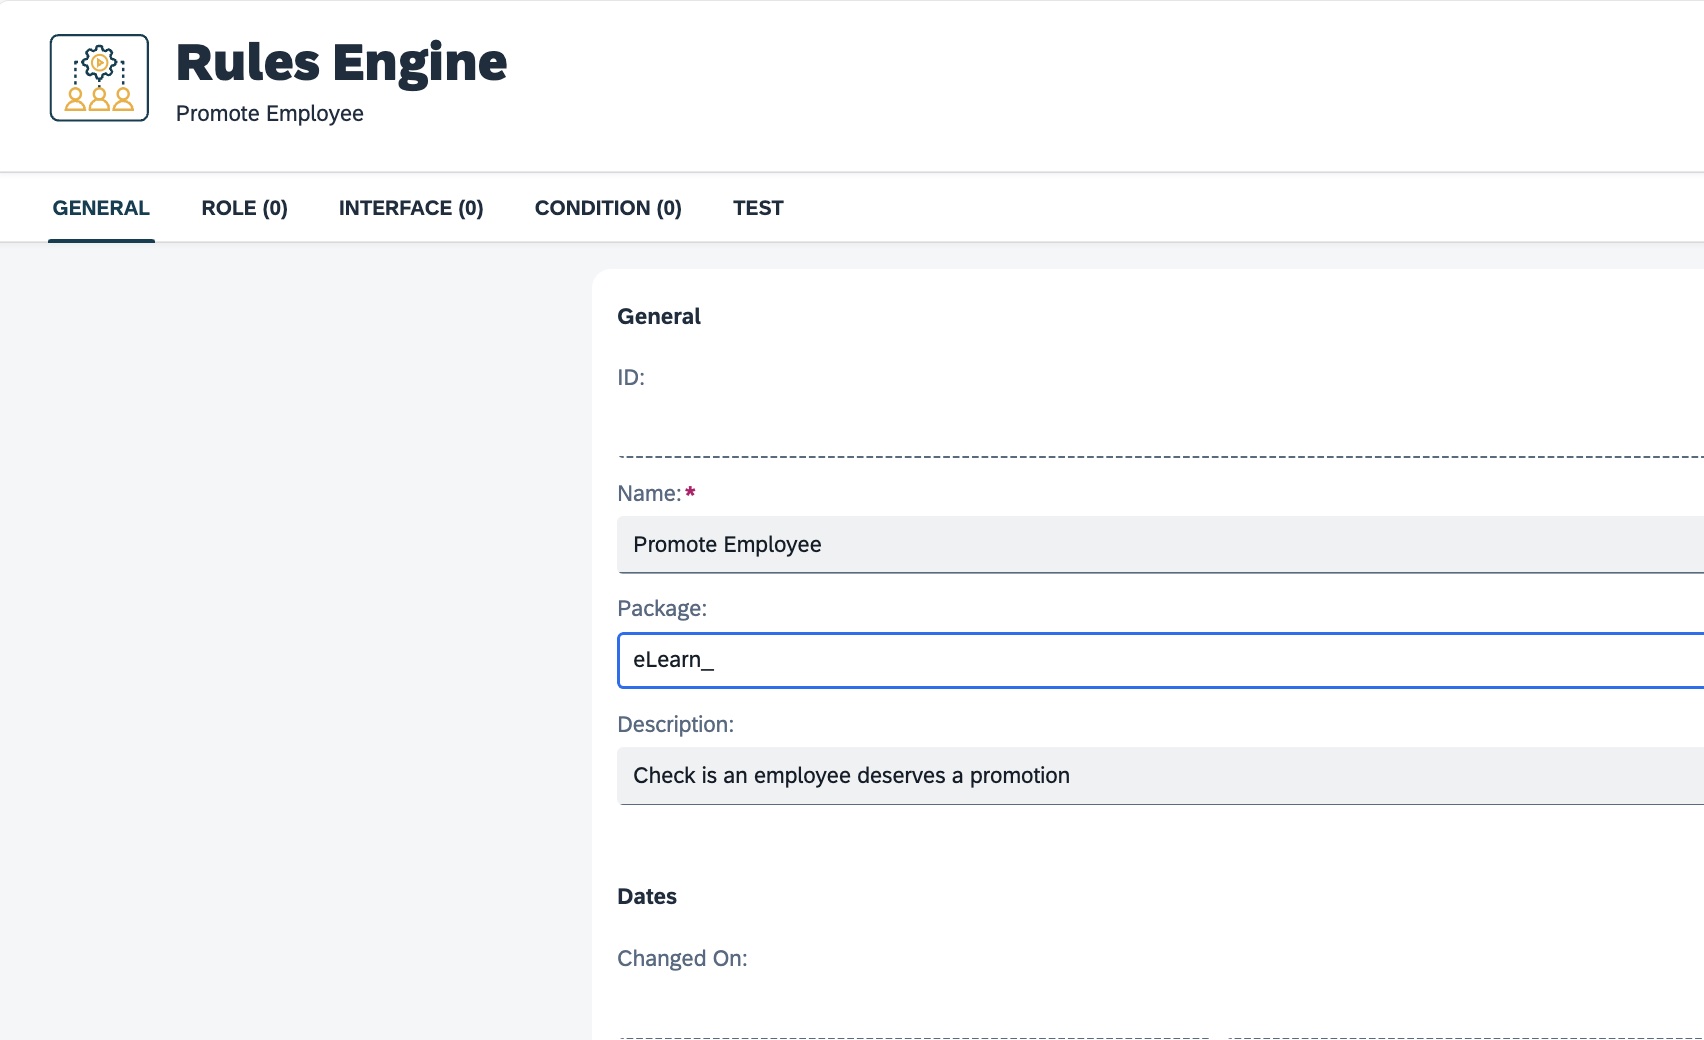
Set up a rule.
-
Create attributes for the rule.
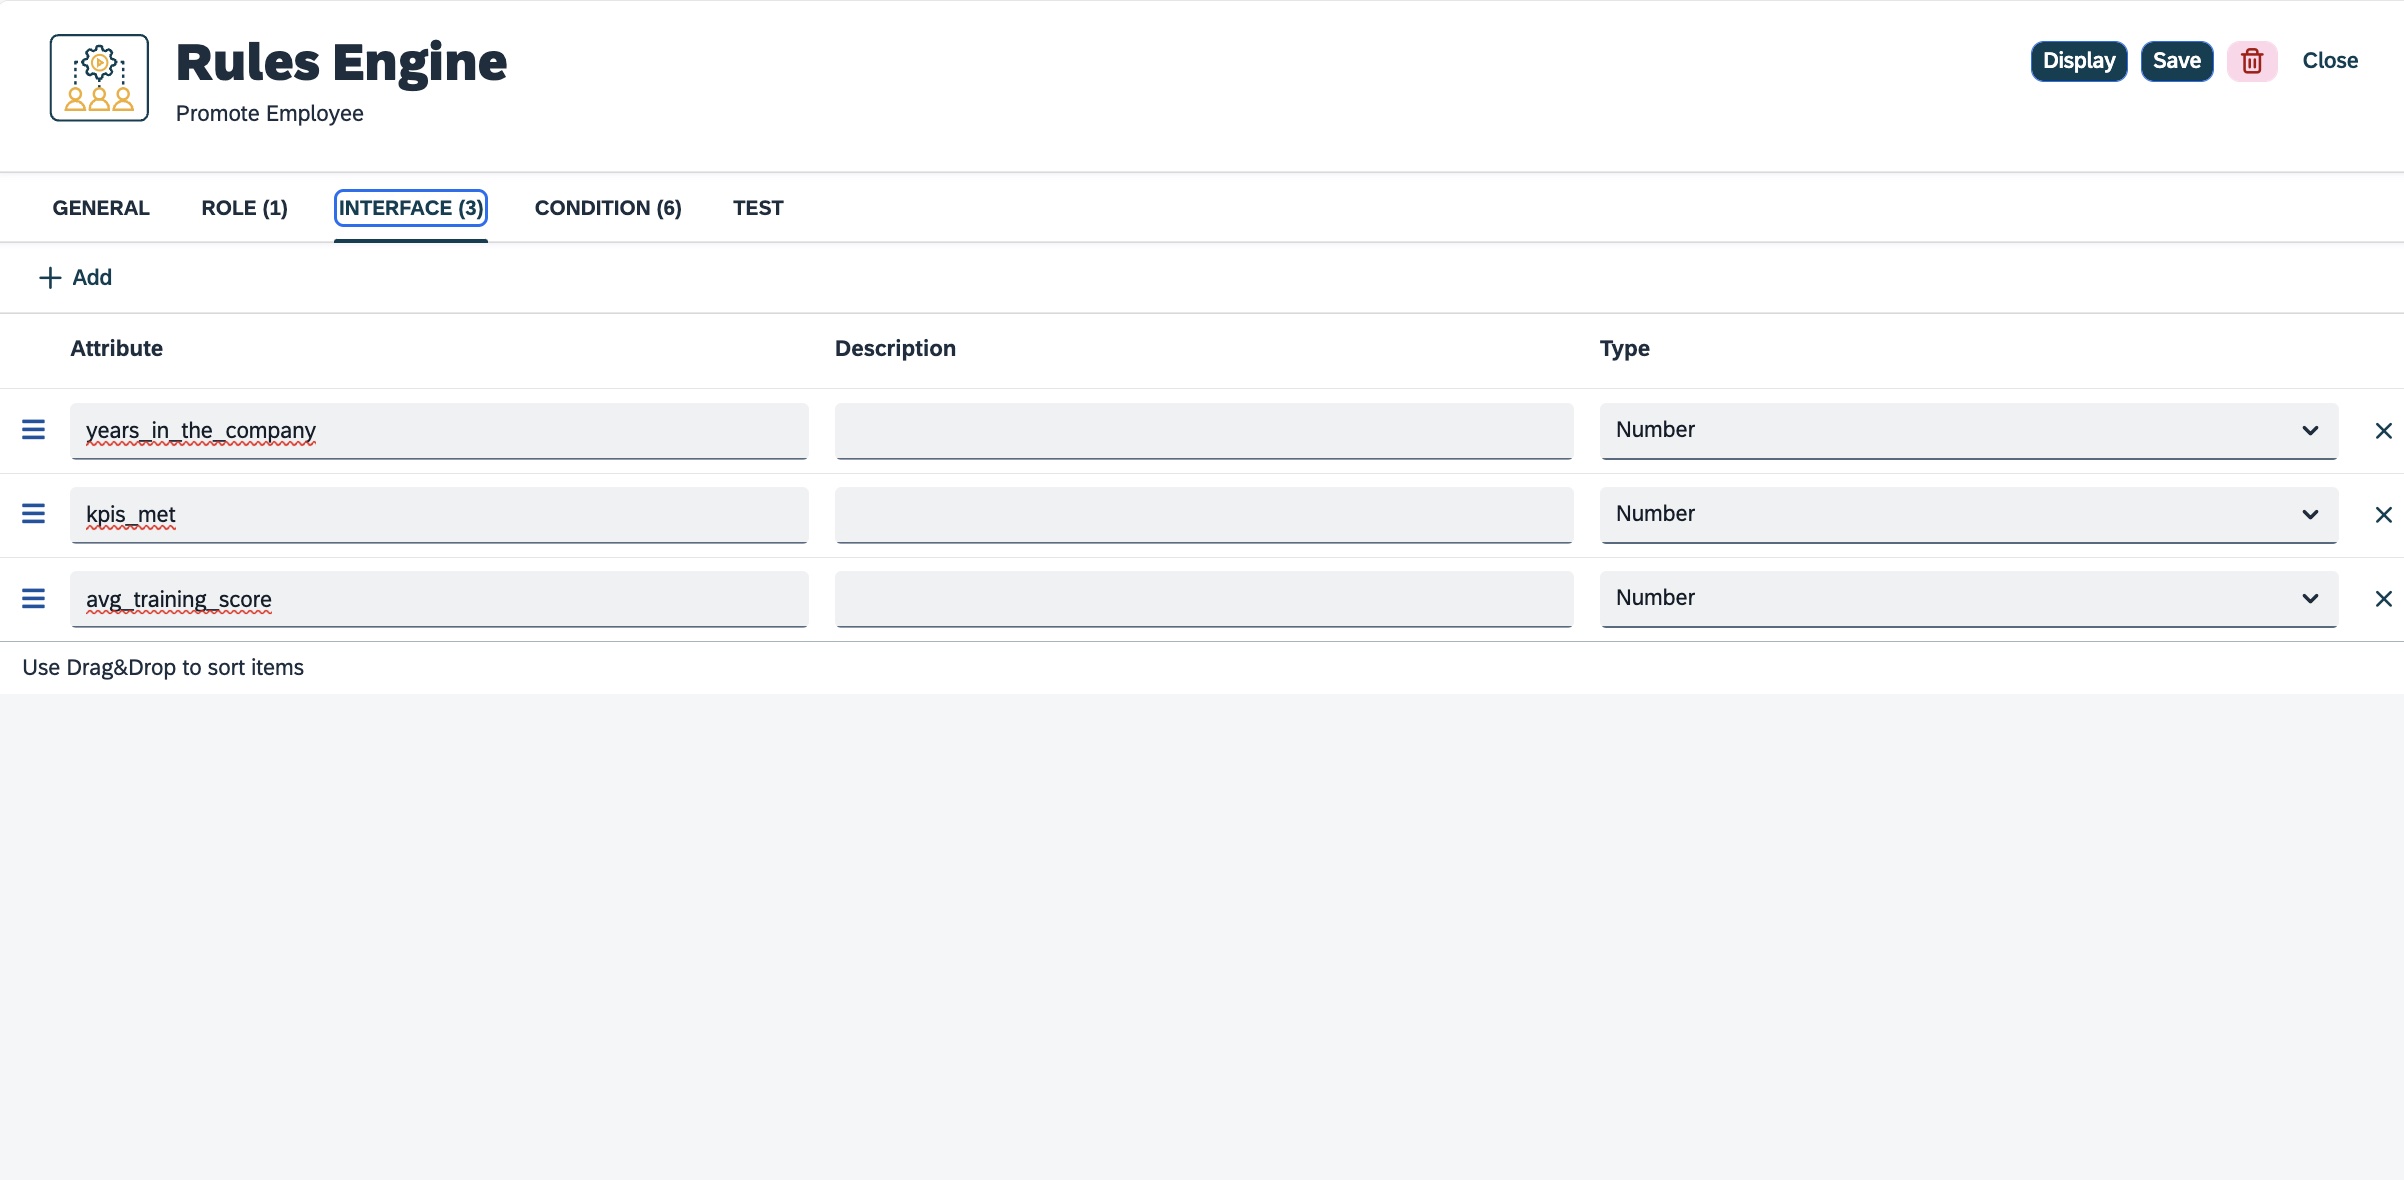
Ensure that the attribute name matches the name of the table column you want to use it for. -
Create a rule with conditions.
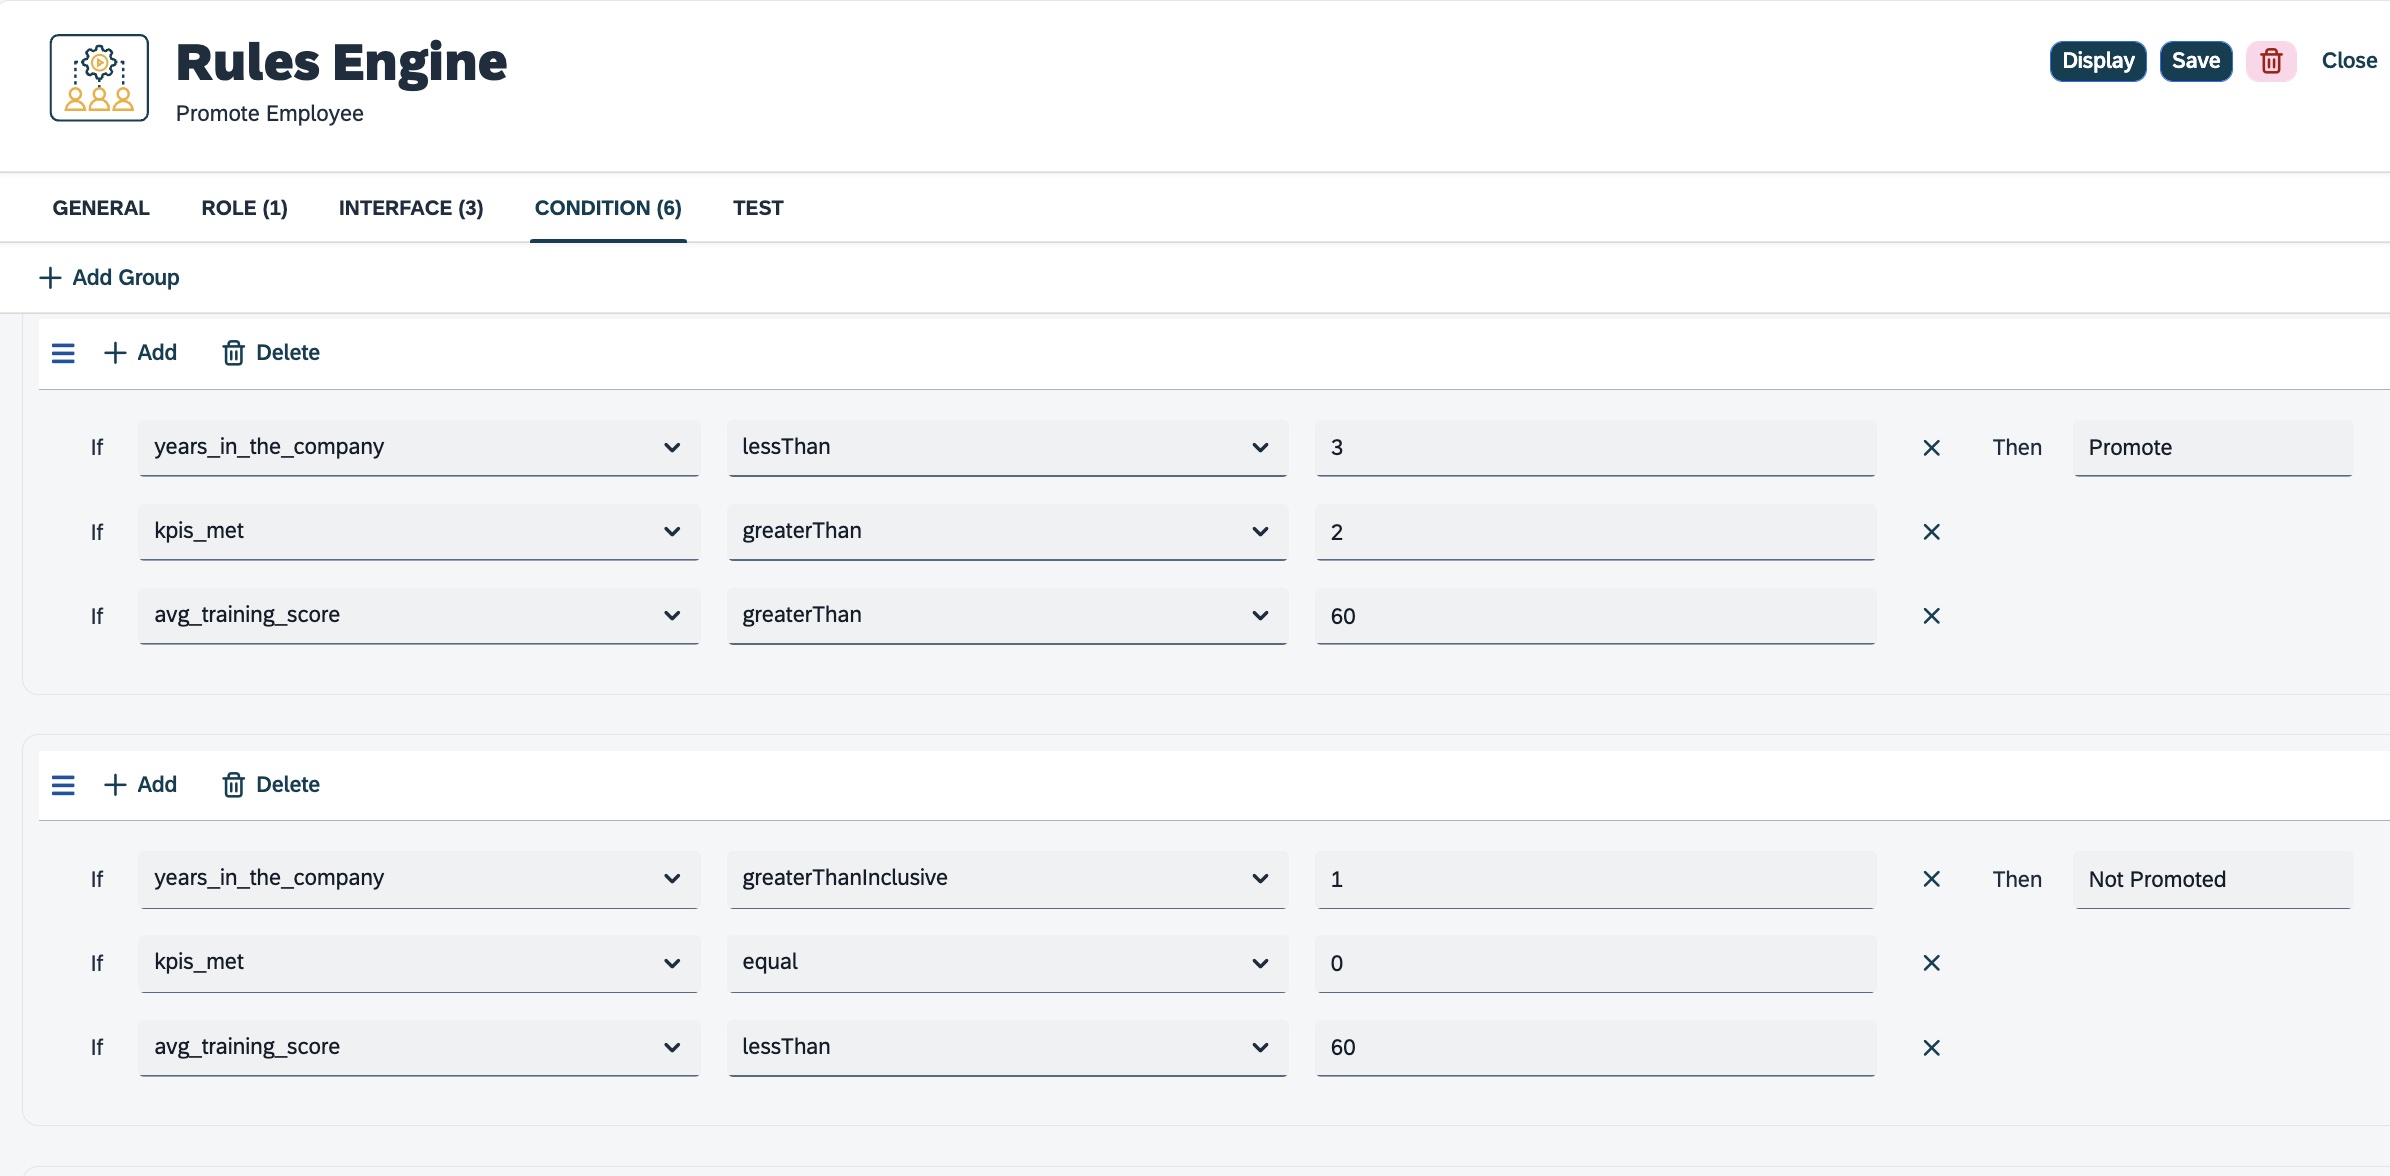
Conditions are in a group function as an AND operation. The result is true if all the conditions are true. -
Test your rule.
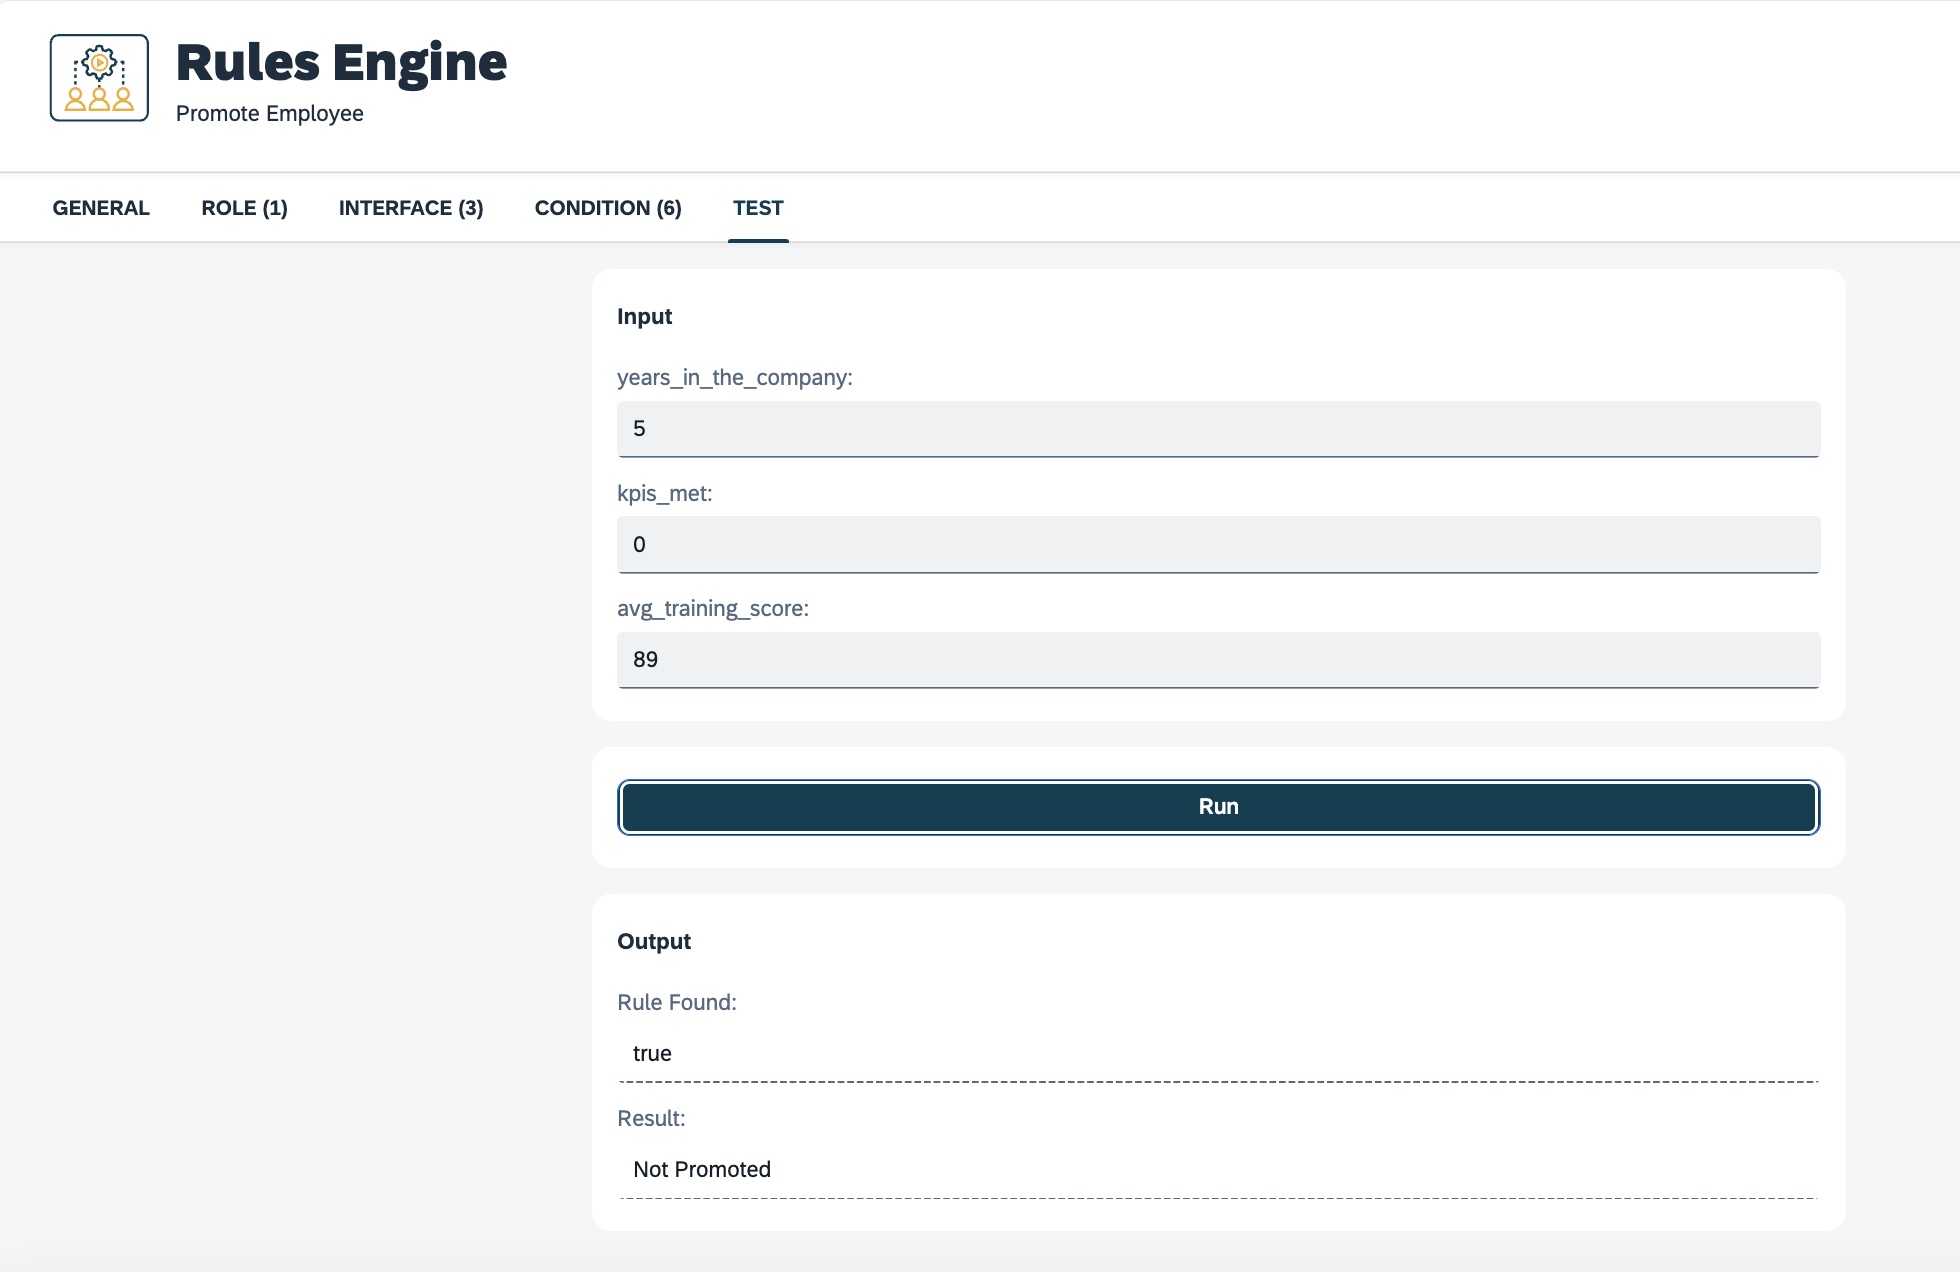
Test with sample data to be sure your conditions are producing the right result.
Add rules to an application based on the adaptive list template in the Adaptive Designer
-
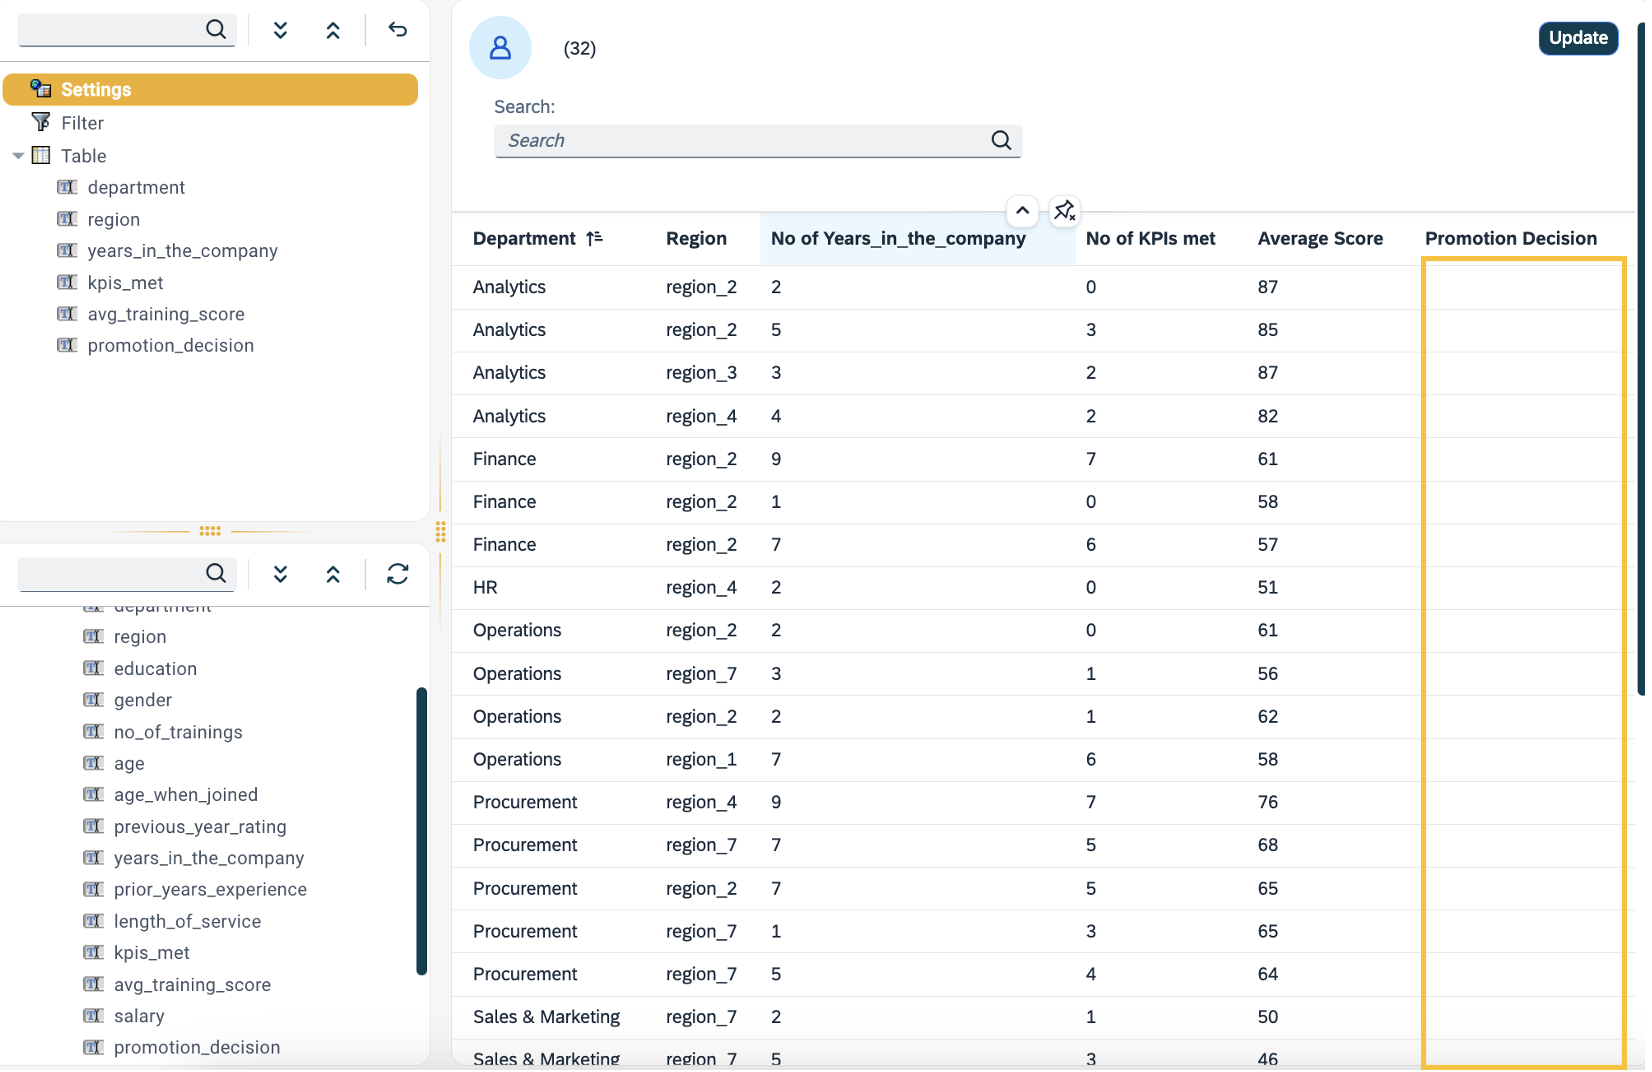
Add the desired columns to the table
See how to set up an Adaptive List app -
Select the column you want to format
-
On the right of the panel, under the value tab, select Rules engine as the source
-
Then, select the Rules you have created.
-
Select Save.
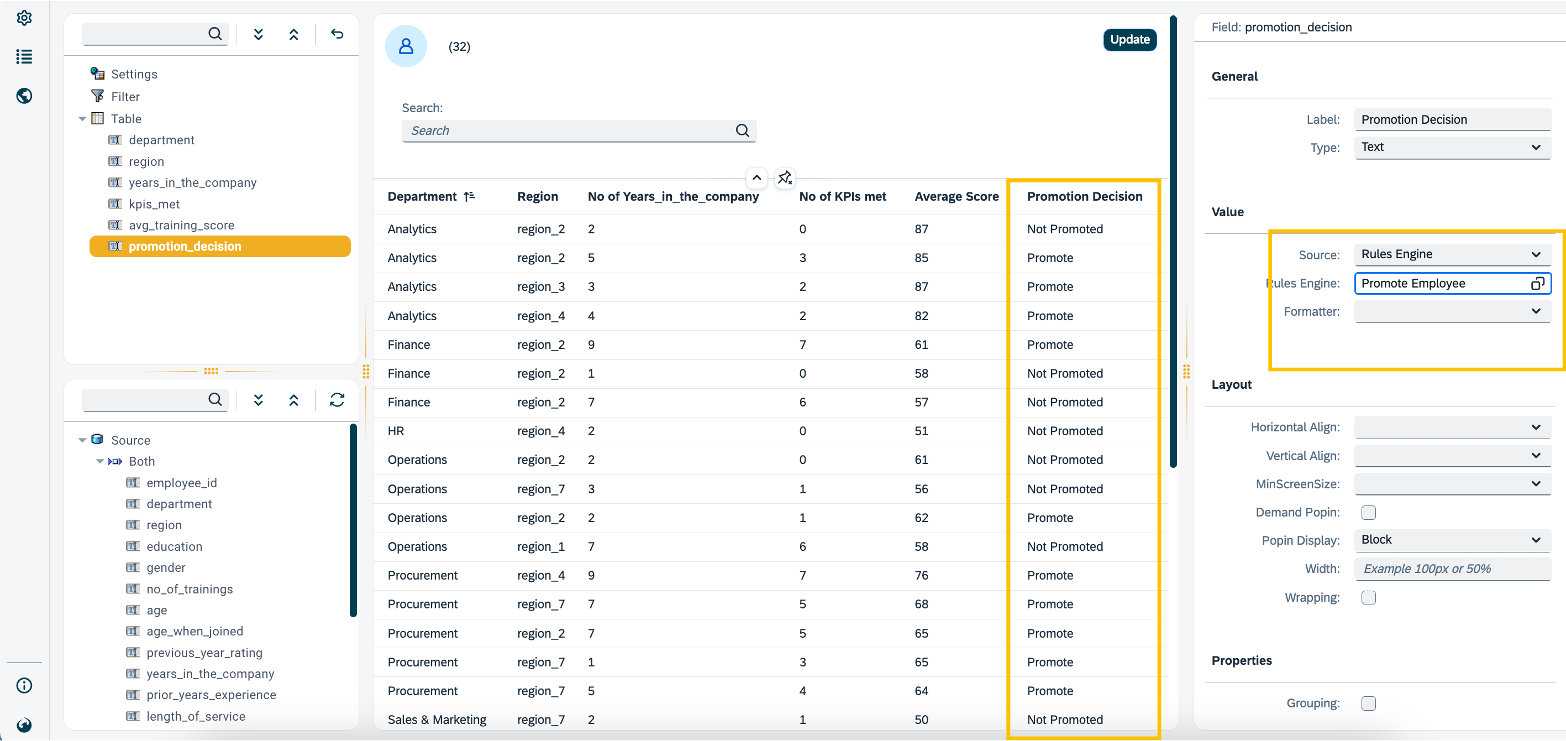
Result:It automatically evaluates the data on your table (attributes on the Rules engine) against the conditions you have in place and shows the results in the selected column.
Add rules to an application in the App Designer using neptune.rulesengine.Rule
-
From the component library add a
neptune.rulesengine.Rulein your Resources. -
Adjust the name from
Ruleto something else. -
Select the rule under Properties from your existing rules made in the Rules Engine.
-
Call the rule:
-
In a JavaScript file:
async function myAsynRule() { await Rules.{componentName}({attribute:value}); } myAsynRule(); -
In an event script:
await Rules.{componentName}({attribute:value});Where attribute is the name of the Attribute located in the Interface tab within the Rules Engine.
-
-
Capture the result of the rule in the ajaxSuccess event of the rule properties:
const ruleResponse = response.result;
console.log(ruleResponse);