Add Microsoft Entra ID authentication to your system
After you have prepared the Azure portal, you can add the Microsoft Entra ID authentication to your Neptune DXP - Open Edition.
Prerequisites
-
You have performed the tasks in the Azure portal.
Procedure
-
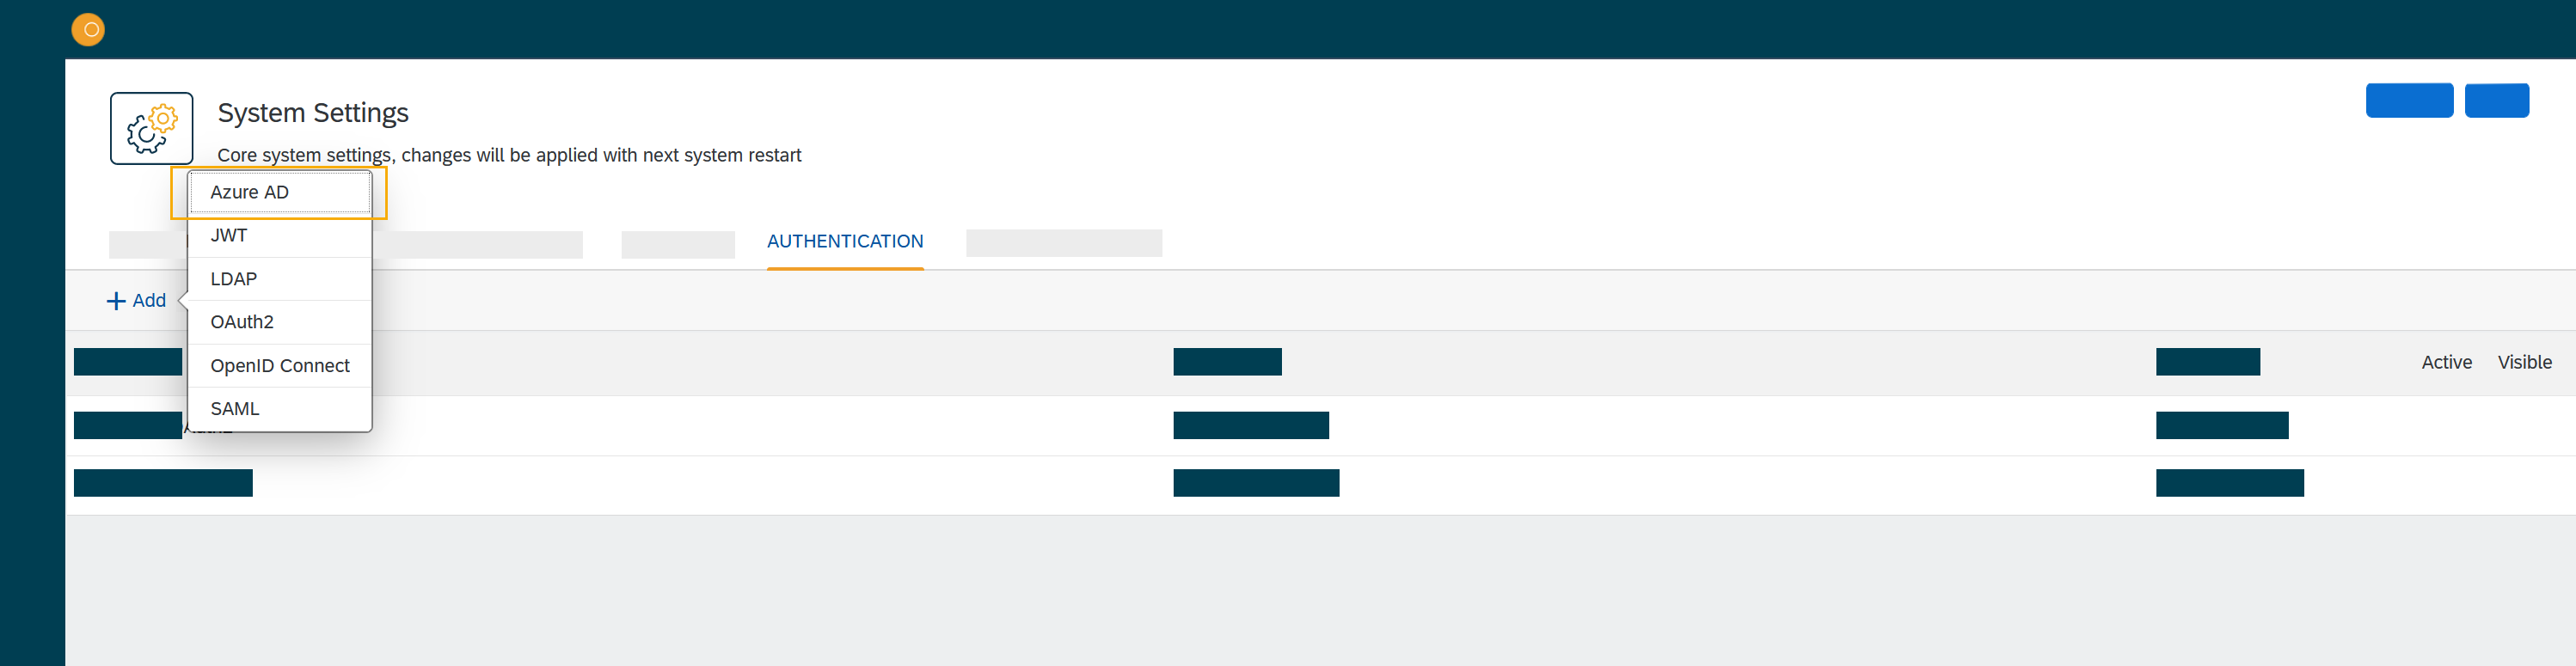
In the DXP - Open Edition Cockpit, go to Settings, and click System Settings.
-
Navigate to the Authentication tab and click Edit.
-
Click + Add and select Microsoft Entra ID.
Result: The Authentication dialog opens.
-
Enter a meaningful Name.
-
Check Active to activate this authentication method.
-
Check Show on Login page to show the login screen on the DXP - Open Edition Session Login Page.
-
Enter a Description.
-
Enter a Path to retrieve a Neptune DXP - Open Edition session (for example, open-edition-ad-bearer). You can add any string as a path.
-
In Identity Metadata, enter a link to a metadata document that contains information required for an app to sign-in.
-
From your Microsoft Entra ID account, enter the Tenant ID of your Neptune DXP - Open Edition.
-
Enter your application’s Client ID from the Azure portal.
-
Enter the Client Secret key that you generated in New client secret in the Azure portal.
-
Additional Scopes
-
Use silent signout in PWA tba
-
Use MSAl v2 tba
-
In Claims Assignment, click Add to add claims assignments.
-
In Auto Assignment, assign roles and departments that are defined in the Azure portal/in your system?
-
In Custom Script, you can enter your custom code.
-
Click OK to save your input.
Result: The Authentication dialog closes.
-
In System Settings, click Restart to activate Microsoft Entra ID authentication.