Configure JSON web token API authentication (JWT)
In this topic, you learn how to set up authentication via a JSON web token (JWT) and how to configure it in your Cockpit. You must perform multiple tasks to enable the connection.
Prerequisites
-
You have registered the Neptune DXP - Open Edition in the Azure portal. Find more information about how to register an app on Microsoft documentation.
-
You know the tenant ID from the Azure Portal for your Neptune DXP - Open Edition.
Procedure
-
In the Cockpit, go to Settings, and click System Settings.
-
Navigate to the Authentication tab and click Edit.
-
Click + Add, and select JWT.
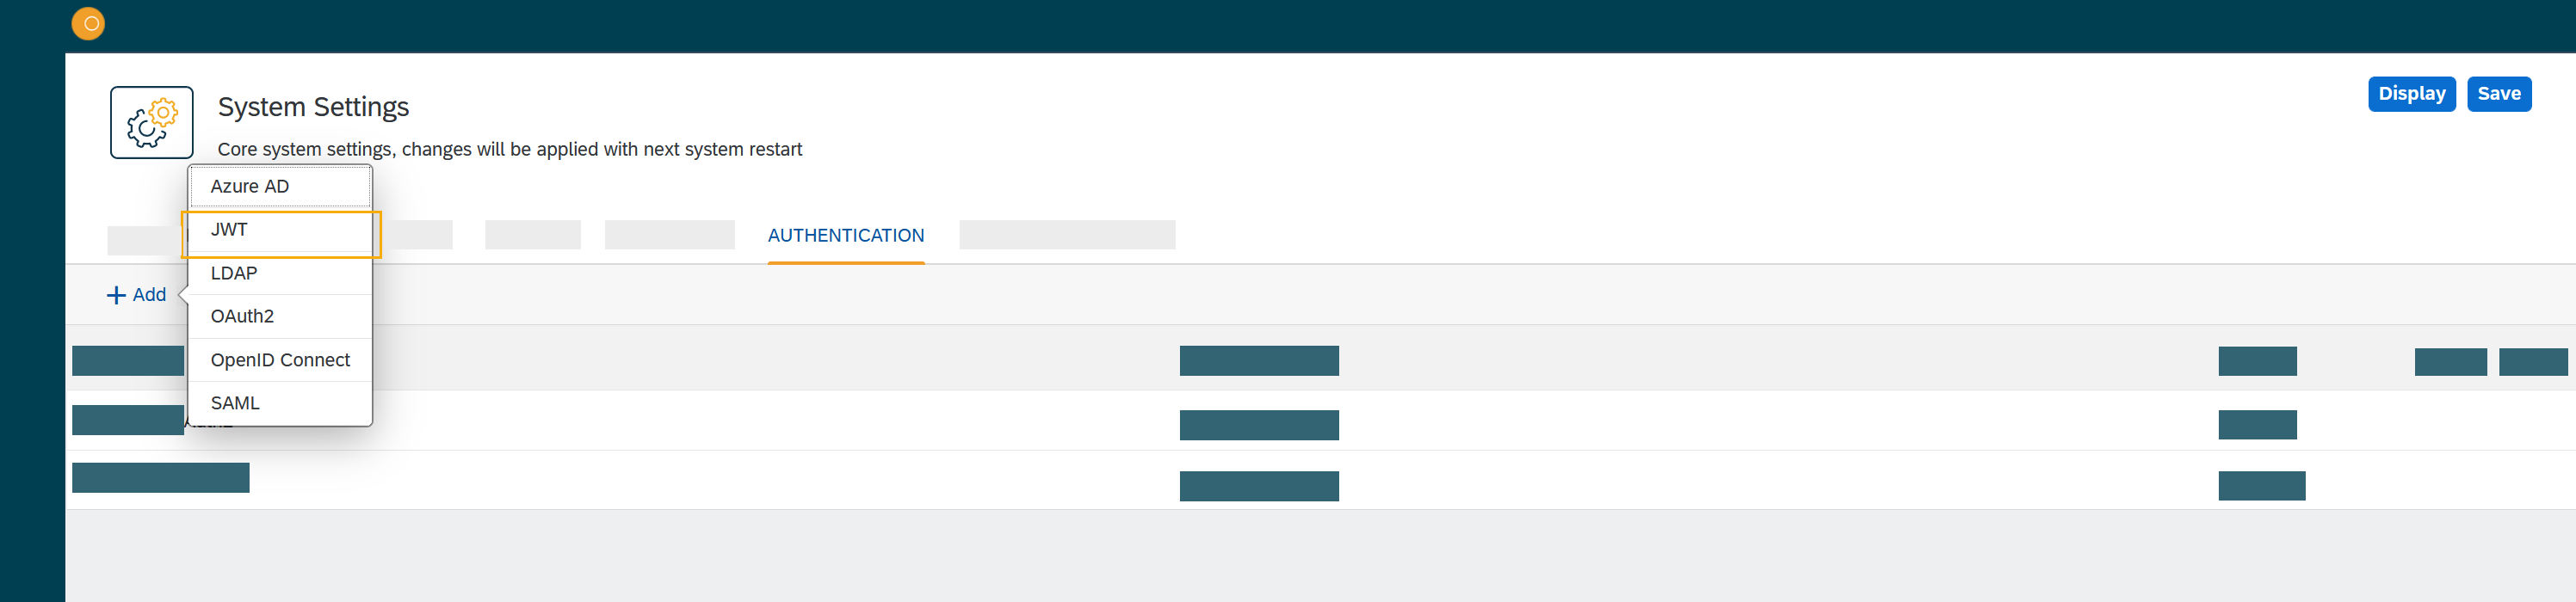
Result: The Authentication window opens.
-
In JWT authentication, fill in or check the following fields:
-
Enter a Name for the authentication.
-
Check Active to activate this authentication method.
-
Enter a Description.
-
Enter a Path to retrieve a Neptune DXP - Open Edition session, for example, /user/logon/jwt/(path). You can add any string as a path.
-
You can add an Issuer validation.
-
You can add an Audience validation.
-
In Secret, add a secret key for the validation if no JSON web key set (JWKS) URL is provided.
- Jwks Url
-
Add the URL that leads to the JWKS. For example:
https://login.microsoftonline.com/<tenantid>/discovery/v2.0/keys
-
In Proxy for jwks urr, add a proxy for your JWKS url, you can add any string.
-
Set a token header field in Override default Jwt Extraction Method - From Authorization Header as Bearer Token
-
In Claims Assignment, click Add to add claims assignments.
-
In Auto Assignment, assign roles and departments from Microsoft Entra ID/from system?.
-
Click OK to save your input.
Result: The Authentication dialog closes.
-
In System Settings, click Restart to activate JSON web token authentication.