Workflow end-to-end example, overview
This guide aims to demonstrate the creation of a workflow and the associated elements that make the workflow functional.
Workflow creation
-
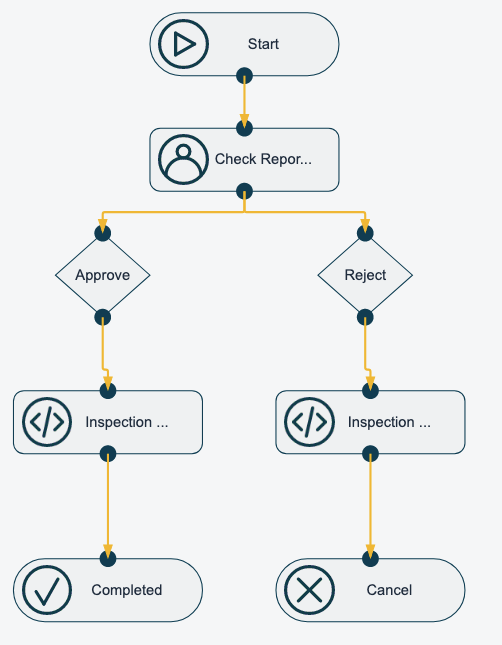
The workflow starts with a start node.
-
The user task, named "Check Report" is a user action in the workflow. This action can either approve or reject the workflow.
-
The properties of the user task include the attributes "approver determination" and "task action".
-
The "approver determination" points to a group of approvers, which can be individual users or roles within the system.
-
The "task action" is a flag that, when matched with an "approver determination," makes the workflow item visible to users in that group.
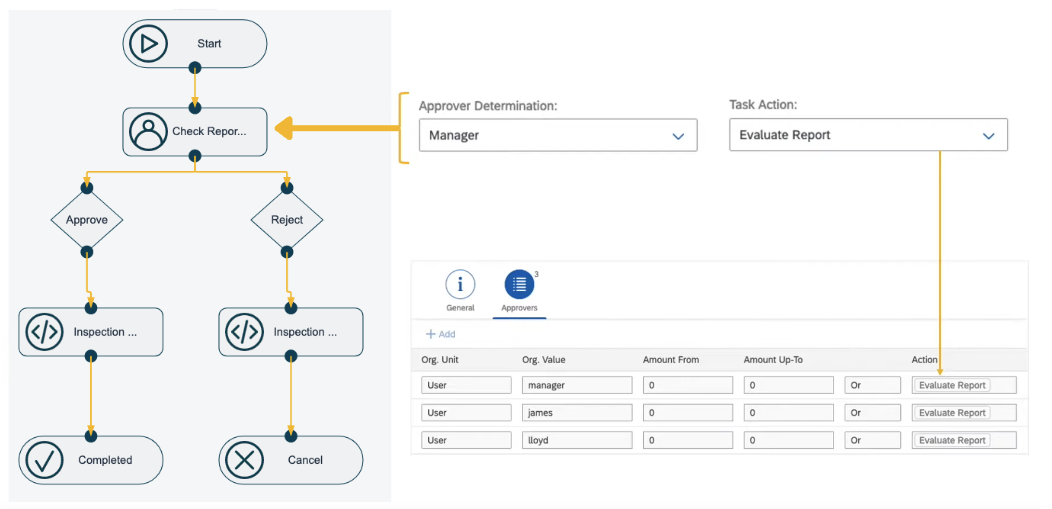
This combination is explained in more detail later in this guide. -
-
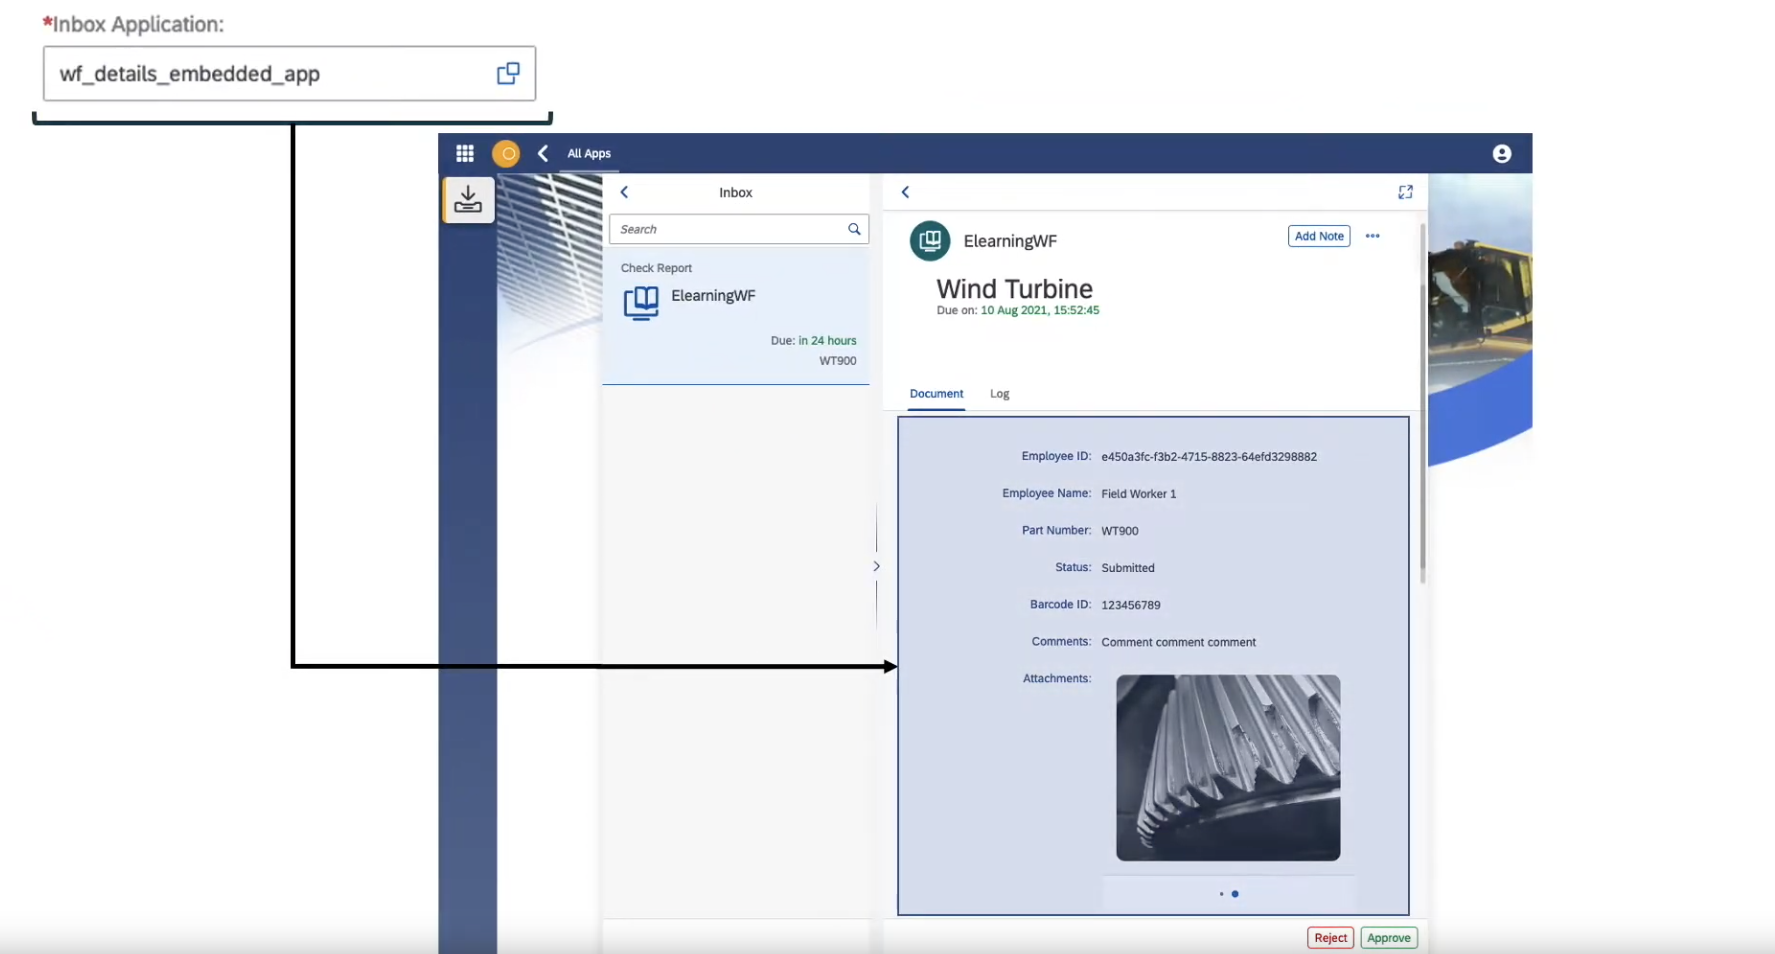
The "inbox application" configured in the User Task is an embedded app that runs inside the workflow inbox app.
-
This is an application you can develop, that can read the data from the workflow item and perform additional logic. In this example, the equipment details are pulled from a table via API based on the equipment code (WT900) stored in the Workflow ObjectKey property.
-
-
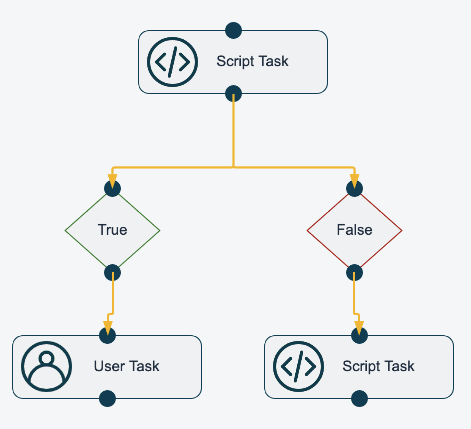
In this workflow example, if approved, the workflow follows a branch to run the "inspection approved" script task. If rejected, it runs the "inspection rejected" script.
Setting up script tasks
-
The workflow uses "inspection approved" and "inspection rejected" script tasks.
-
These scripts point to server scripts that handle the logic for approved and rejected inspections.
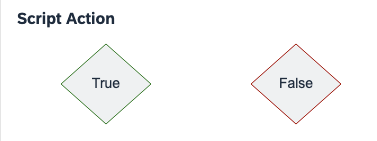
It is also possible to utilise a Server Script (Script Task) with a True or False output, to direct a workflow according to the connected Script Actions.
See Workflow Editor Documentation to understand the wfData.result statement (eg wfData.result = 'False' or wfData.result='True'). This can be used once the script logic has run, to determine the branch which should be taken in the Workflow.
| The Script Action nodes are used for this. |
Remember the 'wfData' property can be used at the start of the script, to understand the context of the workflow data to perform any action.
'wfData'
An example of the wfData, when logged at the start of a server script that is triggered by a workflow, looks like this:
{
    "fromAction": "Approve",
    "id": "61297614-C666-EE11-9937-000D3ADE8894",
    "objectKey": "HIG805202",
    "objectType": "High-frequency vibrating screens",
    "scriptData": null,
    "task": {
        "customApproverScript": "",
        "customerApproverScriptRunSubs": "",
        "daysUntilOverdue": 1,
        "enableApprove": false,
        "enableForward": false,
        "enableNotification": false,
        "enableQuery": false,
        "enableReject": false,
        "enableSave": false,
        "id": "object-77e655ac-cbd6-40e6-8ab8-89961c56dc17",
        "inboxApp": "",
        "runScriptInFork": false,
        "scriptId": "CFF149EF-AD51-4E96-B14C-C62E9A568EE9",
        "scriptTask": "object-118fefbc-9b5e-4f01-8c82-bbd69f36d9ce",
        "scriptTaskType": "Completed",
        "senderEmail": "",
        "subTitle": "",
        "taskAction": "",
        "taskNotification": "",
        "taskType": "ScriptTask",
        "title": "Script Task",
        "userDeterminationLocal": ""
    }
}
Integration of workflow into the app
-
The workflow is integrated into the application using automatically generated code provided by the platform, within the Definition tool of the Workflow tool tile group. This code triggers the workflow.
-
The workflow code consists of defining a wfData object and an AJAX call to the internal API function.
-
Any number of workflow items can be created simultaneously using one workflow definition.
Utilise the Universal Workflow Inbox
The best practice approach to viewing workflow items is to use the Universal Workflow Inbox.
The Universal Workflow Inbox is included by default in the built-in development
package neptunesoftware-dxp-system-artifacts.
|
Use the inbox in your Launchpad and display workflow items assigned to user(s). Or inspect it to customise it to your unique process needs.
This inbox shows only workflow items that the logged in user should see. User Tasks with the Approver Group containing the logged in user, with the associated Task Flag, will be visible.
Depending on the configured workflow, the Universal Workflow Inbox will automatically reflect the correct buttons/actions that are available. EG: If your User Task only has an Accept node and has "Enable Forward" set to true, only these two buttons will be visible for the user to interact with.
The Workflow Overview tool has all the Approve, Reject and Forward options available for all workflow items, regardless of the connected nodes.
Approver groups, task actions combined
Approver determination
-
This is a mechanism to specify which group of users (or roles) can act on a particular User Task.
-
It points to a group of approvers, which can be individual users or roles within the system.
Task action
-
Task Action is a specific flag or attribute associated with a User Task.
-
It determines the kind of action a user can take on a workflow item when it reaches the User Task. A User Task might have the option to "approve" or "reject" an item.
-
When matched with an approver determination, the workflow item becomes visible to users within the designated approver group who have the specified task action.
Combination logic
-
When a workflow reaches a User Task, the system checks the "approver determination" to identify the group of users who can act on it.
-
Within this group, only those users who have the specified "task action" will see the workflow item and be able to act on it.
-
For instance, if a User Task has an "approver determination" set to a "managers" group and a "task action" set to "approve inspection," only managers with the "approve inspection" action will see and be able to approve the inspection.
Enable Forward and enable Query
Each User Task has the option to 'Enable Forward' or 'Enable Query'.
These settings make these buttons visible:

And each actions their own respective dialog:
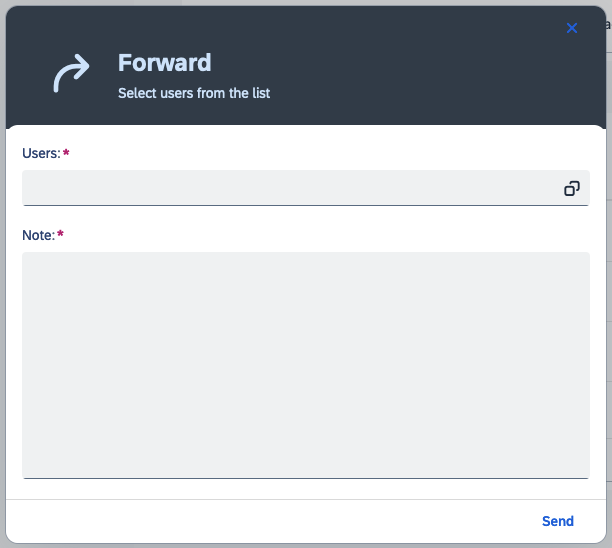
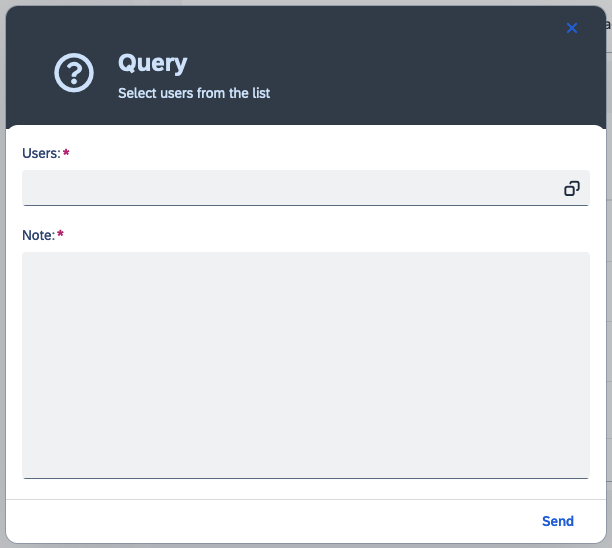
Which allows the user to select one or more other users, along with leaving a note.
Query → For user(s) selected here, they will also be assigned the workflow task and a note is added to the workflow.
Forward → For user(s) selected here, they will be assigned (sent) the workflow task and a note is added to the workflow.