Start a workflow
In this topic, you learn how to start a workflow. To start a workflow, you have to insert a script in your app, into an event - or trigger it via the Code Snippet provided within a Server Script - or start it manually using the 'Workflow Overview' → 'Add' button.
Prerequisites
-
You have created a new workflow in Add a new workflow.
Procedure (Start with Code Snippet)
-
In the Cockpit, go to Workflow and click Definition.
-
Click the button on the right side of your workflow.
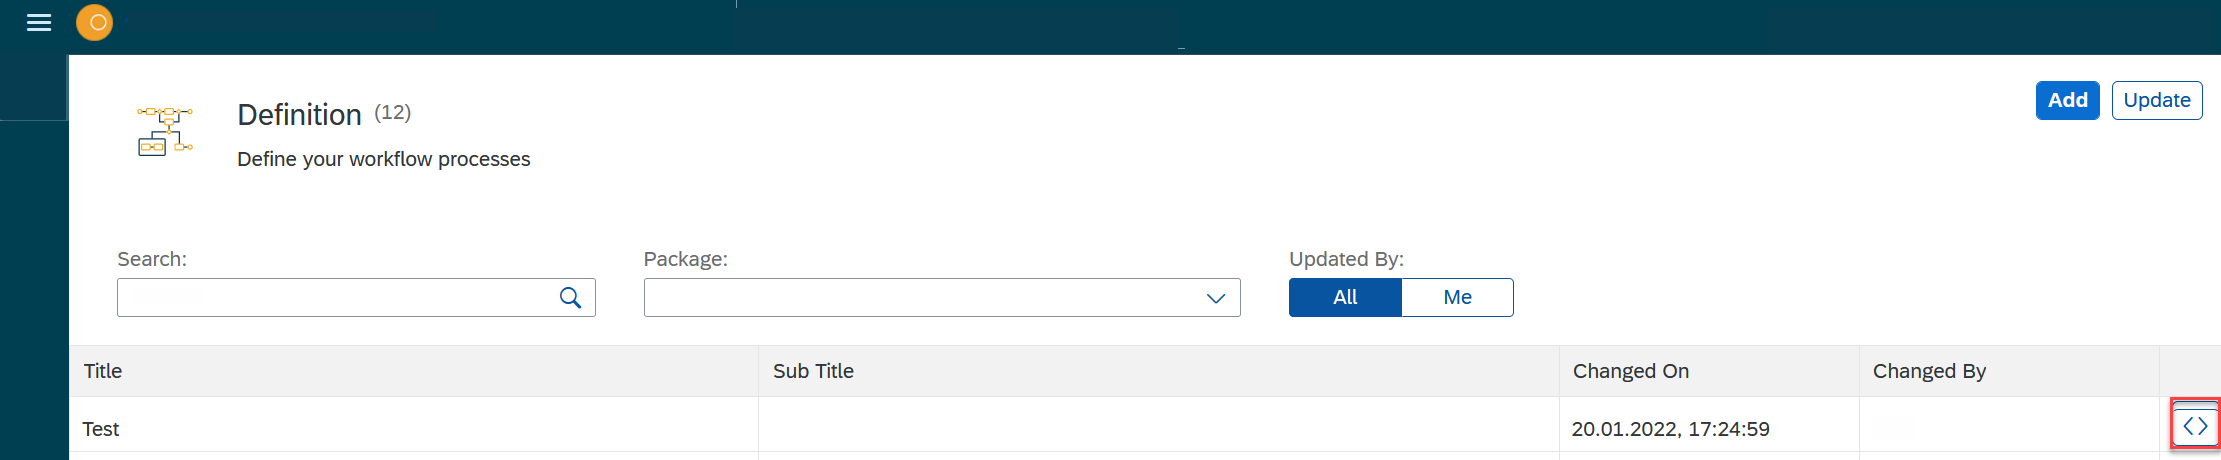
Result: A new window with the server script in
jsonformat opens.
-
Copy the code and insert it where you need it.
-
Run the script.
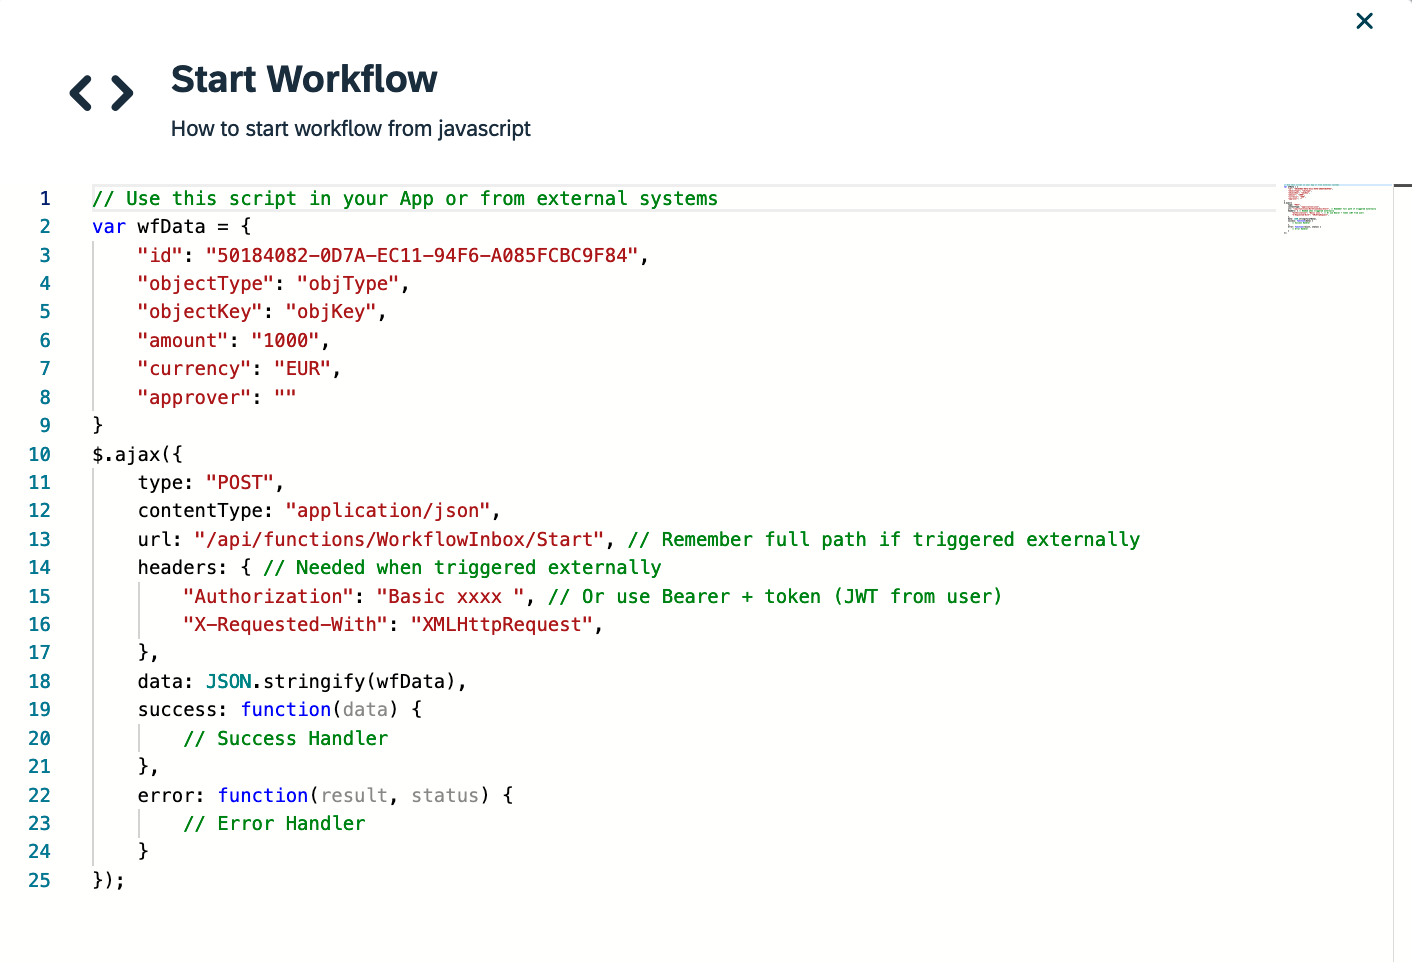
Here is an example of the provided code snippet:
// Use this script in your App or from external systems
var wfData = {
    "id": "c90c723a-682f-ed11-a27c-0050f27989a1",
    "objectType": "objType",
    "objectKey": "objKey",
    "amount": "1000",
    "currency": "EUR",
    "approver": ""
}
$.ajax({
    type: "POST",
    contentType: "application/json",
    url: "/api/functions/WorkflowInbox/Start", // Remember full path if triggered externally
    headers: { // Needed when triggered externally
        "Authorization": "Basic xxxx ", // Or use Bearer + token (JWT from user)
        "X-Requested-With": "XMLHttpRequest",
    },
    data: JSON.stringify(wfData),
    success: function(data) {
        // Success Handler
    },
    error: function(result, status) {
        // Error Handler
    }
});| The wfData variable defined here consists of the Workflow ID, along with a few other properties. 'ObjectKey' and 'ObjectType' are "generic" properties for you to utilise to identify the workflow as unique. 'Amount' can be utilised within the Workflow Approvers tool to direct workflow User Tasks to different people depending on the value. |