Building a simple Form
Prerequisites
-
You are familiar with creating Adaptive Applications
Procedure
The aim of this guide is to build a simple form that is connected to an adaptive application which, can be used in an application.
In this example no Classifications will be utilised.
Creating the Form
-
Open the Neptune Forms Designer, click add to create your form and give your form a meaningful name.
-
Over the Component Tree Section located in the DESIGNER tab, click the Add button to add either a form or a table depending on your layout style
-
Right-click on the parent components to add more elements to your form
Now that you have a simple form built, the following sections will show you how to extend the Neptune Forms capabilities
Fetching Data from Adaptive Applications (Value help)
-
Place a Value Help component in a form or table
-
In Properties, select your Adaptive application and choose a Return Field (this is the property from the selected line which should be used in the input)
In this way, each time you press on the Value Help a dialog will open with the adaptive app running in it. Selecting an entry from that adaptive application will return the selected field

Conditional Visibility
Conditional visibility can be applied either on a parent or child component. To enable it, do the following:
-
Click on the component you wish to hide or show
-
At Conditional Visibility over the Settings and Properties Panel choose which component you wish to trigger this feature depending on its value
-
Select an Operator and a Value
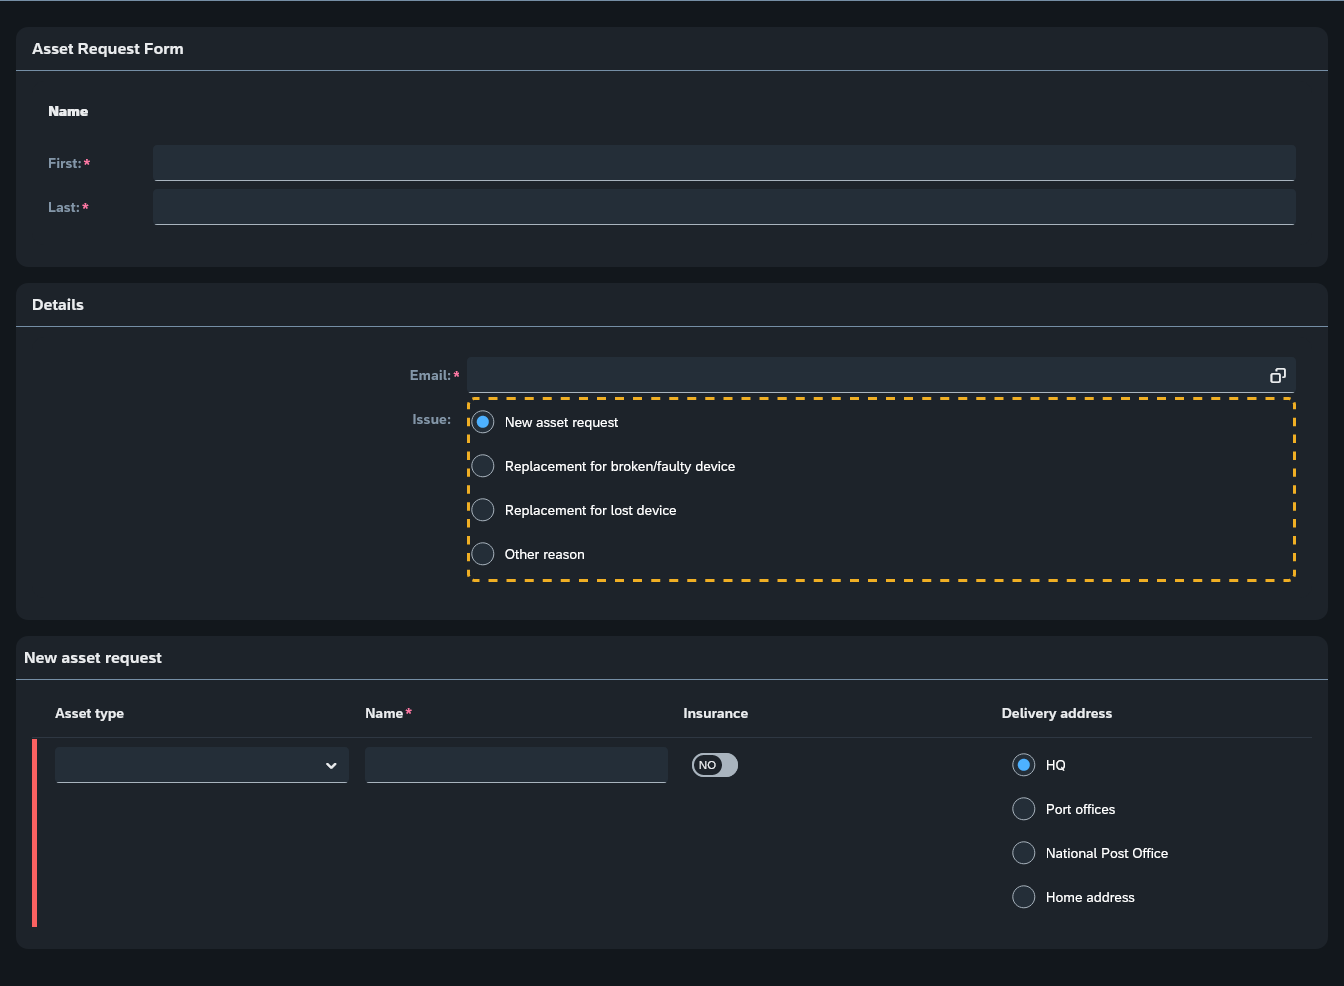
In this example, a table will appear if at the Single Select someone chooses the first item which is New asset request
Selecting the first item:
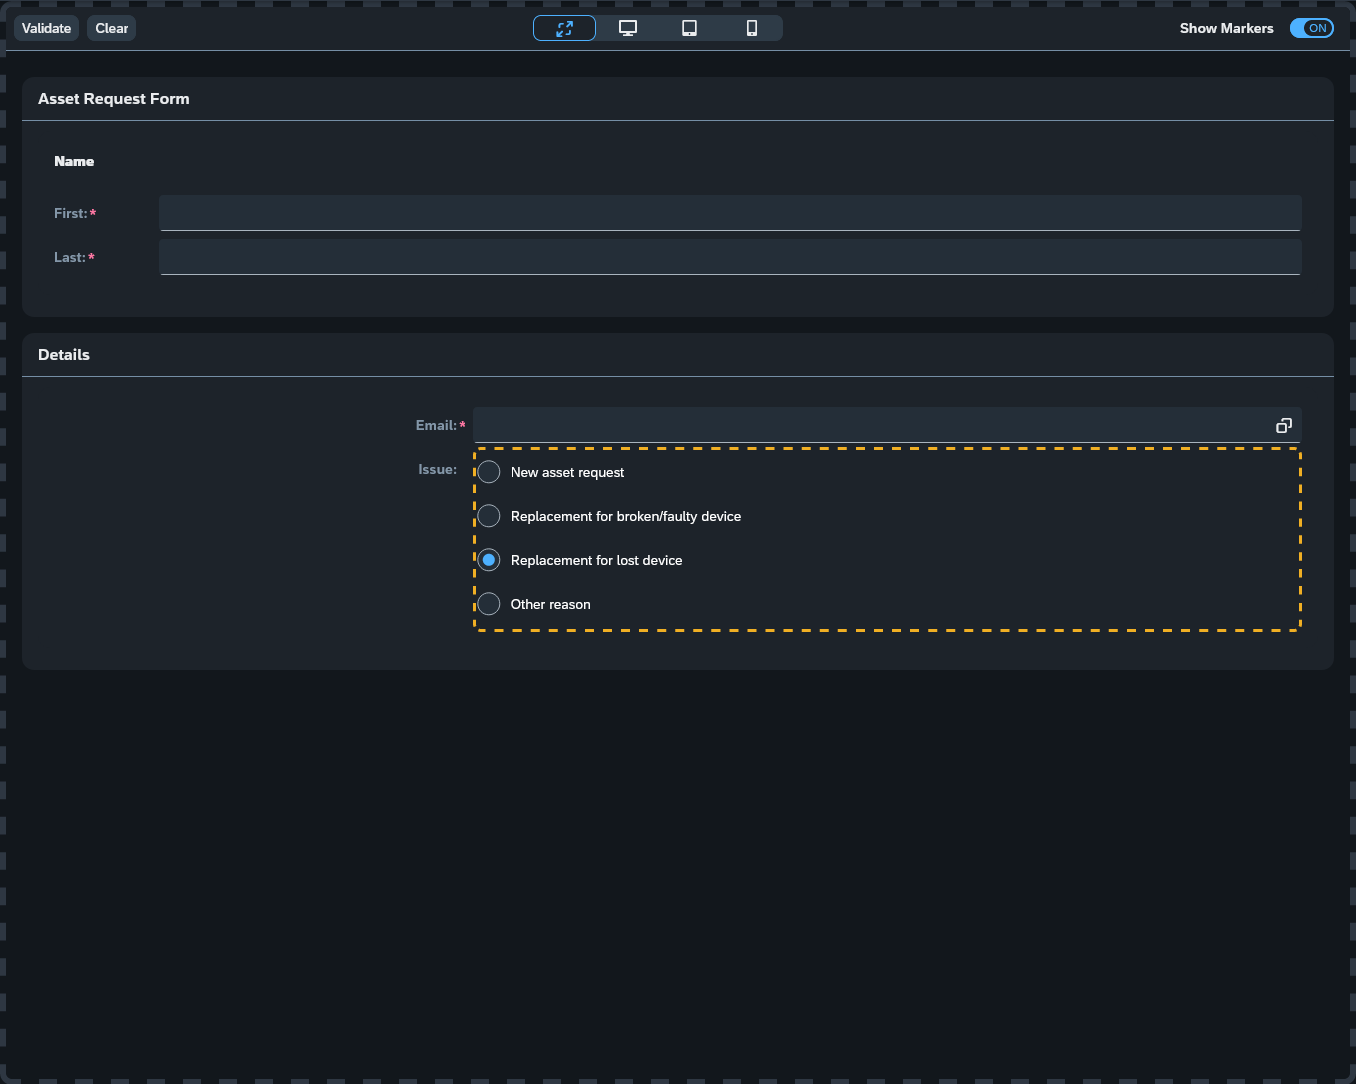
Selecting any other item:
Loading the Form into a Low-Code App
-
Open the Form you wish to use and copy the ID which is located in the GENERAL tab
-
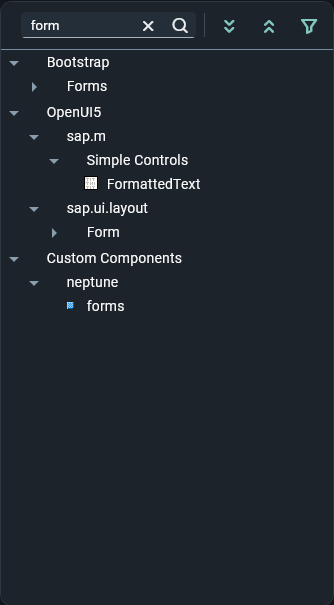
Open the app you want to use and search for forms from the component library
Here you can see the 'forms' component, within the Custom Components → Neptune folder:
-
Place the component in your component tree or in the application resources.
Best practice is to place this component in your component tree, where the form will be loaded - however it can be placed anywhere -
Search for JavaScript and add the component to your application Resources
-
Add the following in the JavaScript file
-
Ensure you replace "ID" with the copied ID of your form and that it is a string
-
The "parentName" should be replaced with the component name where you wish to load the form - this could be the 'oPage', or 'oPanel' for example
-
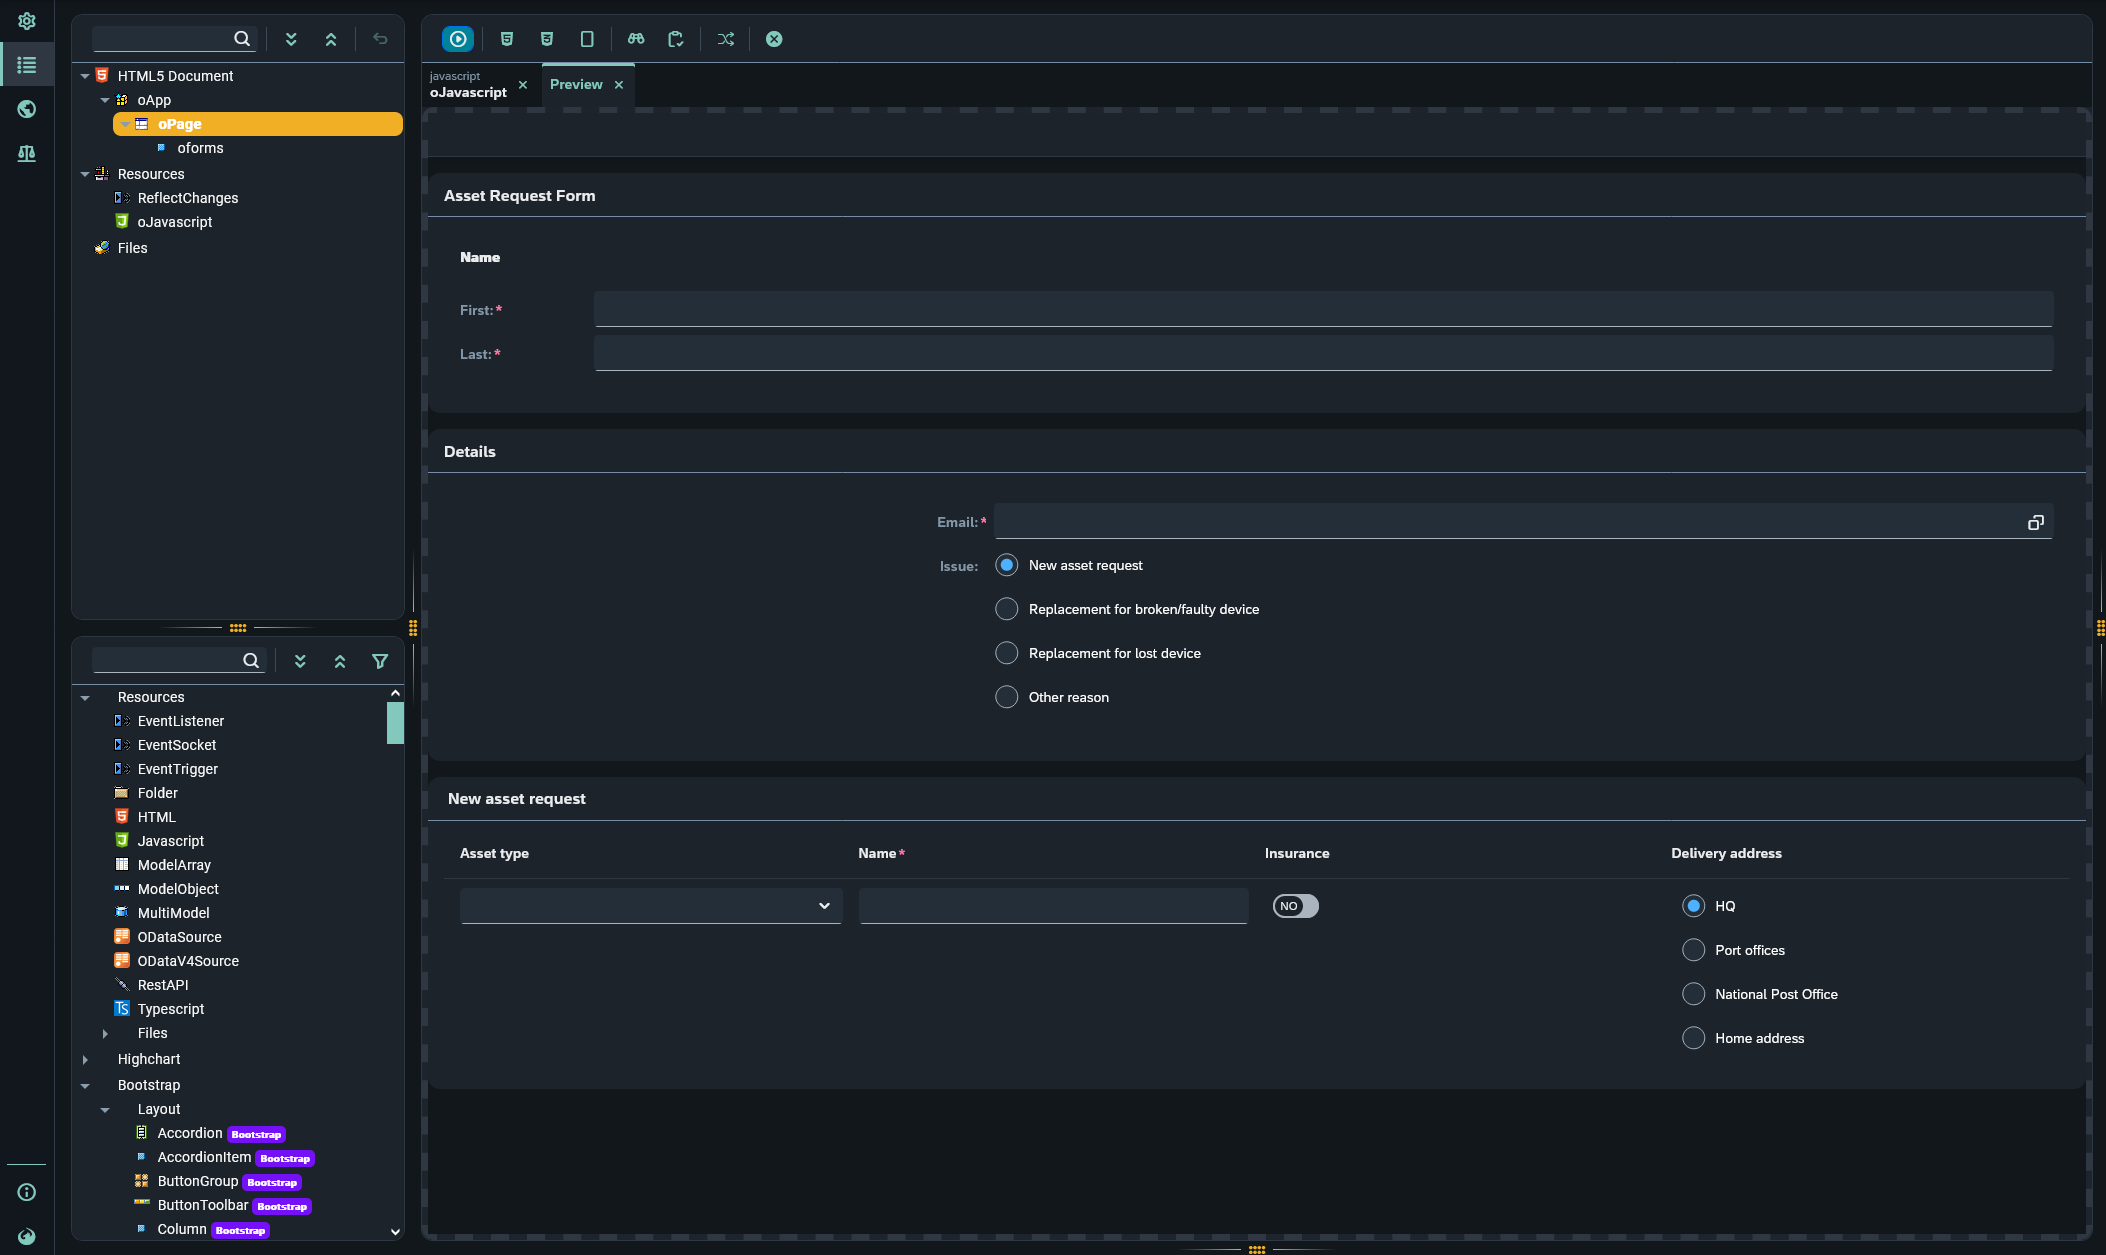
sap.ui.getCore().attachInit(function(startParams) {
    FORMS.build(parentName, ID ); //parentName: Name of parent component, ID:string
})
Image of a form being utilized in the App Designer - the parent component in use is 'oPage':