Create a deployment package
In this topic, you learn how you create deployment packages, how you deploy them from one Neptune Open-Edition system to another.
You have three options to create and to deploy a deployment package:
-
Create a deployment package and transfer it to Neptune Open-Edition systems in a defined order with one transfer (route).
-
Create a deployment package and transfer it to one Neptune Open-Edition system or to different Neptune Open-Edition systems simultaneously.
-
Create a deployment package only for export.
Prerequisites
-
Before you start a deployment process, make sure that the system you want to send the deployment packages to is available. How to set up a remote system, see Setting up a remote system.
-
Optional: You have set a deployment authentication in Custom Settings.
Procedure
-
In the cockpit, navigate to Deployment, and go to Deployment Create.
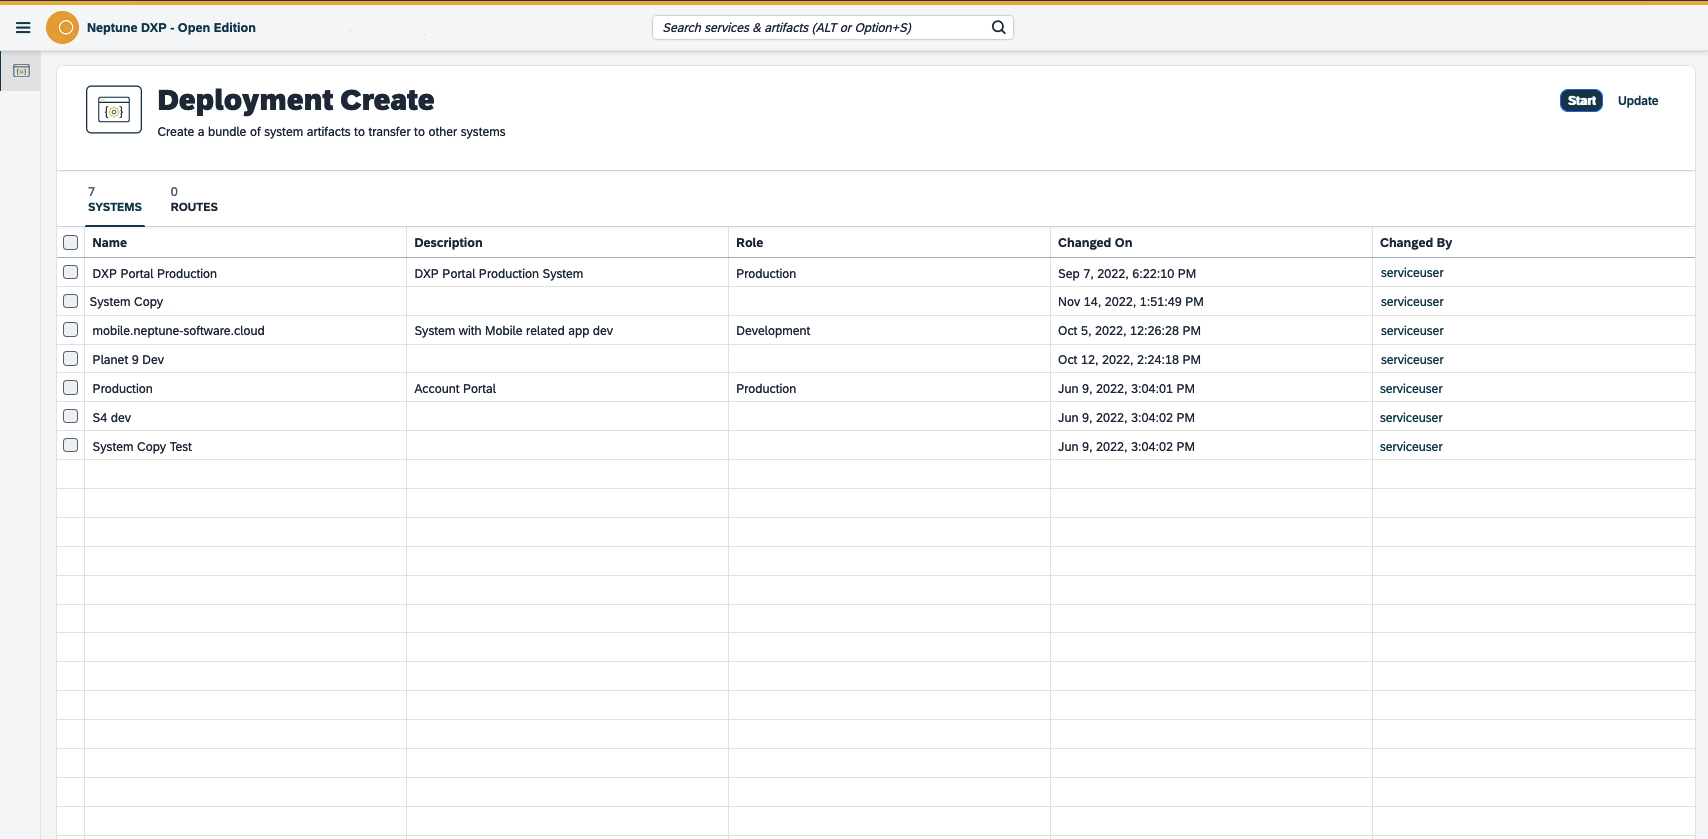
Result: The Deployment Create window opens.
-
Click System or Routes.
-
Depending on the option you selected, select one or more systems or routes from the list, and click Start.
If you want to create a deployment package for export only, do not select a system or route, just click Start. You can then download the deployment package and import it using the Deployment Log. Result: The Deployment Create window opens.
-
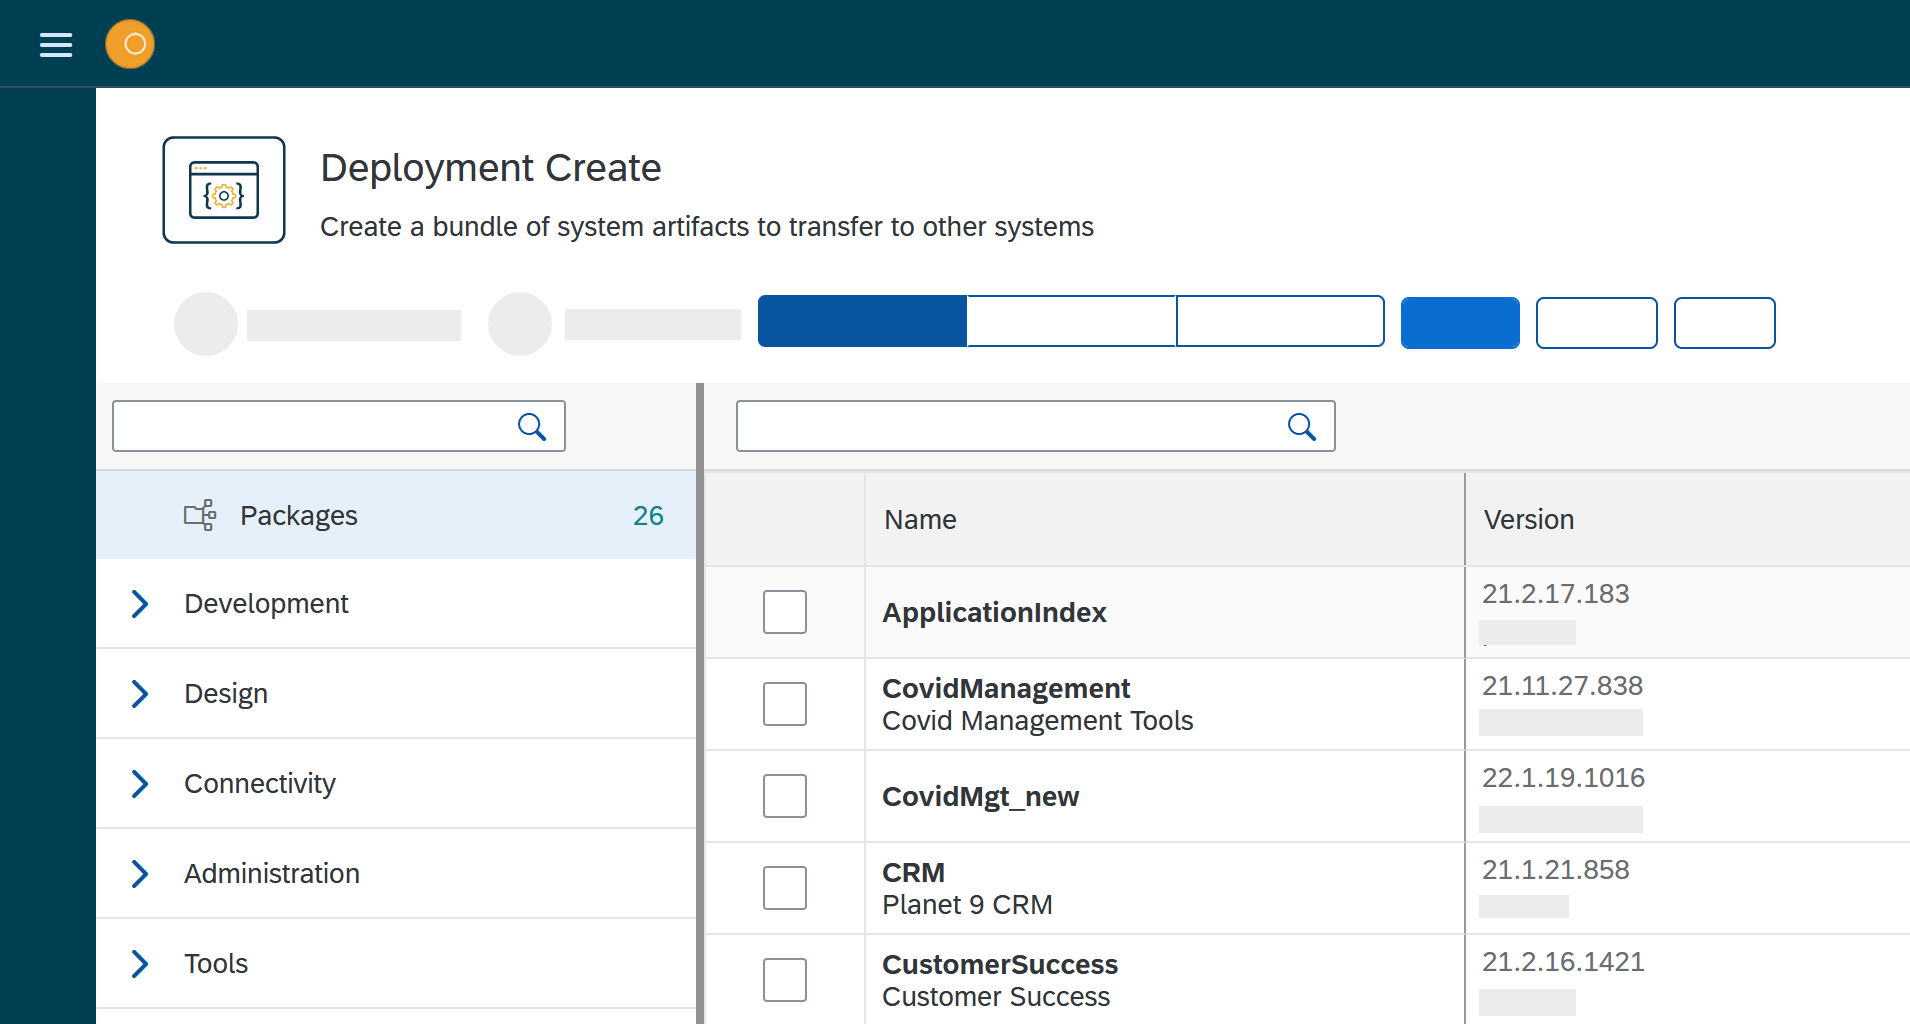
Click Packages to select already existing development packages.
The number next to Packages indicates the number of available packages. -
Select the package or packages you want to deploy.
-
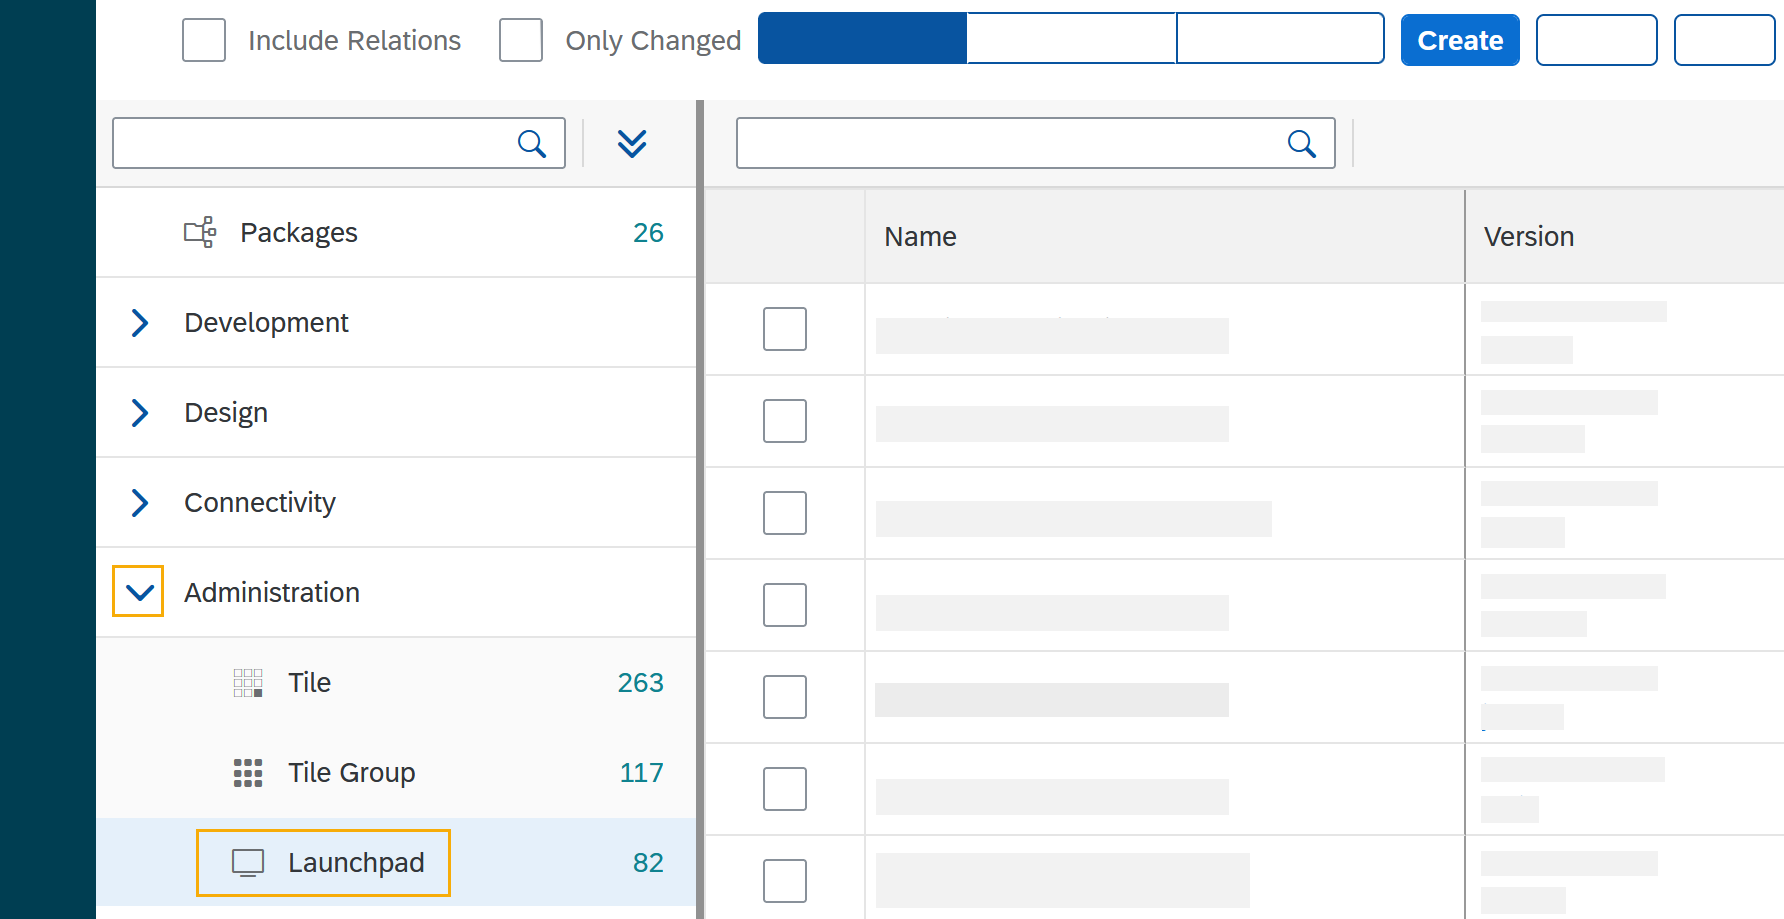
Click the arrow next to the tile group to select a service you want to deploy artifacts from. For example, a Launchpad from the Administration tile group is selected.
The number next to the tool indicates the number of available artifacts. Result Deployment create shows a list of all artifacts of the selected service.
-
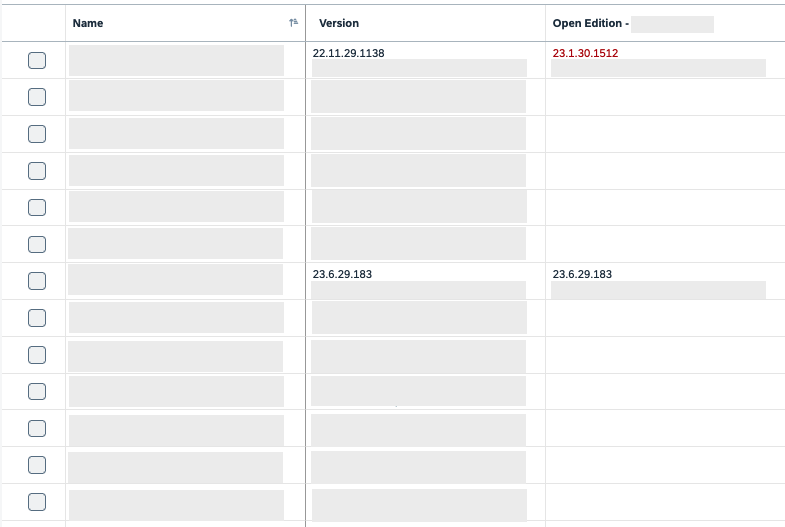
Select the artifacts you want to add.
Note: The last two columns display the version of the artifact in the source system from which it will be deployed and the version in the receiving system (the version will be available only if the artifact was previously deployed).
-
Check Include relations to add all the links/relations to selected artifacts. For example, if you select Launchpad, and you check Include relations, all the artifacts connected to Launchpad like Tile, Tile group, API, etc., will be deployed as well.
-
Click Create.
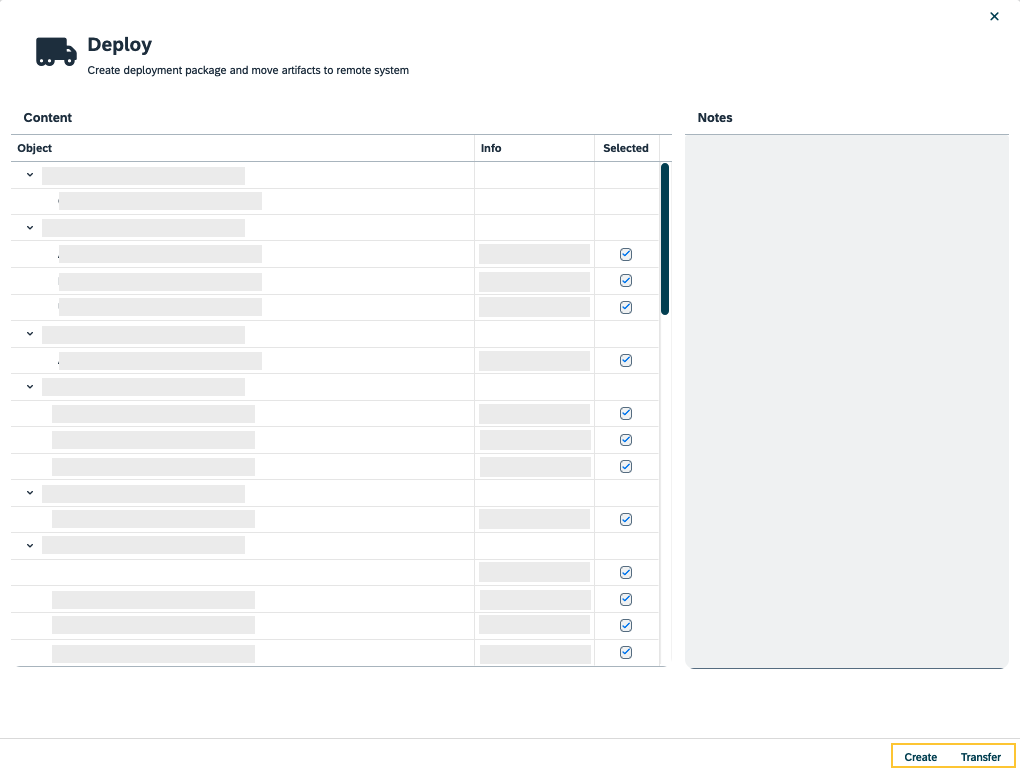
Result: The Deploy window opens.
-
Verify the packages you want to deploy by selecting or deselecting artifacts.
-
Click Create, Or Transfer if available. (Note: The approval process can be configured in Custom Settings. )
Results
-
If you selected a route or system before, Deployment Create creates a package that must be approved before transfer according to the deployment authentication you selected in Custom Settings.
-
If you did not select a route or system before, Deployment Create creates a package for export.