Integrate data from an API
In this step, we use an API with equipment details. We integrate the data in a table for an exemplary equipment overview.
Prerequisites
-
You have done the first configuration of your application.
Procedure
-
On the component library, open sap.m > Table Responsive and drag and drop the Table component onto oPageStart in the application tree.
-
On the UI object pane, name your Table
oTableEquipment. -
On the component library, open Resources and drag and drop the RestAPI component onto Resources in the application tree.
-
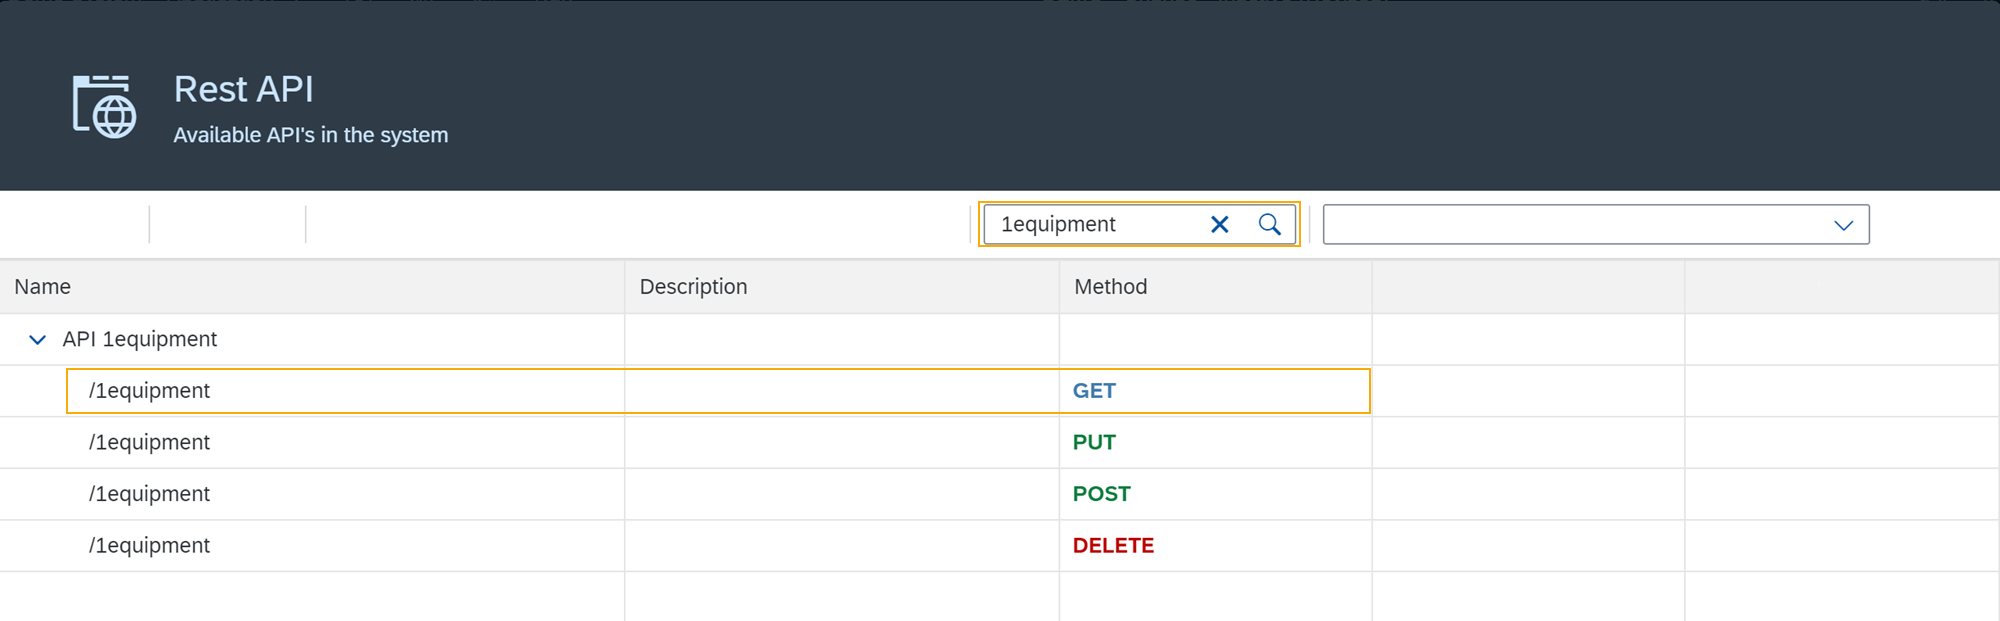
On the UI object pane, click the Rest API field to open the Rest API library.
-
Search either for your API or
API 1equipment. -
Click on the operation with the GET Method.
Result: You have integrated a table, a Rest API, and an Operation. Now you bind the Rest API to the table to display data in your table.
-
On the UI object pane, click the API tab and navigate to Response > 200.
-
Click into the field that matches the Operation of your API and select your table from the list. In our example, it is
oTableEquipment. -
On the Model tab, click into the setInitLoad field and select online from the list.

-
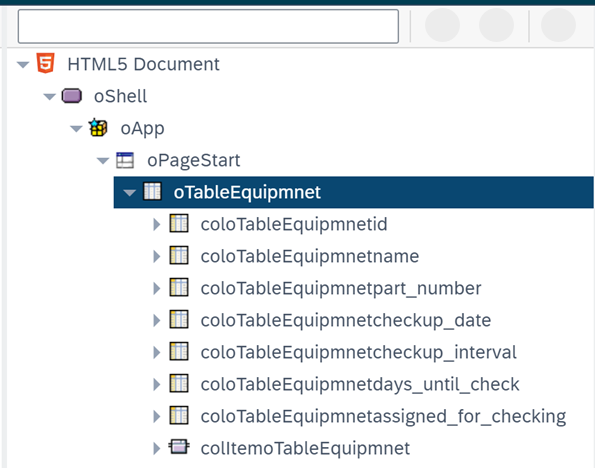
On the application tree pane, select oTableEquipment.
-
On the UI object pane, click into the Model Source field, and from the Binding pop-up window, select the property from your API. In our example, it is
1equipment. -
Right-click oTableEquipment, and from the drop-down menu, select Wizard > Insert Fields - Edit.
-
In the Wizard window, check all properties you want to display in the table and click Create.
-
On the top menu, click Save and Activate.
Result: For each property you selected, a column component is added to your Table component. To see the changes, restart the preview.