Configure authentication in the Microsoft Entra admin center
To add Microsoft Entra ID authentication to your Neptune DXP - Open Edition, you first have to perform the following tasks in the Microsoft Entra admin center.
Prerequisites
-
You have registered the Neptune DXP - Open Edition in the Microsoft Entra admin center. Find more information about how to register an app in the Microsoft documentation.
-
You have created a self-signed certificate.
Procedure
Add a redirect URI
-
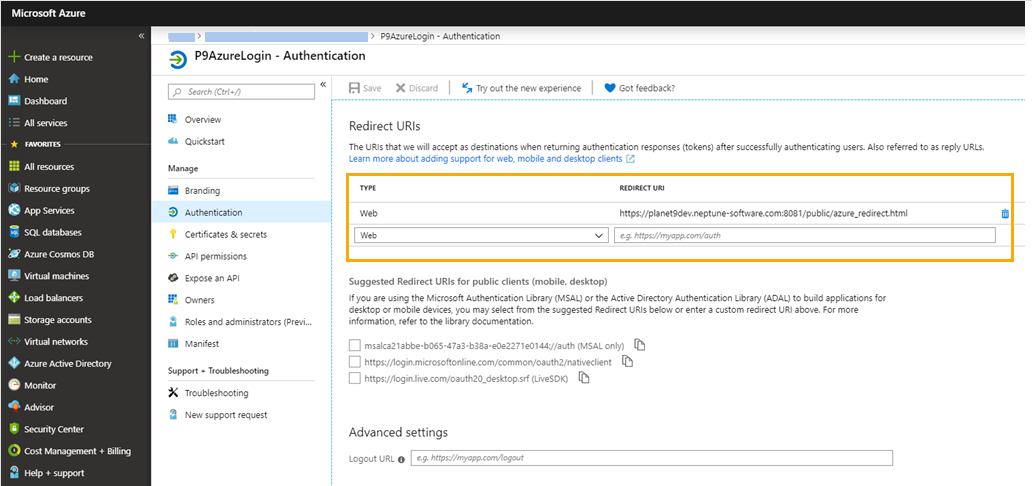
In the Microsoft Entra admin center, in Applications, select your application. Under Manage select Authentication.
-
In Redirect URI, add one or more URIs. These URIs will be accepted as destinations when returning authentication responses (tokens) after authenticating users.
The redirect URI must have the following format:
https://<Planet 9 URL>/public/azure_redirect.htmlFor example:
https://planet9explored.neptune-software.com:8081/public/redirect.html
Add a certificate and get a password
-
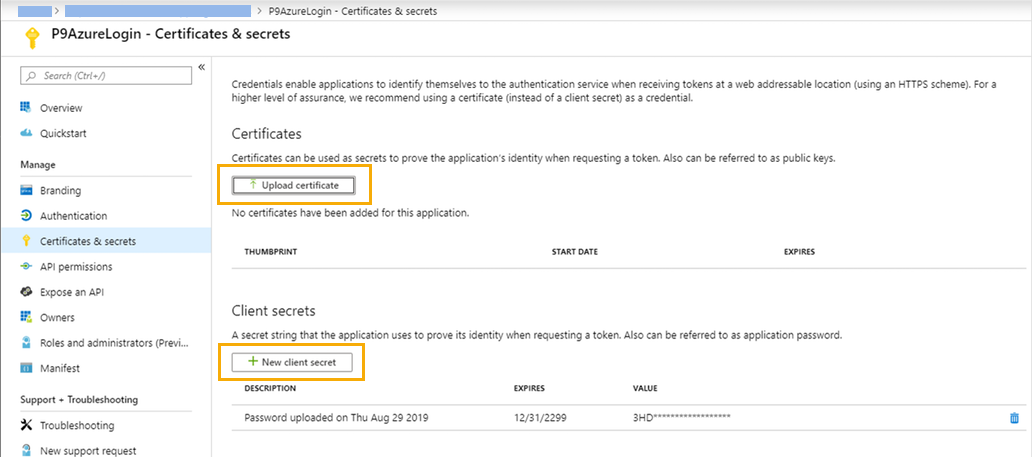
In the Microsoft Entra admin center, in Applications, select your application. Under Manage select Certificates & secrets.
-
Click Upload certificates to upload the self-signed certificate you created in the Cockpit.
-
Click New client secret to generate an application password. Copy this password and save it for later use.

Add API Permissions
-
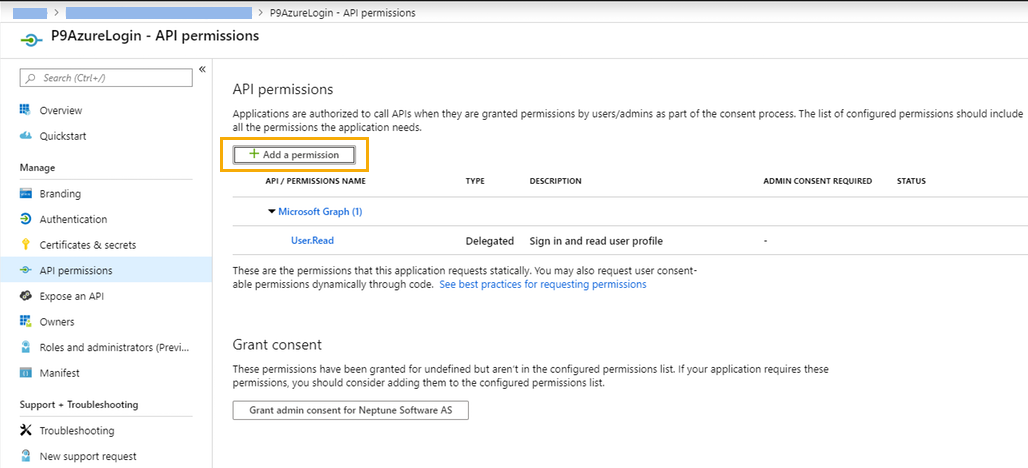
In the Microsoft Entra admin center, in Applications, select your application. Under Manage select API permissions.
-
Click Add a permission to configure a permission.

-
Save the permission.
Result: In the Microsoft Entra admin center, you have prepared the authentication for your Neptune DXP - Open Edition.